
In case you’ve forgotten, Apple introduced the scanning feature in the Notes app on iPhone in 2017. Six years later, that feature has been widely used by many iPhone and iPad users alike. Maybe you haven’t used it before and now you need to scan a document, but have no access to a dedicated scanner. Well, it’s time to finally put the good old Notes app on your iPhone into good use. Read along to find out how to scan a document with your iPhone or iPad.
How to Scan a Document Using Notes on Your iPhone or iPad
Thanks to the introduction of this feature in the Notes app, scanning a document using your iPhone or iPad has never been easier. If you’re ready to scan a document, follow the steps outlined below.
Time needed: 1 minute
In order to scan a document using Notes app, here’s what you need to do.
- Open the Notes app on your iPhone or iPad.
- Create a new note (or tap on an existing one).
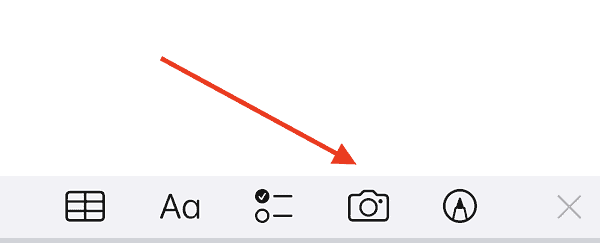
- Tap the Camera button at the bottom of the screen (or above the keyboard).
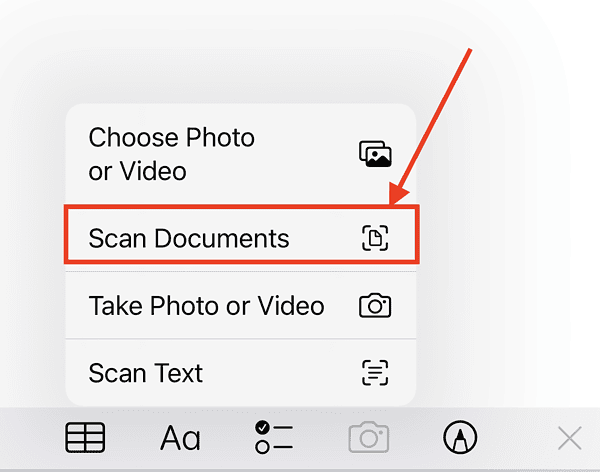
- Tap Scan Documents.
- Line up the document you want to scan in the camera view.
- Tap the Shutter Button if the app doesn’t automatically scan the document.
- Tap Save.


The scanned document will be saved as a new note. From here, you can add markups and sign them before sharing them with someone else. I’ll get to that later. But in the meantime, let’s move on to the next important thing about document scanning, saving it to a PDF.
How to Save a Scanned Document to PDF
After you’ve learned how to scan documents with your iPhone or iPad, your next question is going to be how can you save it into PDF. The steps are as easy as scanning a document.
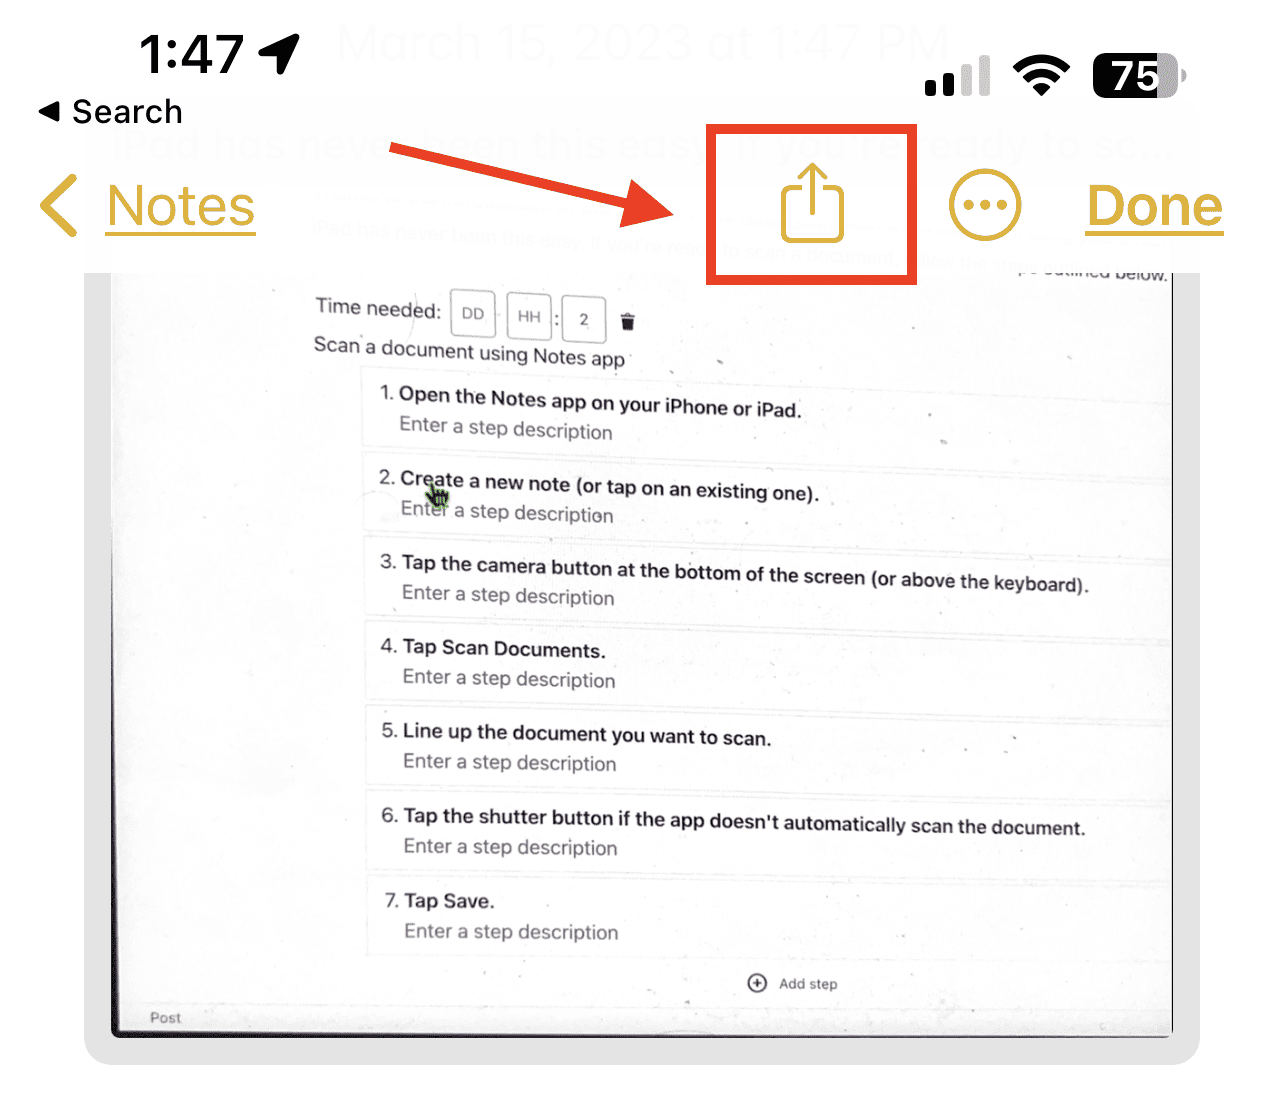
- Tap the scanned document.
- Tap the Share button in the upper-right corner
- Tap the app or location that you want to share or save your PDF to.
Easy, right? Now, what if you want to share a scanned document with somebody else? The steps to do that are easy as well.
How to Share Scanned Documents on iPhone and iPad
- Tap the scanned document.
- Tap the Share button in the upper-right corner.
- Tap the person or app you want to share the document with.
- Share your scanned document in PDF.

How to Add Markup and Add a Signature
As mentioned, after you’ve scanned a document using your iPhone or iPad, you can edit that document using the Notes app’s markup tools. With these tools, you can highlight part of the document, add handwritten notes, cut out and move sections, and add various elements such as text boxes, shapes, and arrows.
- Tap on the scanned document.
- Tap Markup.
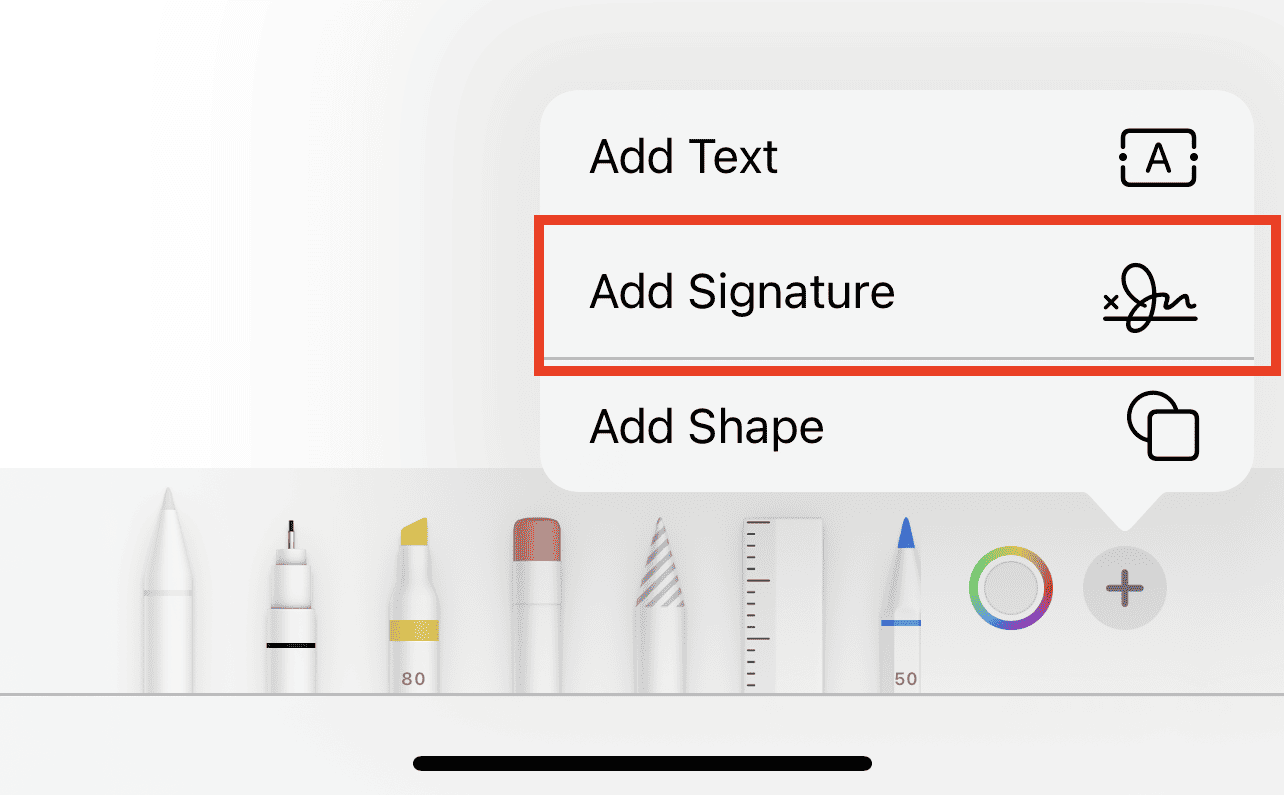
- Tap the “+” icon.
- Tap Add Signature.
- Draw your signature.
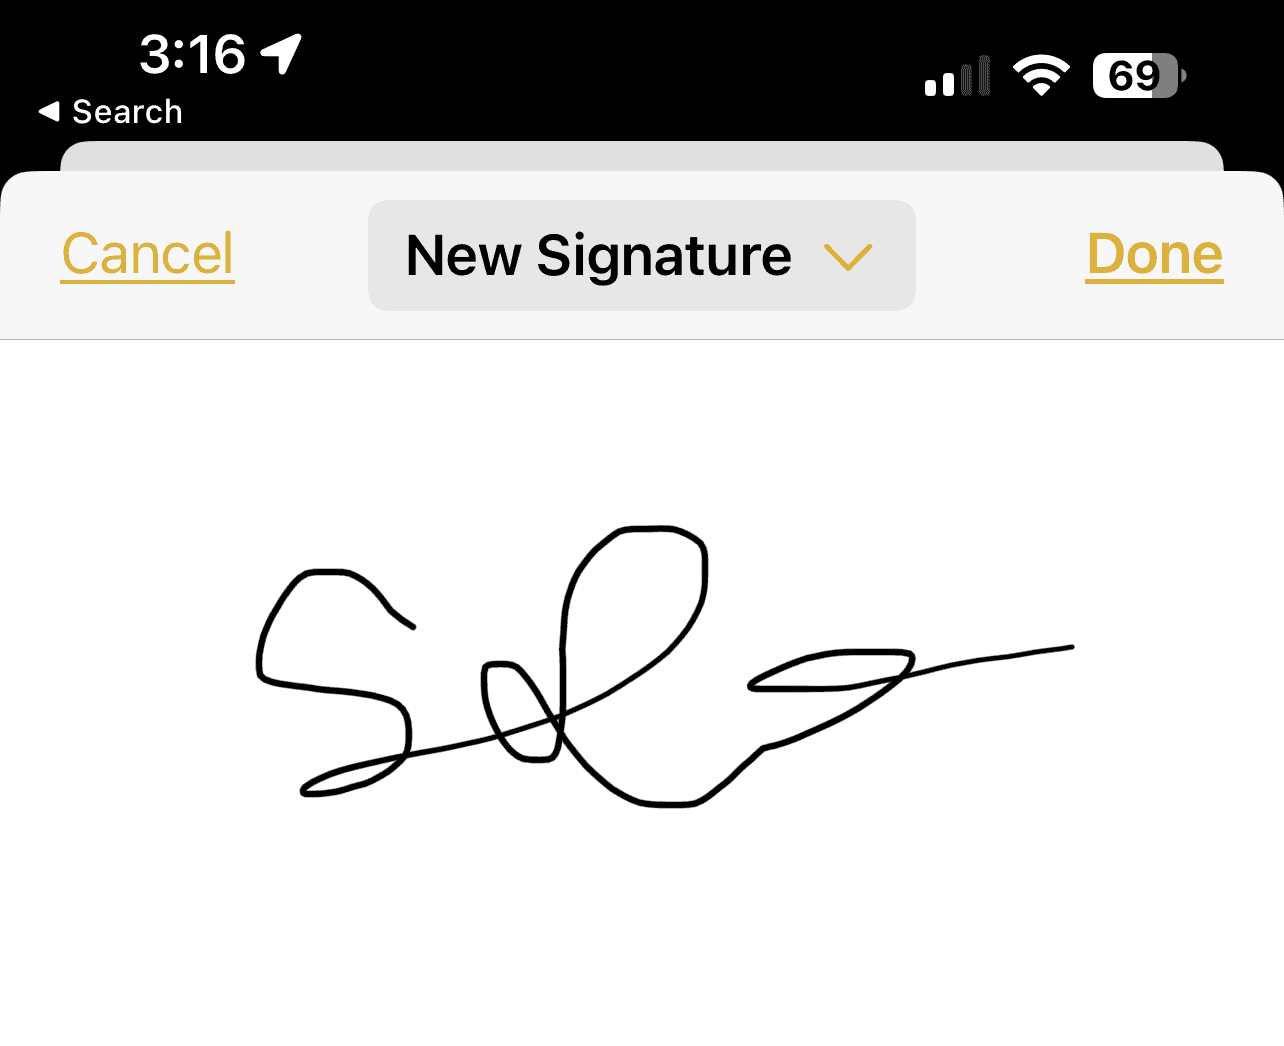
- Tap Done.


Final Words: The Notes App is a Useful Tool But Doesn’t Get the Merits It Deserves
Scanning documents with iPhone or iPad is not the only thing that you can do with the Notes app on your device. It’s a useful and powerful tool that deserves to be credited properly. Unfortunately, it doesn’t share the limelight as much as Apple’s other built-in apps.
One useful feature of the Notes app is the scanning tool, which could pretty much take away the need for you to get a commercial scanner. Or, if you’re looking for quicker alternatives, you can use an app like Adobe Scan that instantly scans docs into PDFs, recognizing text automatically.


