
One of the new features in iOS is the ability to natively print to PDF, similar to what you can do with macOS. It’s relatively simple, but not necessarily obvious. Here are the steps:
- First, choose to print a page. Note that not every app will support this. For our example, we’ll use Mail. Tap the Reply arrow at the bottom and choose Print from the list that comes up.
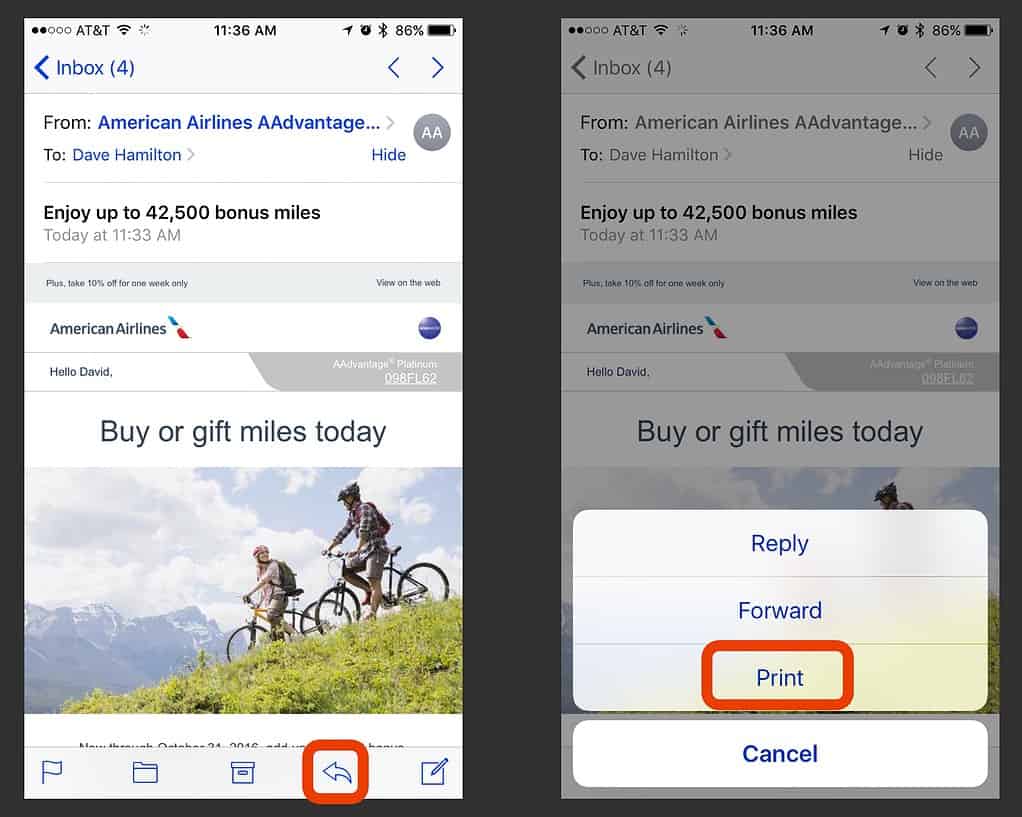
Tap the Reply button to bring up the option sheet and choose Print - While on the print page you have one of two options, depending upon your iOS device. On an iPhone with 3D Touch (6s or 7 series), you can Pop (hard push) the page you see and that will reveal the appropriate screen. If you don’t have 3D Touch or don’t want to use it, you can pinch-to-zoom (Apple speak for “reverse pinch outwards from center”) and that will reveal the same screen.
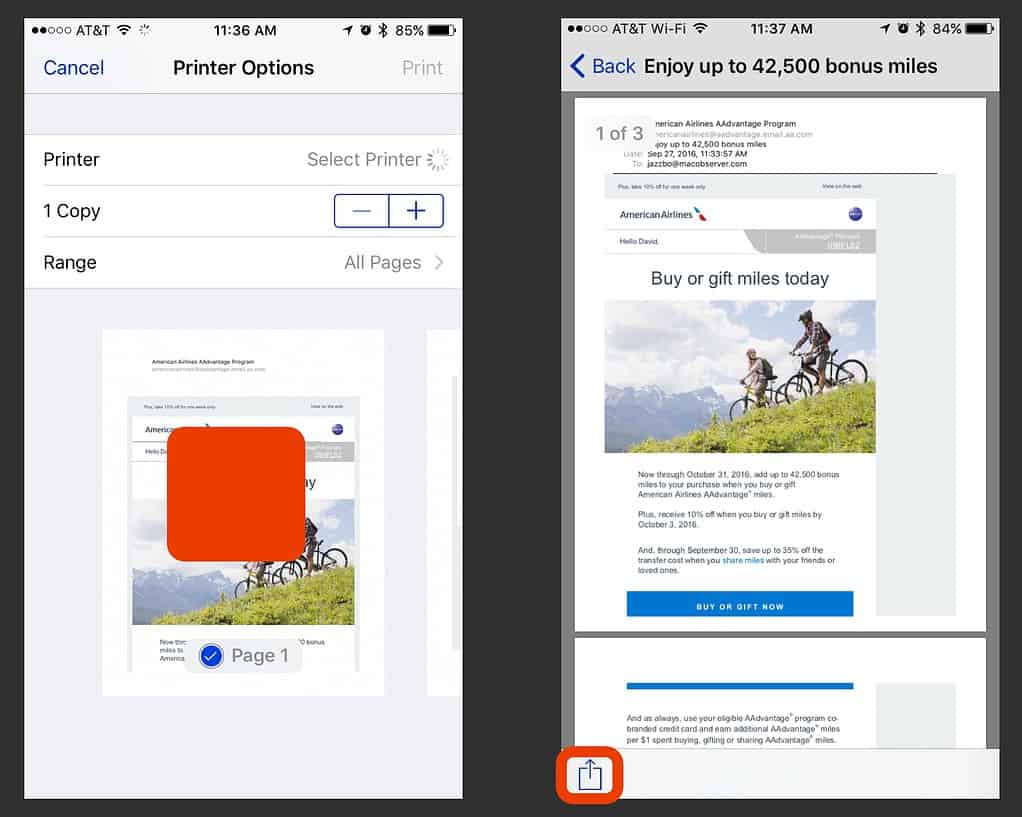
3D Touch or pinch-to-zoom out on the document preview, then tap the Share button in lower left - Once here, tap the share icon in the lower left. From there choose your destination. That could be your iCloud Drive, a Mail message, a Message, your Dropbox or any other destination capable of receiving a file.
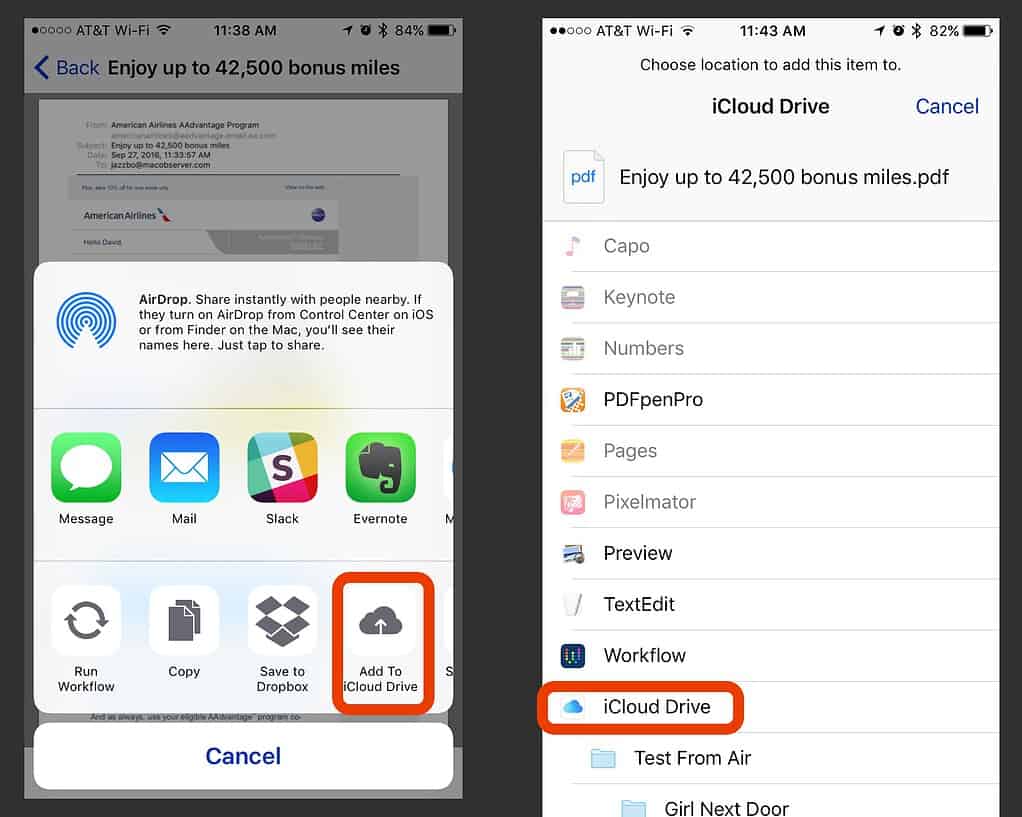
Choose your Service and save it there. (“Girl Next Door” is the name of a Fling song, nothing more!)


That’s it! Now you can save PDFs from most places on iOS.


Other than wishing there was a one-button way of doing this, this is great! I’ve wanted to be able to send articles on sites behind a paywall. This will make it easy!