
The iPhone 15 series offers an advanced camera system. However, you must adjust default settings for professional photos. Focus on key areas to understand advanced iPhone photography best practices. You unlock your device’s full potential by optimizing key features. Consequently, tailoring these options ensures maximum detail and balanced exposure. Your images will avoid common issues like blur or darkness.
Table of contents
Optimizing iPhone 15 Image Quality
1. Maximize Detail and Resolution

The iPhone 15 Pro uses a powerful 48MP sensor. This sensor captures incredibly detailed shots. Generally, photos default to 12MP or 24MP to save storage. Therefore, adjust format settings for maximum resolution. Do this if you plan heavy editing or large prints.
- Enable 48MP ProRAW: Switch to Apple ProRAW for maximum post-editing control. This format captures uncompressed image data. Furthermore, it preserves detail and allows greater flexibility. Adjust color, shadows, and sharpness easily. Go to Settings > Camera > Formats > Apple ProRAW and choose 48MP.
- Select 48MP HEIF Max: Alternatively, select 48MP HEIF Max for high resolution. This option avoids the large ProRAW file size. Find it under Settings > Camera > Formats > Photo Mode. It provides crisper textures and finer details in good light.
2. Ensure Clarity and Focus
Distortion and accidental macro use compromise clarity. Consequently, you get unfocused results. Key steps maintain sharpness. Your device must correct lens warping automatically. Manual control over close-up shooting also prevents blurry or out-of-focus photos.
- Enable Lens Correction: This feature automatically prevents distortion and warping. These issues happen with the ultra-wide or front camera. To keep lines straighter and images natural, toggle this on. Find it in Settings > Camera > Lens Correction.

- Activate Macro Control: The camera may switch to Macro mode when zooming. This switch sometimes causes blur or unfocused images. Therefore, enable Macro Control in Settings > Camera. You can then manually decide when to use the Macro function.

3. Control Exposure and Post-Processing
iPhone’s computational photography sometimes results in dark photos. This is especially true with faces or complex lighting. Crucially, adjust how the camera processes light and color. Do this before you take the picture. This achieves balanced exposures.
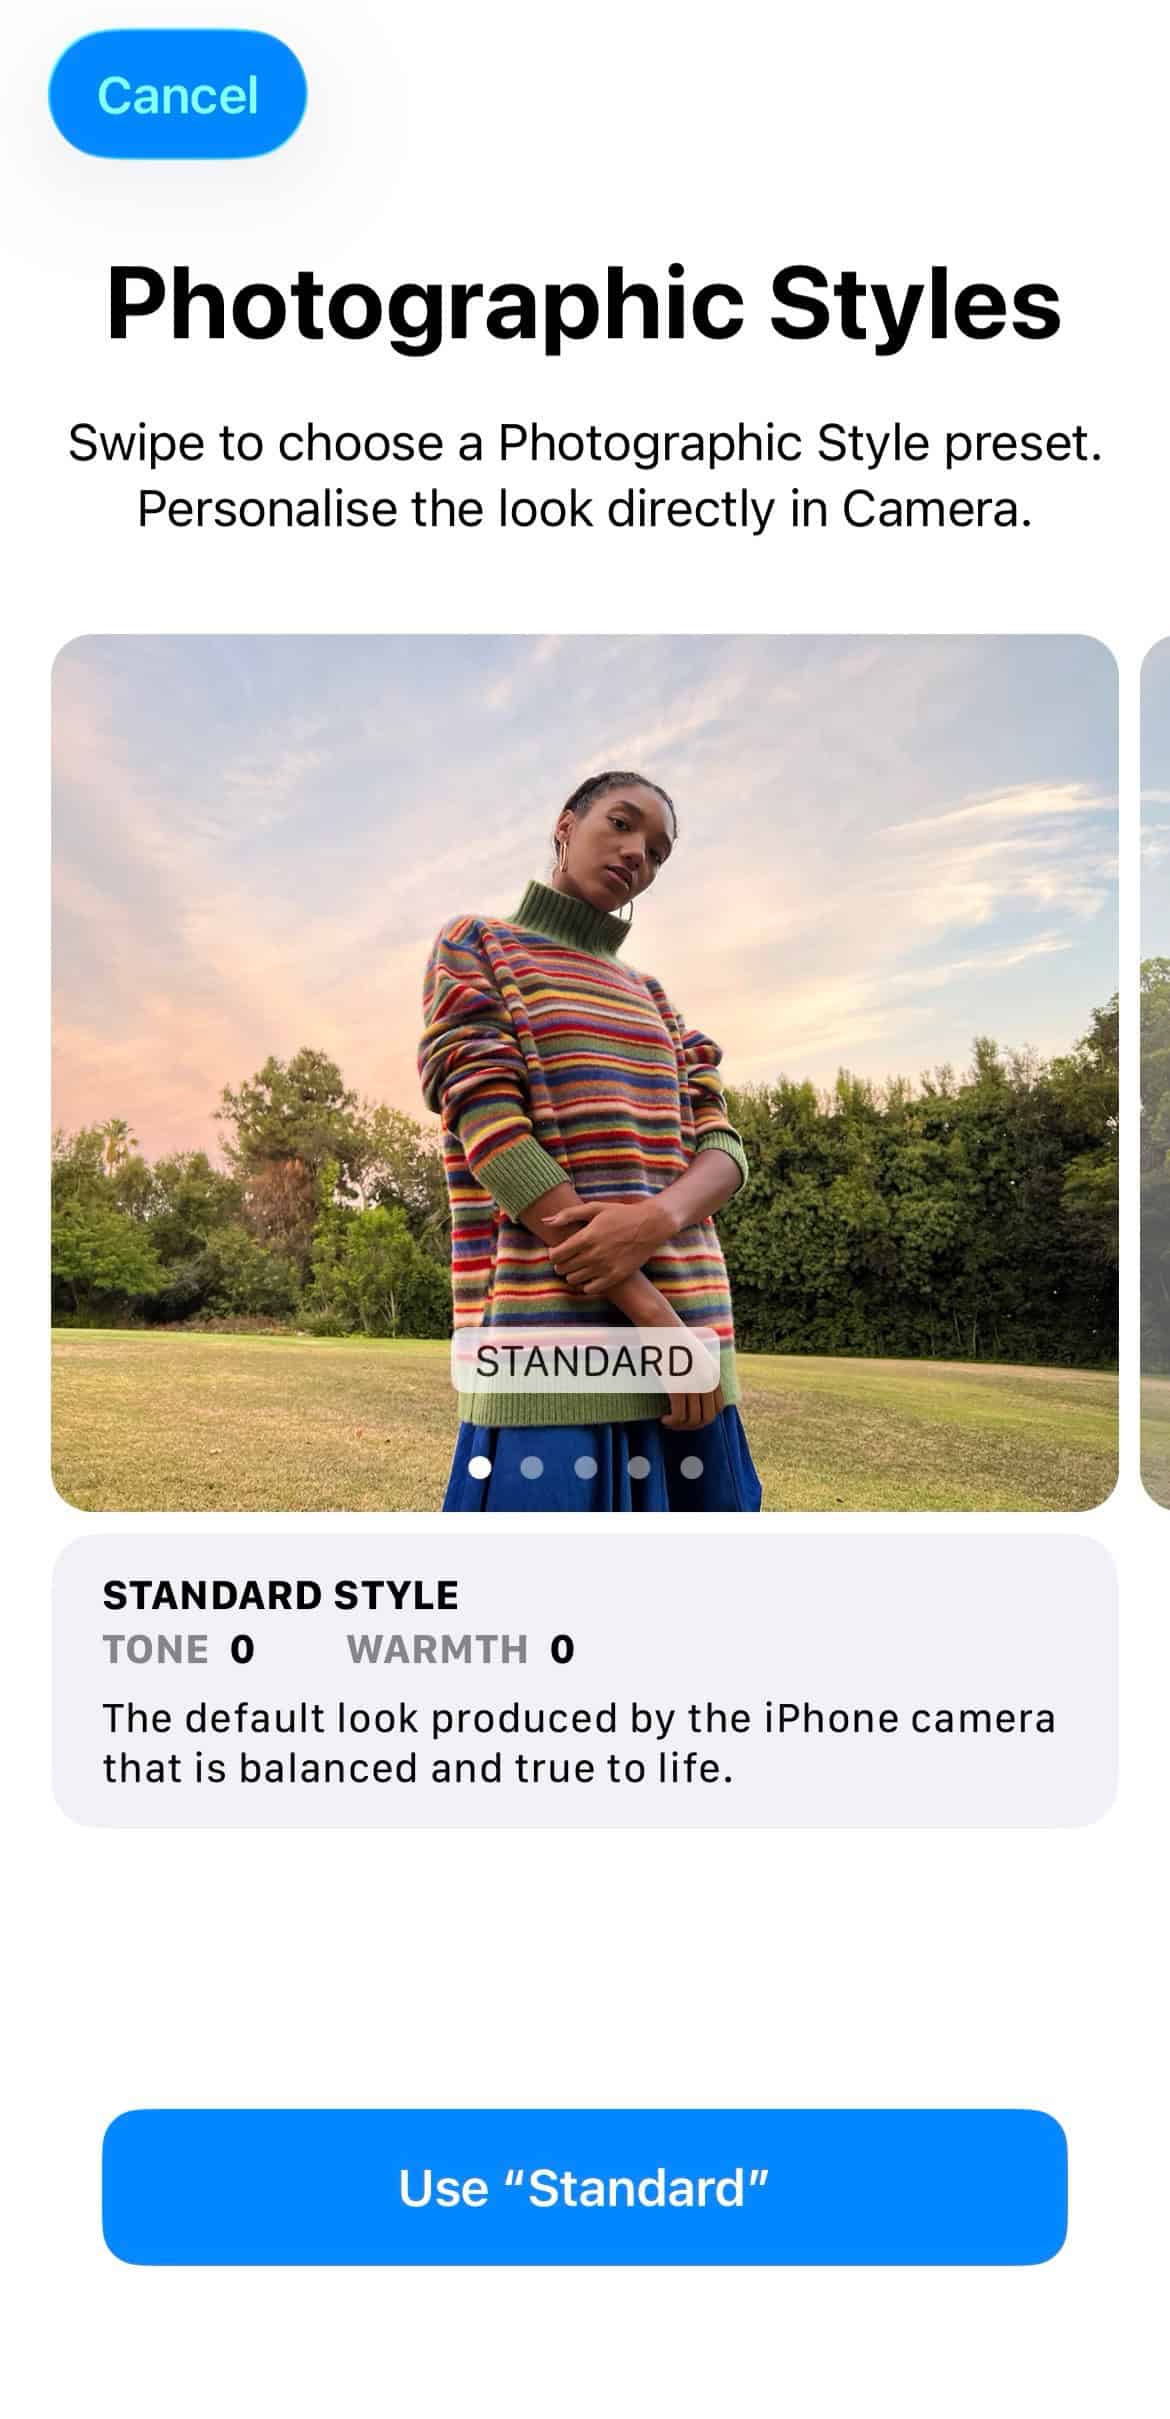
- Adjust Photographic Styles: Your images may consistently look too dark. If so, go to Settings > Camera > Photographic Styles. Select the Standard option. This neutral style gives natural colors and subtle contrast.
- Disable Prioritize Faster Shooting: This feature prioritizes shutter speed over image quality. Disabling the toggle gives the camera more time for processing. Specifically, it allows time for Deep Fusion. This prevents smudgy or blurry results. Furthermore, this setting addresses darker photos.

FAQ
The camera’s post-processing often causes this issue. The Deep Fusion algorithm sometimes underexposes the scene. Adjust Photographic Styles to Standard for a fix. You can also manually set exposure or use ample light.
The 48MP mode offers the highest detail. However, those files are significantly larger. Therefore, only use it for landscape shots. Also use it for photos you plan to print or crop heavily. The 24MP setting offers a great balance for daily use.
Mastering Your iPhone 15 Photography
Mastering your camera settings helps capture high-quality images consistently. Enable ProRAW for flexibility. Adjust resolution for great detail. Correct lens distortion to move beyond simple results. These steps help with landscapes and also fix selfie camera issues on the iPhone 15 Pro Max. Ultimately, dedicate time to experimenting with these settings. You will see immediate improvements in your photography.


