
A freezing screen is one thing, but on an expensive machine like a Mac, I have zero tolerance for it. Macs are built for speed, efficiency, and heavy workloads, so glitching after an update is really unusual. It’s best to seek professional support, but you can troubleshoot by booting in Safe Mode, removing startup apps, and running Disk Utility’s First Aid.
The steps are straightforward, but when your Mac barely responds, timing matters. Here’s what you can do.
1. Boot in Safe Mode
Time needed: 3 minutes
Safe Mode strips macOS down to essentials. It disables login items and kernel extension to help you isolate whether the lagging is caused by a third-party process or system-level glitch. It also runs a basic disk check during boot. I know it’s a pretty technical step, and honestly, I’d normally save this for last. However, it’s also ideal to perform this step early why your machine is still responding.
- Shut down your Mac completely.
- Press and hold the power button (Apple Silicon) or press power then hold Shift (Intel) until the login screen appears.
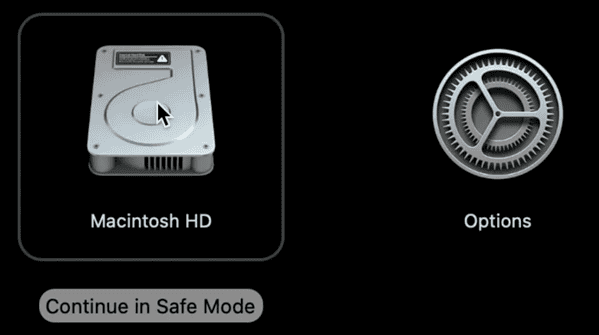
- Log in. If prompted again, log in a second time.
- Use your Mac and monitor for freezes.

2. Remove Problem Apps From Startup
Lagging generally happens before you even reach the desktop. That’s because login items, i.e., apps that auto-launch, can hang the system during boot. If you’re not in Safe Mode, you still have time to disable background apps before another freeze hits.
- Go to System Settings > General > Login Items.
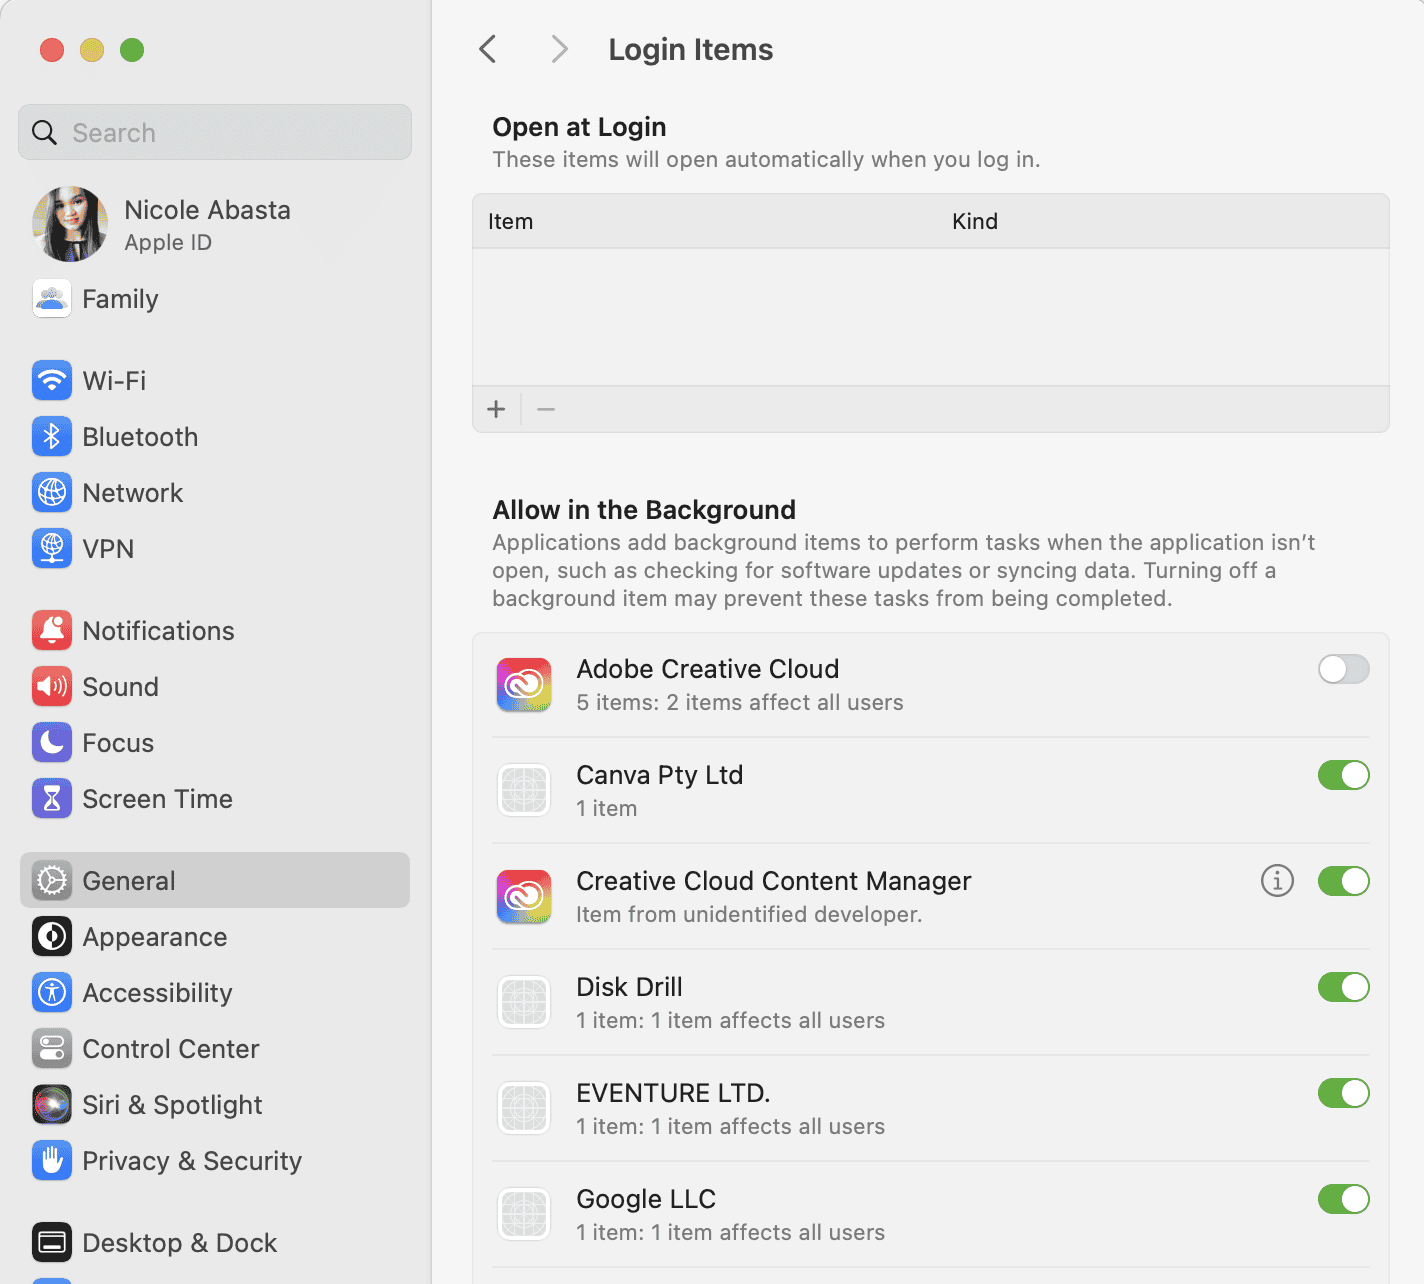
- Under Open at Login, remove apps you don’t absolutely need.
- Scroll to Allow in Background and disable any apps that seem unfamiliar or unused.
- Restart and test for freezing.

3. Run First Aid in Disk Utility
Corrupted file systems and volume errors can cause your Mac to lock up when it’s trying to read or write certain files. Disk Utility’s First Aid checks for and fixes common drive errors without erasing your data. The sooner you repair it, the less likely you are to run into boot failure. To speed up the process, make sure you know the locations to target.
- Boot into macOS Recovery (hold Power on Apple Silicon or Command + R on Intel during startup).
- Click Disk Utility.
- Select your startup disk (usually named Macintosh HD).
- Click First Aid, then Run.
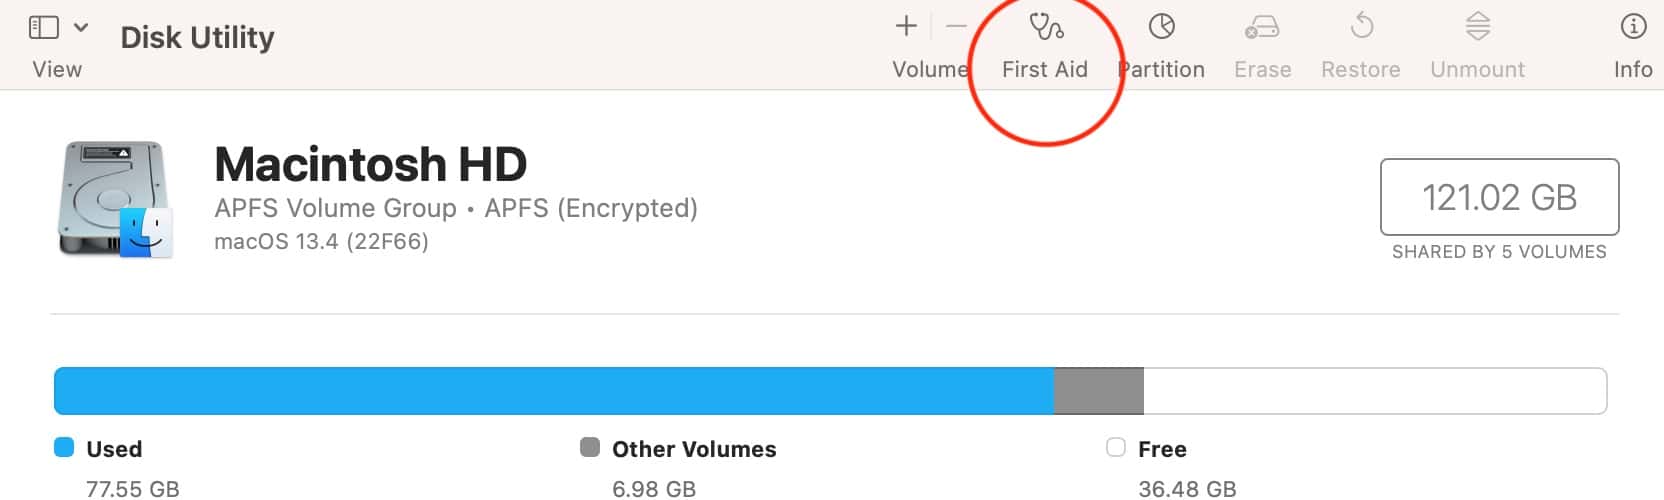
- Restart your Mac once complete.

4. Disable Heavy Background Apps and Menu Bar Utilities
After a major update like macOS Sequoia 15.5, your machine might lose optimization for some background tools. Menu bar utilities, clipboard managers, or outdated antivirus apps often spike CPU or memory usage, freezing your entire desktop. Disable or remove them temporarily while troubleshooting.
- Click the Apple menu > System Settings > General > Login Items.
- Disable background items you don’t recognize or actively use.
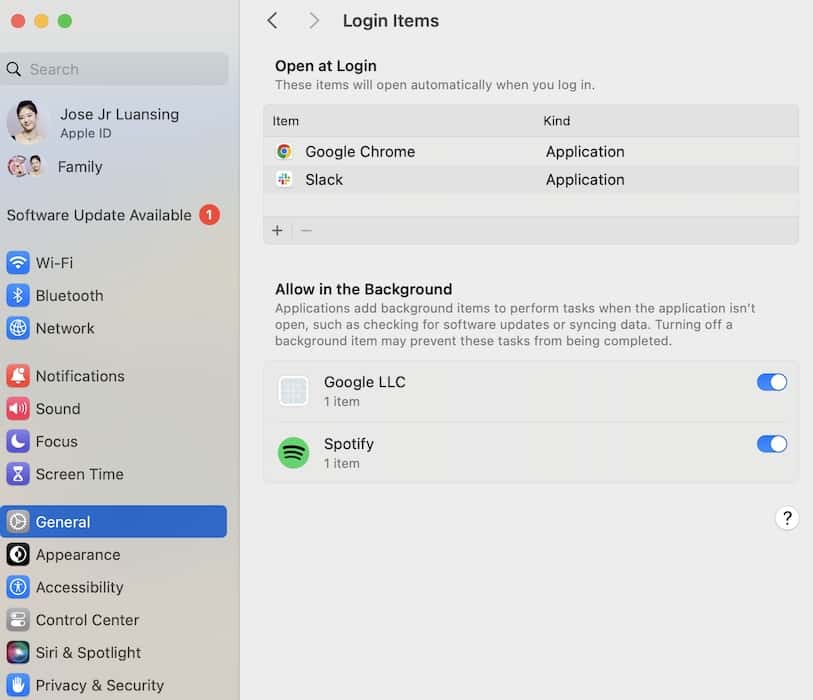
- Use Activity Monitor (in Applications > Utilities) to force quit anything eating high CPU or memory.
- Restart and use your Mac normally.

5. Reinstall macOS Sequoia Without Erasing Data
A clean install of macOS Sequoia refreshes system files while preserving apps and files. If freezing started after the 15.5 update, reinstalling from Recovery is the best way to rule out corrupted system files without wiping your Mac.
- Restart into Recovery (hold Power on Apple Silicon or Command + R on Intel).
- Select Reinstall macOS Sequoia.
- Follow the prompts. Your files and apps will stay intact.
- After reinstalling, observe whether the system stabilizes.

6. Factory Reset as a Last Resort
If nothing else works, your macOS installation or user profile might be too far gone. Unfortunately, a full reset is likely your last bet. Wipe the system clean to eliminate all corrupted settings and files. Try your best to back up your data first. Yes, it’s a hassle when your Mac is barely functioning, but you won’t get the chance to recover it anymore afterward.
- Boot into macOS Recovery.
- Open Disk Utility, select your startup drive, and click Erase.
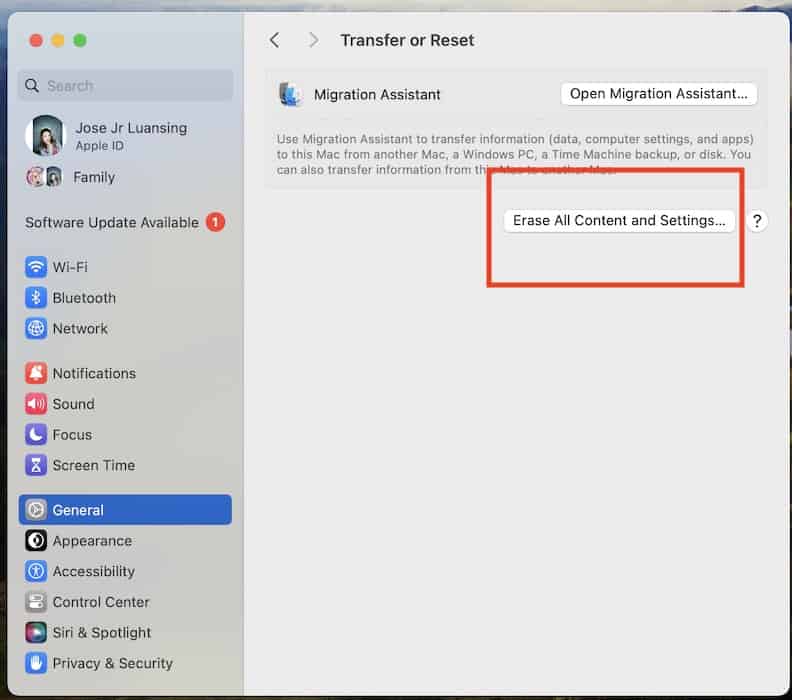
- Return to the main menu and click Reinstall macOS.
- Set up your Mac as new.

Contact Apple Support if you still can’t use your Mac. At this point, it’s worth having a certified technician check for hardware defects. That said, OS-related lagging isn’t limited to Mac. You might also notice your iPhone freezing after a heavy iOS update.


