
The Finder serves as the main tool for file management on your Mac. Usually, macOS hides system files to prevent accidental damage to the operating system. However, users often need these files for advanced troubleshooting or specific app configurations. You can easily master how to show hidden files in macOS Finder with a few simple steps.
Table of contents
Essential Methods to View Hidden Files
You might need to access hidden files to modify settings or check system logs. These files usually start with a period (.) and remain invisible by default. Fortunately, Apple includes built-in tools to toggle this visibility quickly. You can use these methods to manage your system more effectively.
1. The Quick Keyboard Shortcut
The fastest method for viewing hidden files uses a simple three-key combination. This shortcut works instantly without requiring you to open any complex menus.
- Open a new Finder window on your desktop.
- Navigate to your specific target folder.
- Press Command + Shift + Period (.) together.
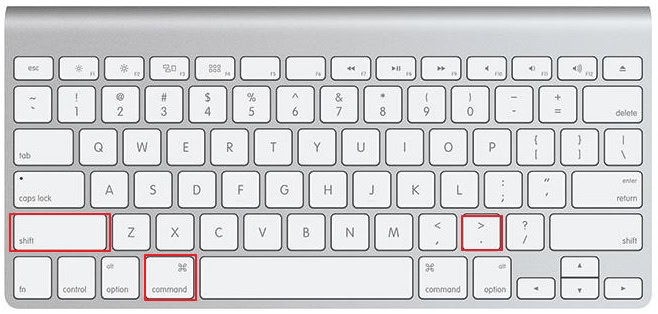
- Watch for the semi-transparent icons to appear.
- Press the same keys again to hide them.

2. Using the Terminal Command
Some users prefer the command line for more permanent system changes. You can use Terminal to adjust how the Finder handles hidden items.
- Open the Terminal app from your Utilities folder.
- Type the command
defaults write com.apple.finder AppleShowAllFiles true.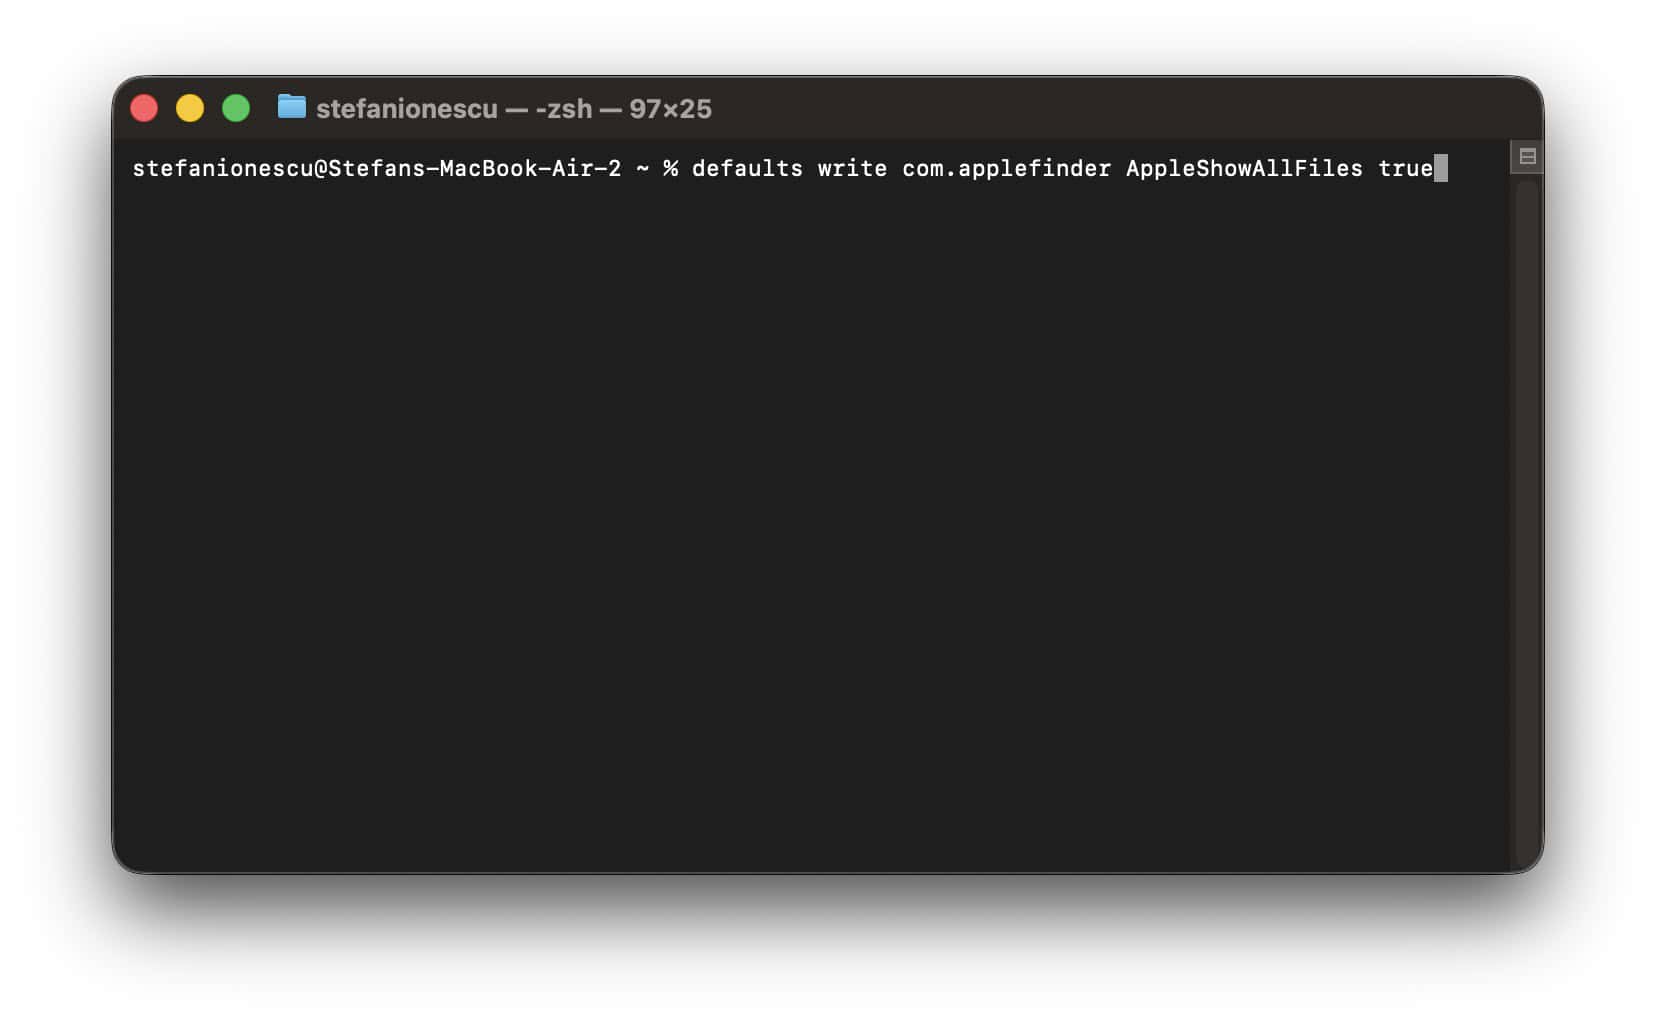
- Press Enter to execute the specific instruction.
- Restart the Finder to see your changes by typing
killall Finder. - Change the command to false to reverse it later.

3. Fixing Finder Performance Issues
Technical glitches sometimes prevent the Finder from displaying hidden files correctly. If you notice Finder search is not working, you should reset your preference files.
- Click the Go menu in the top bar.
- Hold the Option key to reveal Library.
- Locate the com.apple.finder.plist file.
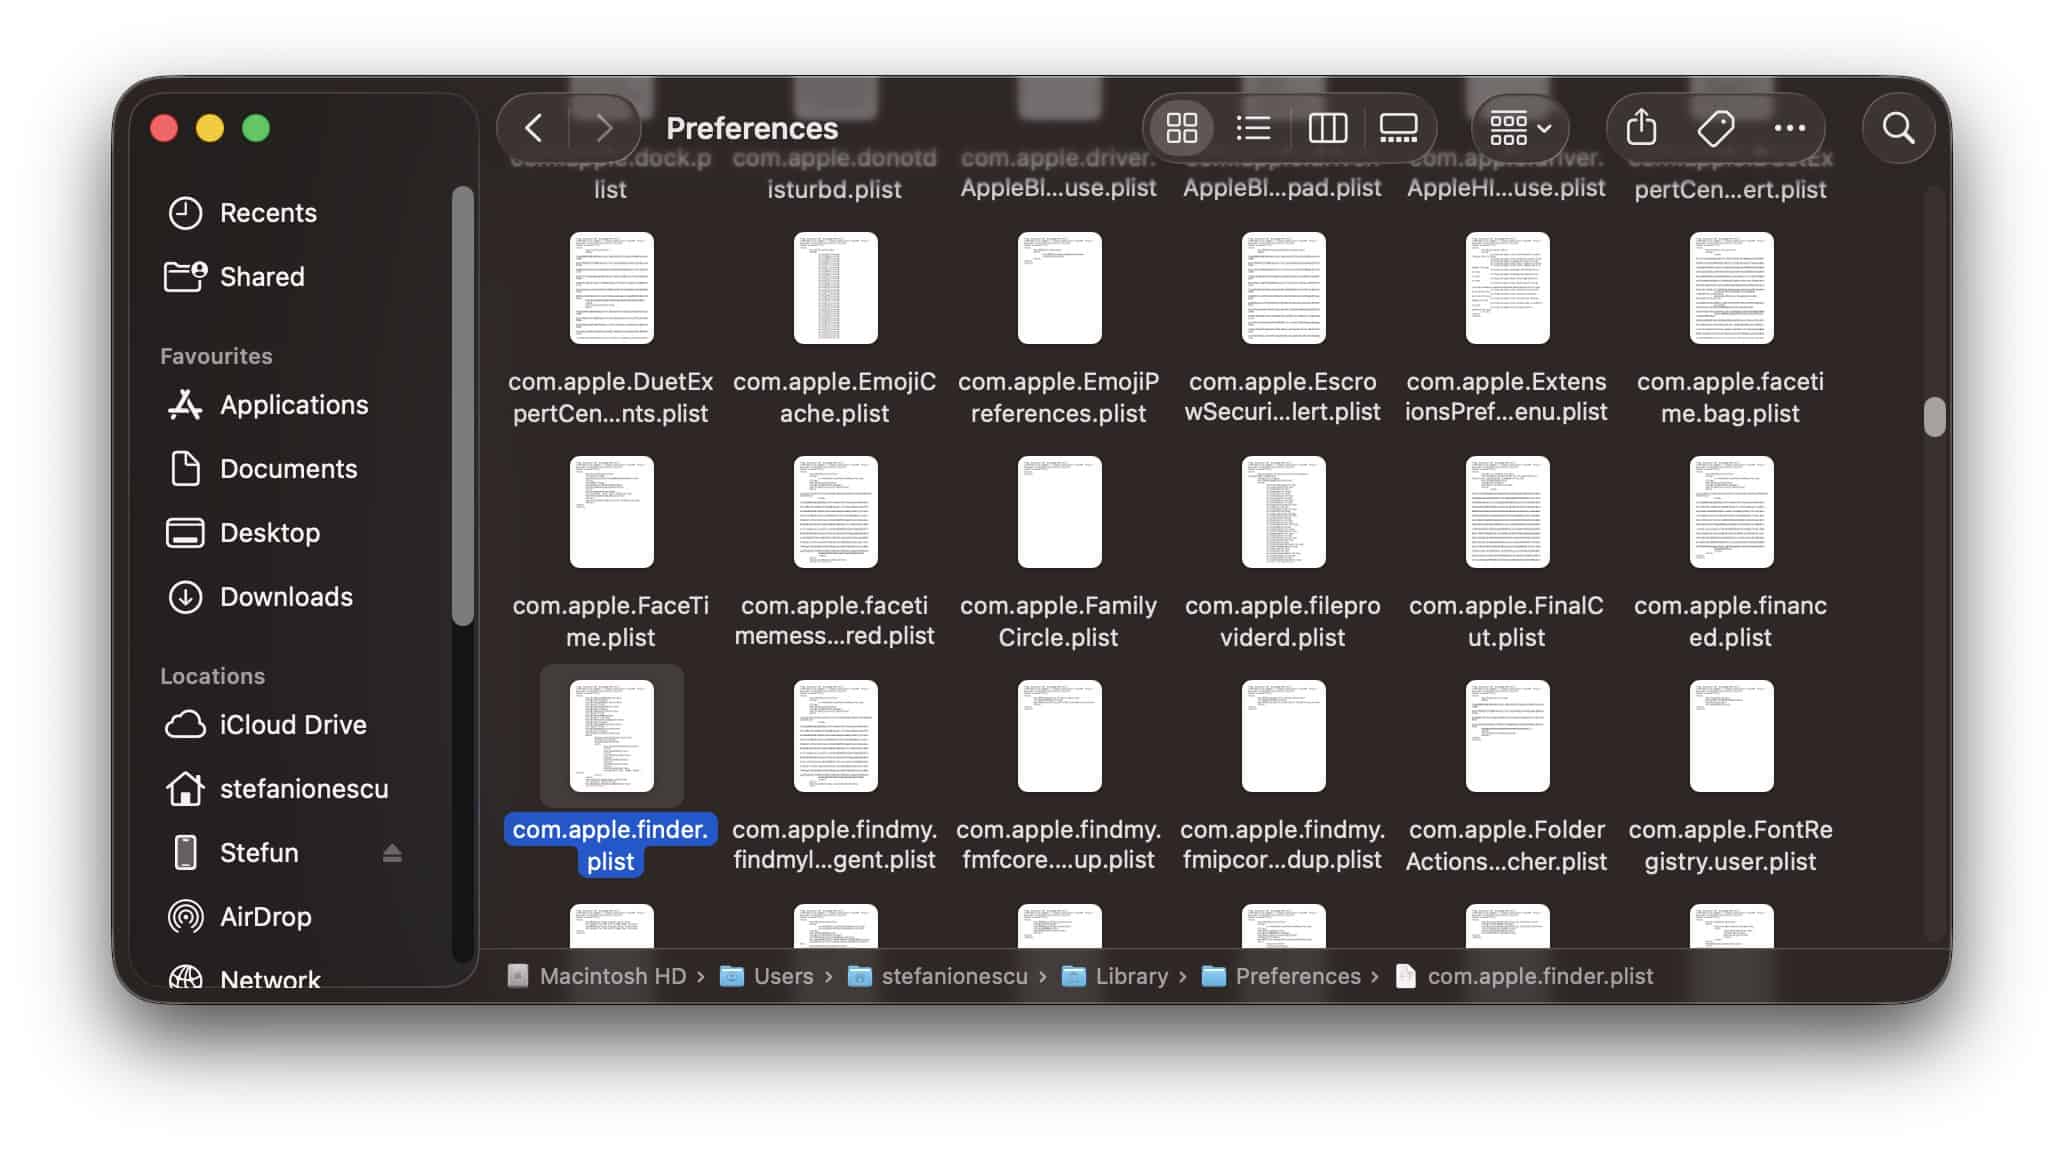
- Move this file to your Trash bin.
- Restart your Mac to refresh the system.

4. Resolving Application Unresponsiveness
A frozen Finder often hinders your ability to manage hidden data. Many users experience the Finder not responding after updating to macOS Sonoma 14 quite frequently.
- Locate the Apple icon in the corner.
- Select the Force Quit option immediately.
- Highlight Finder in the list of apps.
- Click the Relaunch button to start fresh.
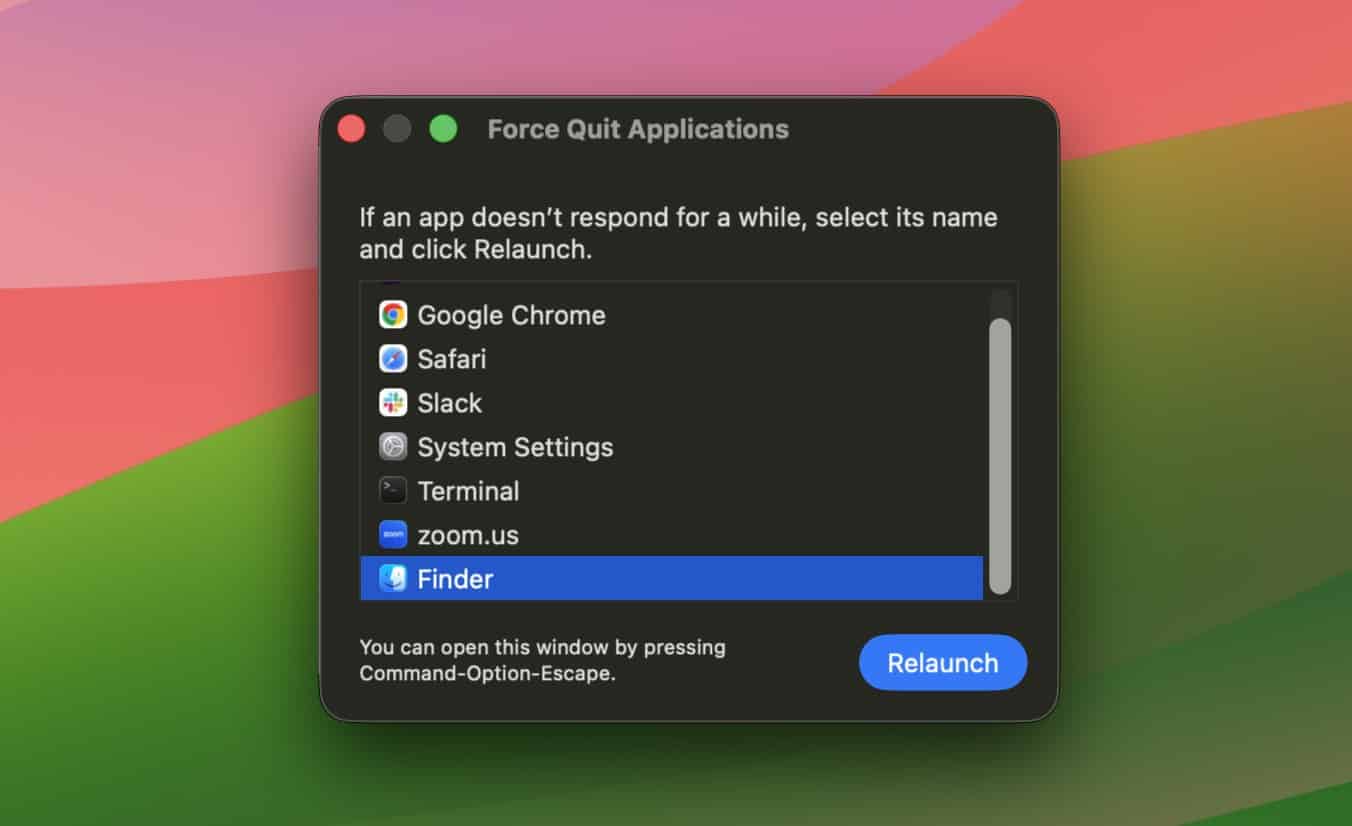
- Check if your hidden files now appear.

5. Repairing File Management Errors
Updating your software can sometimes break basic file operations. For example, Finder copy and paste keeps breaking on macOS 15 for some users.
- Launch Activity Monitor from your Applications.
- Search for the pboard process specifically.
- Click the X button to stop it.
- Select Force Quit to confirm.
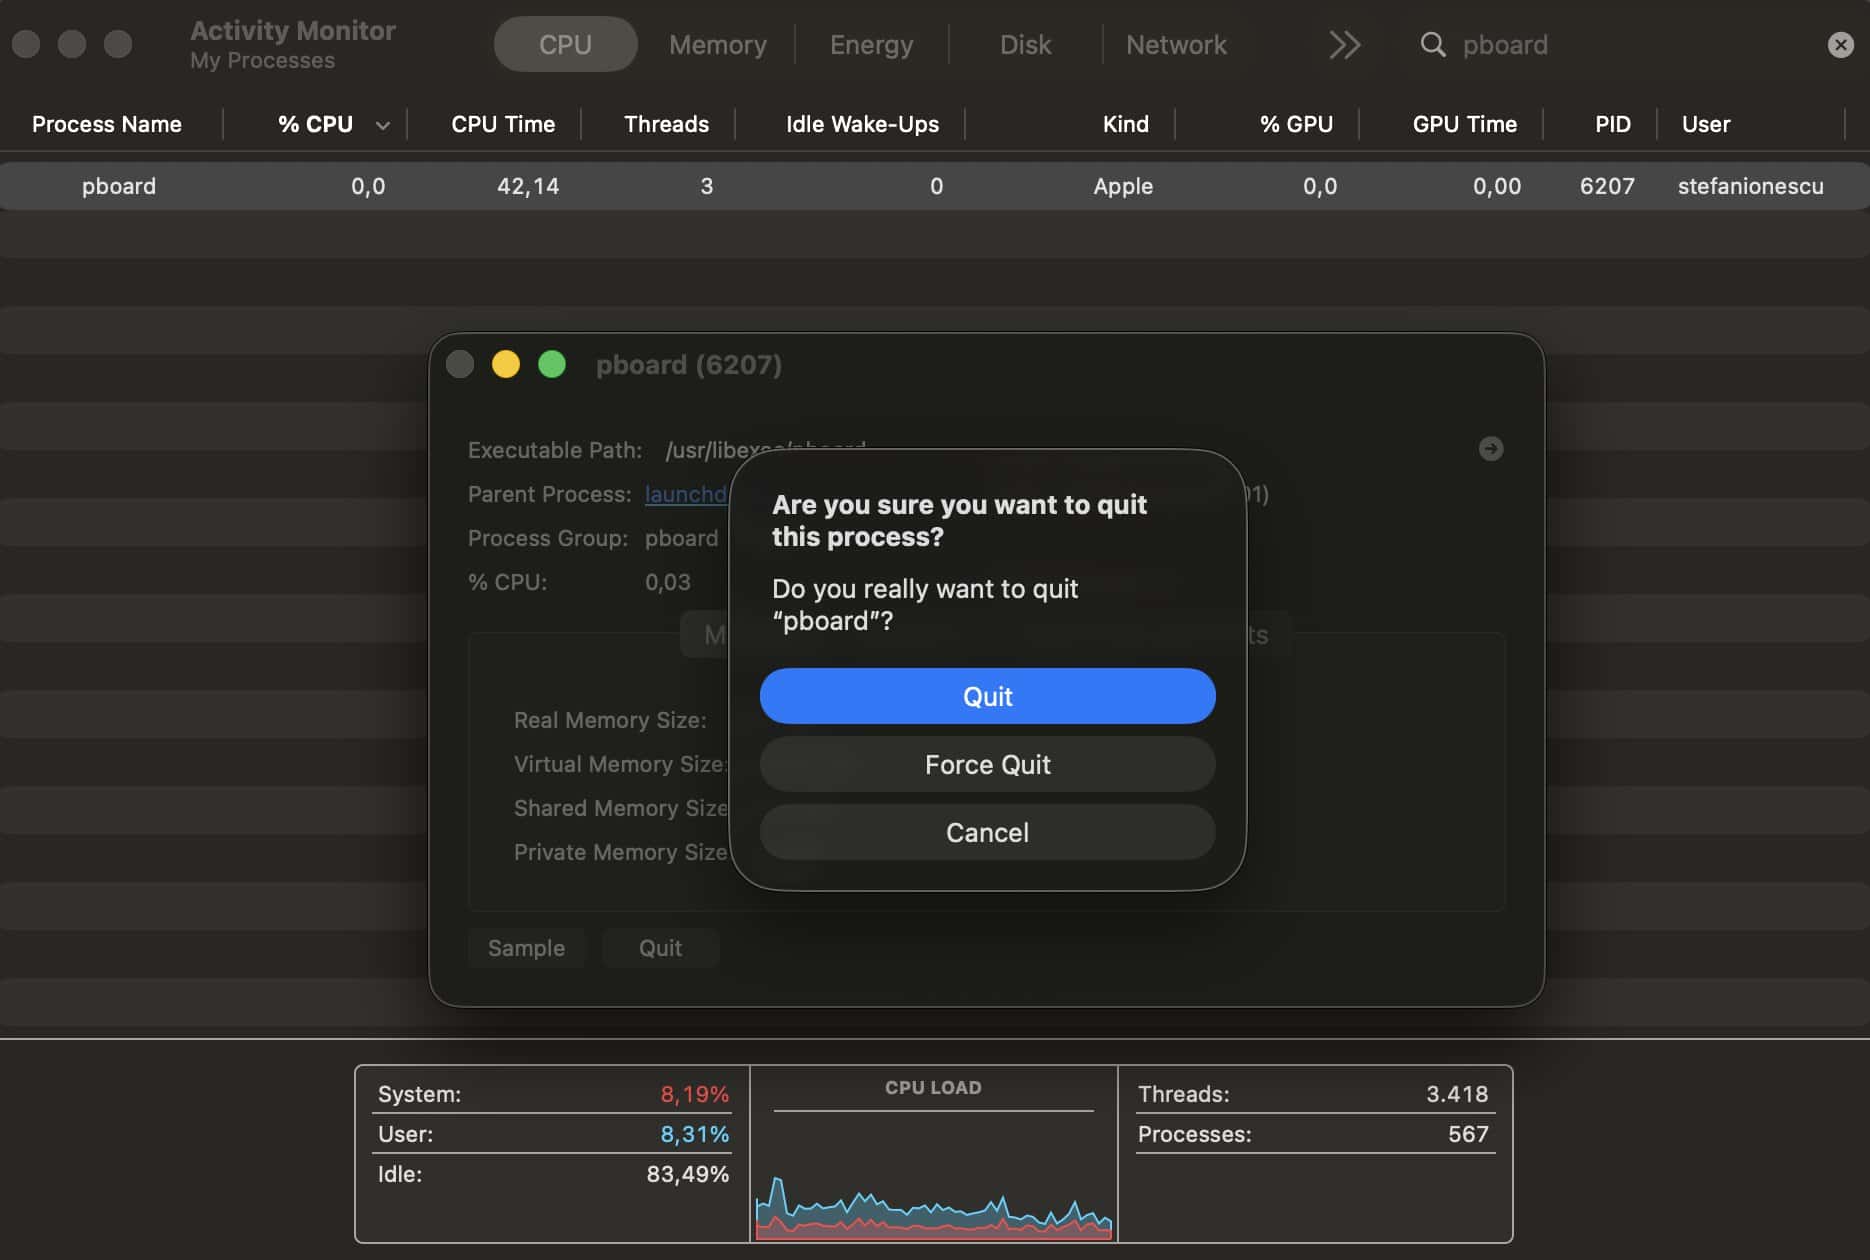
- Try moving your hidden files again.

FAQ
Apple hides these files to protect the core operating system. This prevents users from deleting files that the Mac needs to run.
No, you should avoid deleting hidden files unless you know their purpose. Deleting the wrong file can cause your apps to crash.
Changing the visibility of files does not impact your processing speed. The Mac handles these files regardless of their visibility status.
Master Your Hidden Mac Files
Learning to toggle hidden files gives you deeper access to your computer. You can now troubleshoot system issues and manage app data like a professional. Furthermore, knowing how to cut and paste in Finder with Command X improves your overall workflow efficiency.


