
The colored dots on the macOS Sonoma menu bar are helpful when checking which functions your apps are using, but they shouldn’t stay visible 24/7. Seeing these indicators unnecessarily pop up can feel alarming. You might worry that your camera is still running. Thankfully, there are several easy fixes—let’s look at the best ones.
What Do the Different Menu Bar Dots in macOS Sonoma Mean?
You should see different colored dots when you use your microphone, camera, or system sound recorder. Each usually shows up next to the Control Center icon.

- Green: This means you’re using your Mac camera. You’ll see it when using FaceTime, Zoom, and Google Meet, among other video conferencing apps.
- Orange: It means you’re using your computer’s microphone. Expect to see this when you use Siri or any audio-recording app.
- Purple: This dot appears when you use the system sound recorder on your Mac. For example, you’ll see it when speaking in audio editing software like Adobe Audition.
How To Remove Colored Dots on macOS Sonoma Menu Bar
Based on personal experiences, I’ve ranked the best solutions for this problem from top to bottom in order of ease and effectiveness.
1. Check if You Have Any Apps Open
Time needed: 3 minutes
Before performing any complex steps, close all apps that use your camera, microphone, and system sound recorder. Here’s how:
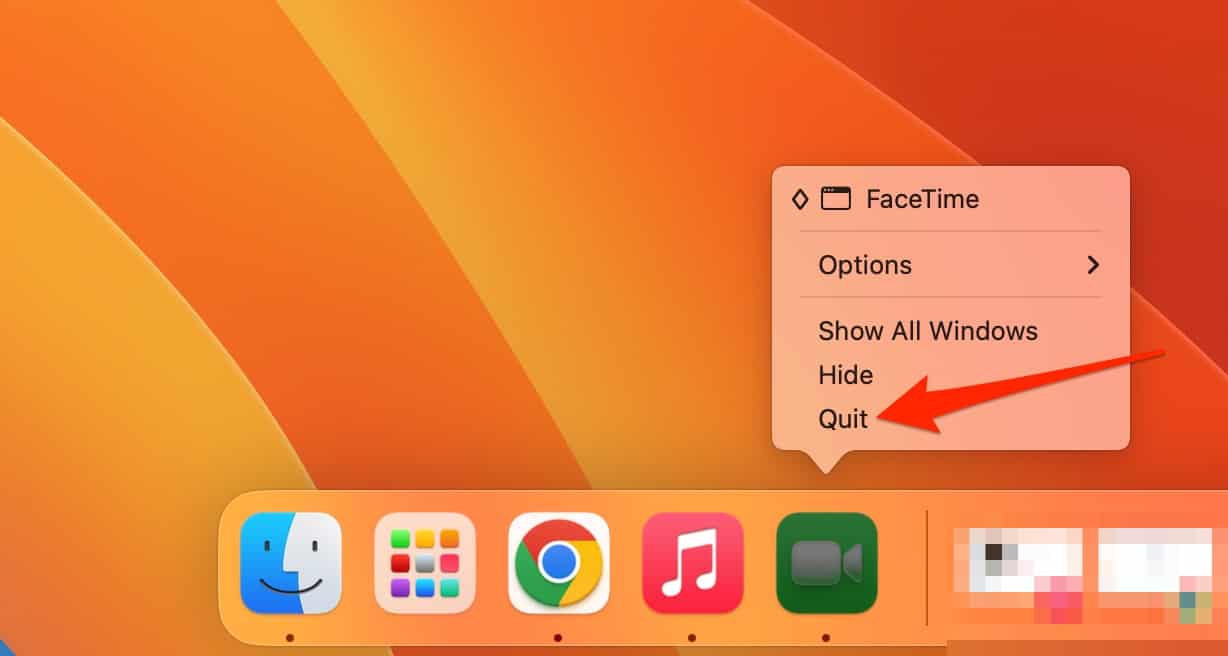
- Hover your cursor over each app you want to close.
- Simultaneously press the Control key and your trackpad on the app’s icon.
- Select Quit.

If that doesn’t work, try force-quitting open apps and programs.
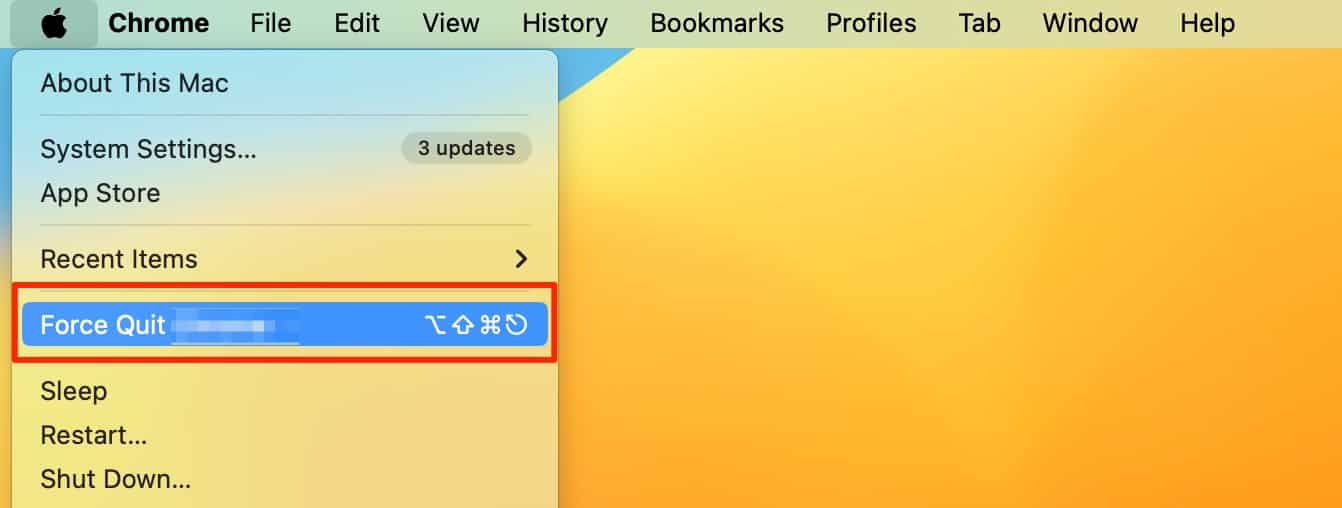
- Expand the Apple logo menu and select Force Quit.
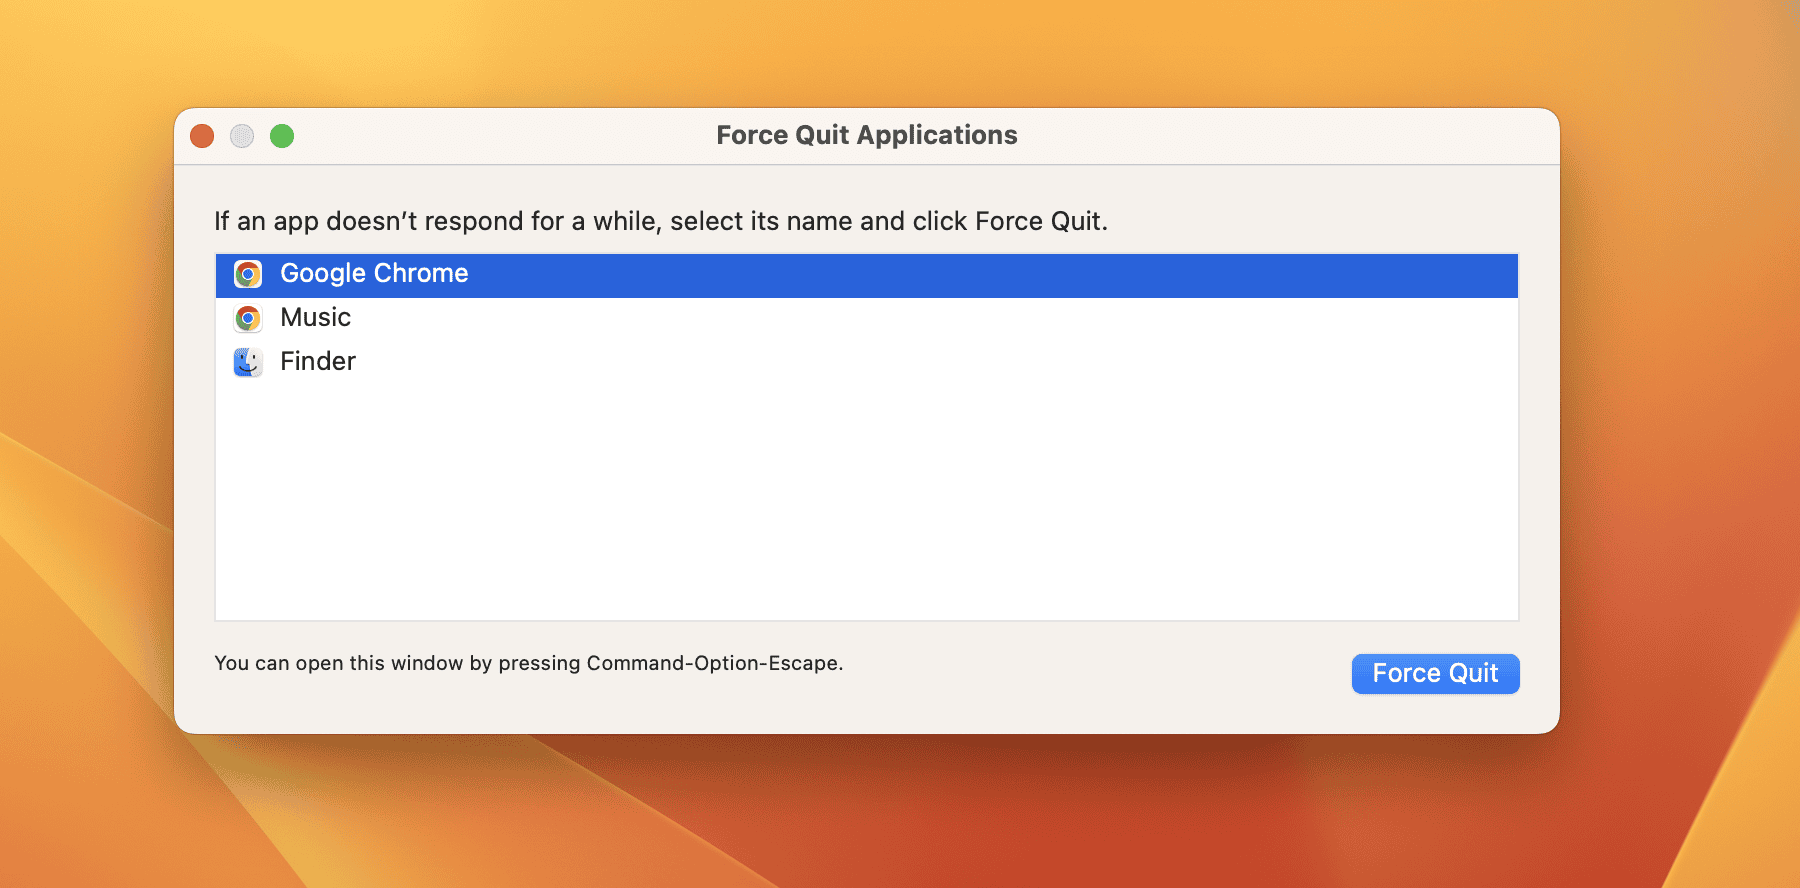
- Highlight everything you want to close and click Force Quit again.


2. Put Your Mac to Sleep
If force-quitting apps don’t work (or you’ve already done that previously), see if putting your Mac to sleep solves the issue.
First, check how long your Mac requires its password after you turn off your display. Go to System Settings > Lock Screen > Require password after screen saver begins or display is turned off. For example, my computer requires this information after five minutes.

Next, follow these steps to put your Mac to sleep:
- Change your set time to Immediately so that you don’t need to wait to reawaken your Mac.

- Close the lid of your Mac.
- Reawaken your Mac and sign back in, then check to see if the dot has disappeared.

If that method doesn’t work, try putting your Mac to sleep from the Apple menu.
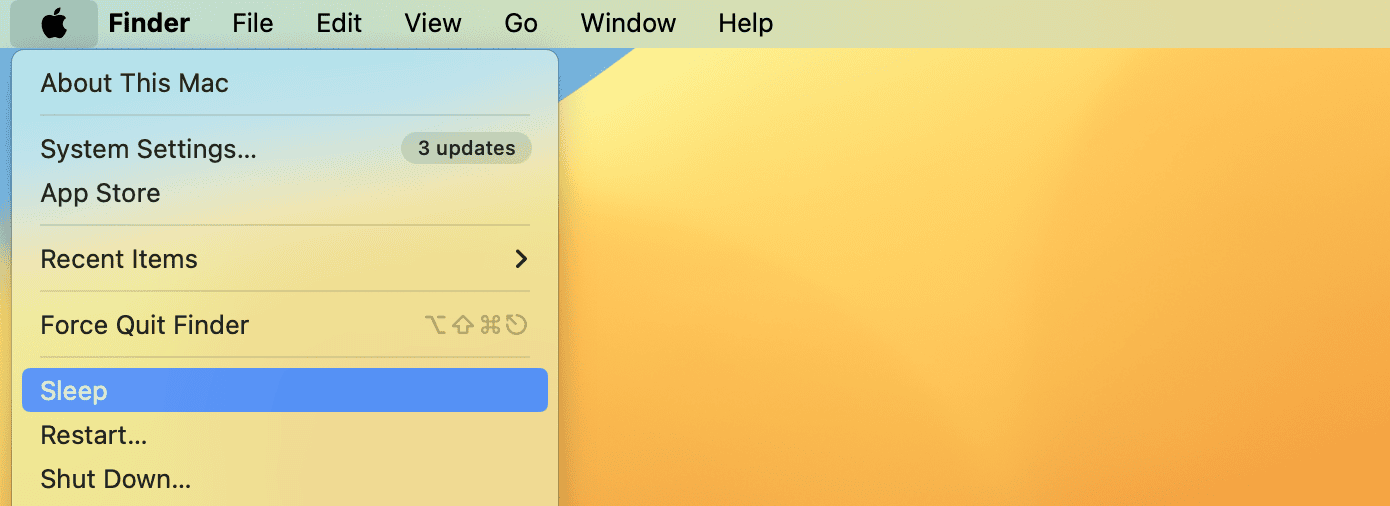
- Expand the Apple menu and select Sleep before putting the display down.
- Re-enter your login details.
Should you have trouble waking your Mac up from Sleep, plug in your charger or start your Mac in Recovery Mode.
3. Stop App Processes in Activity Monitor
If you’re worried that some app processes from your apps haven’t stopped, manually kill them in Activity Monitor.
- Search for and open Activity Monitor in Spotlight or Finder.
- Look for any apps you think may use your camera, microphone, or audio recording via the search bar. Repeat this process for CPU, Memory, Energy, Disk, and Network.
- Press the Command key and highlight every related process.
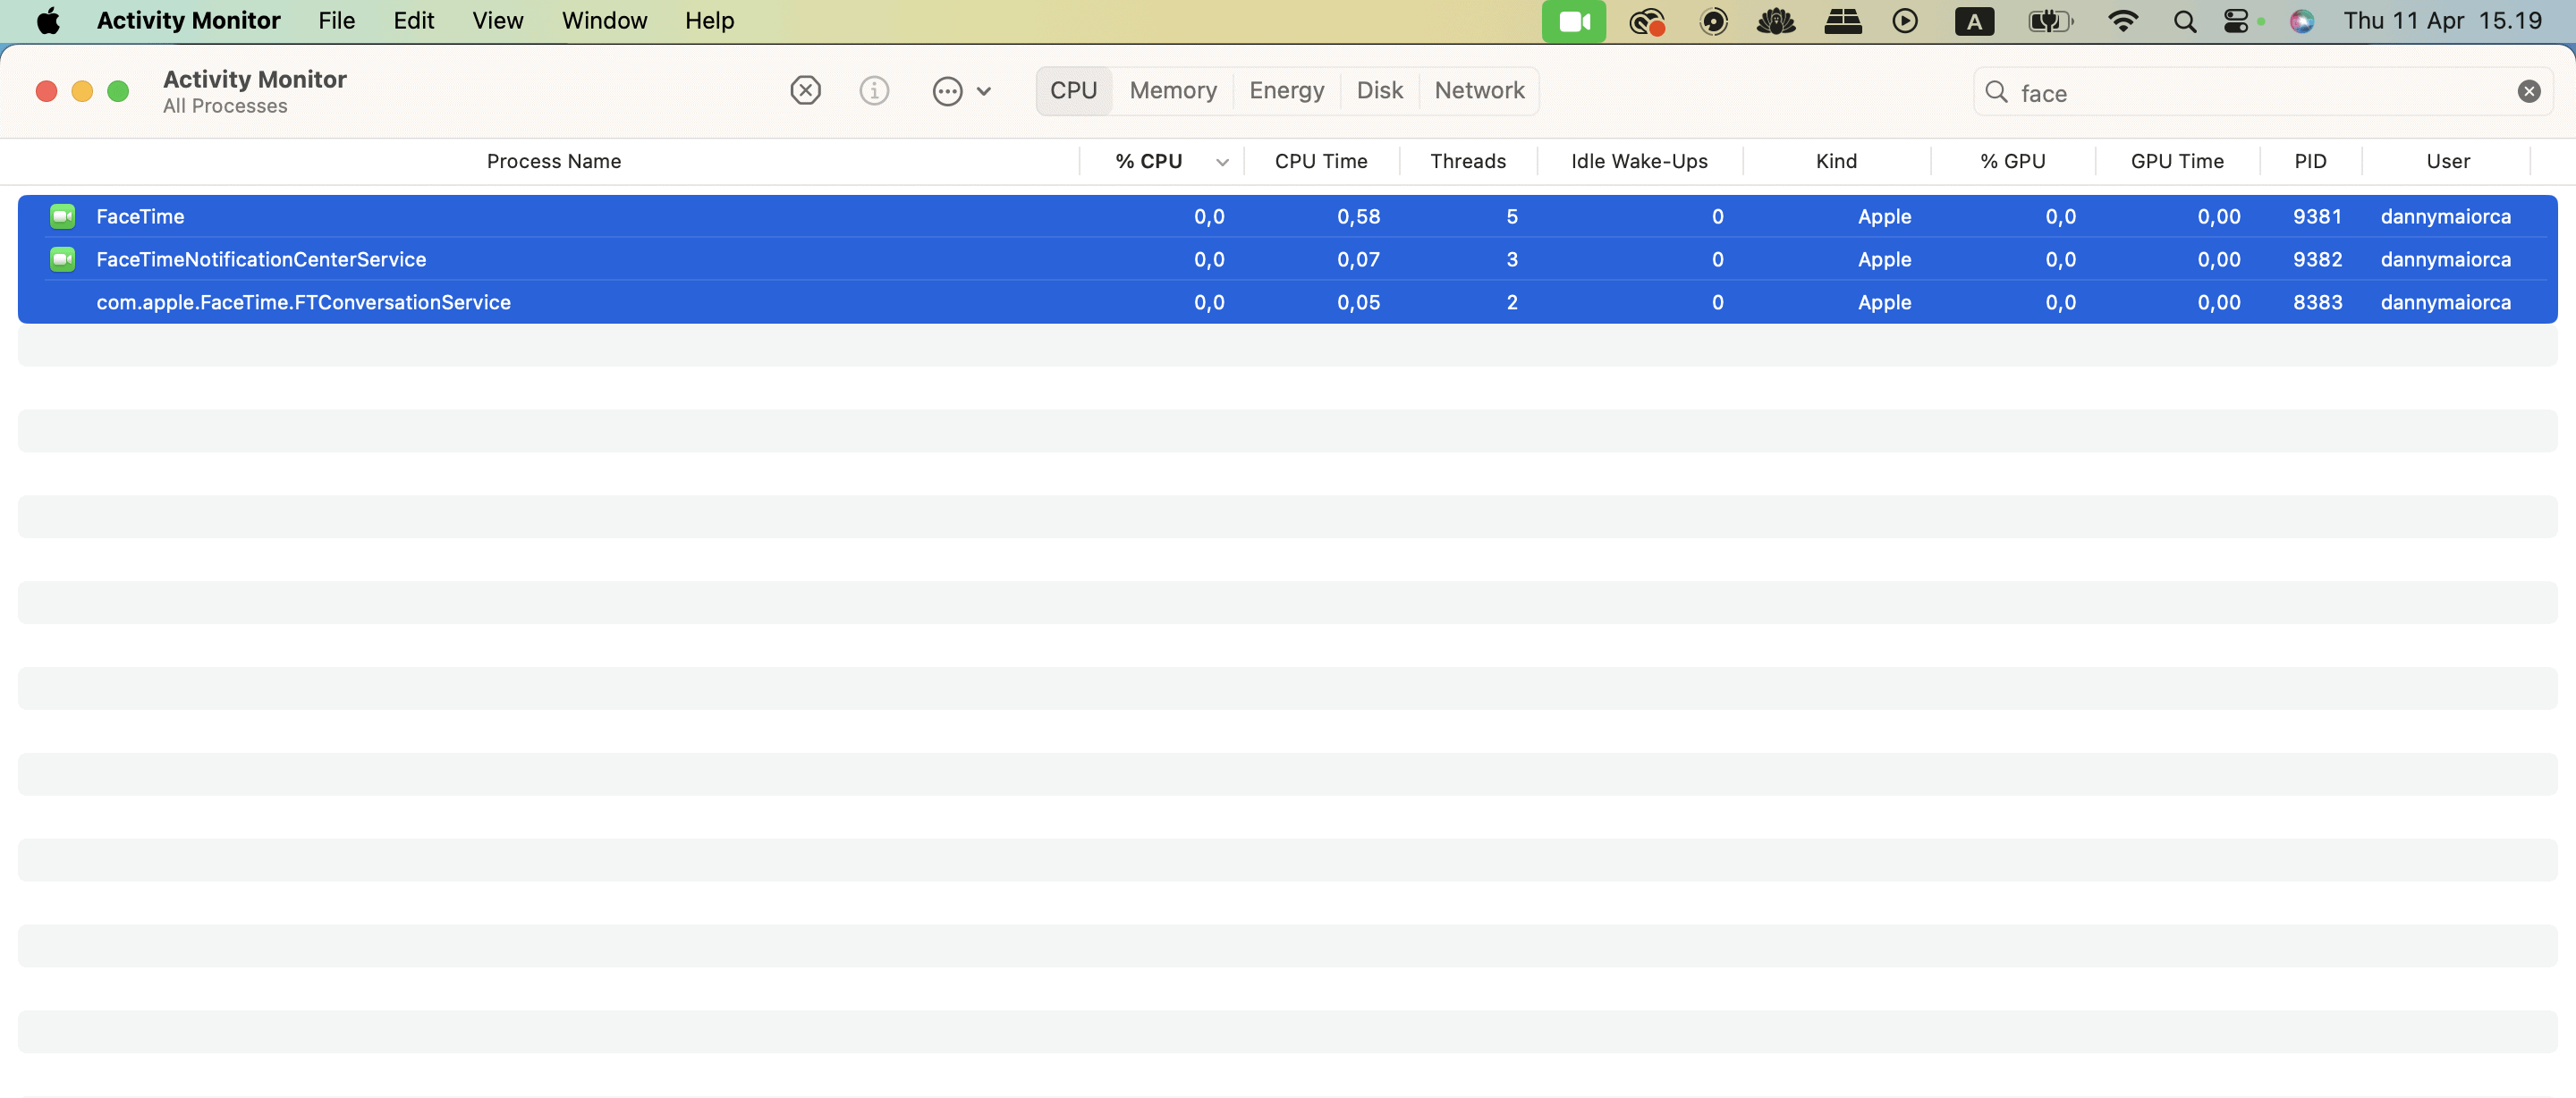
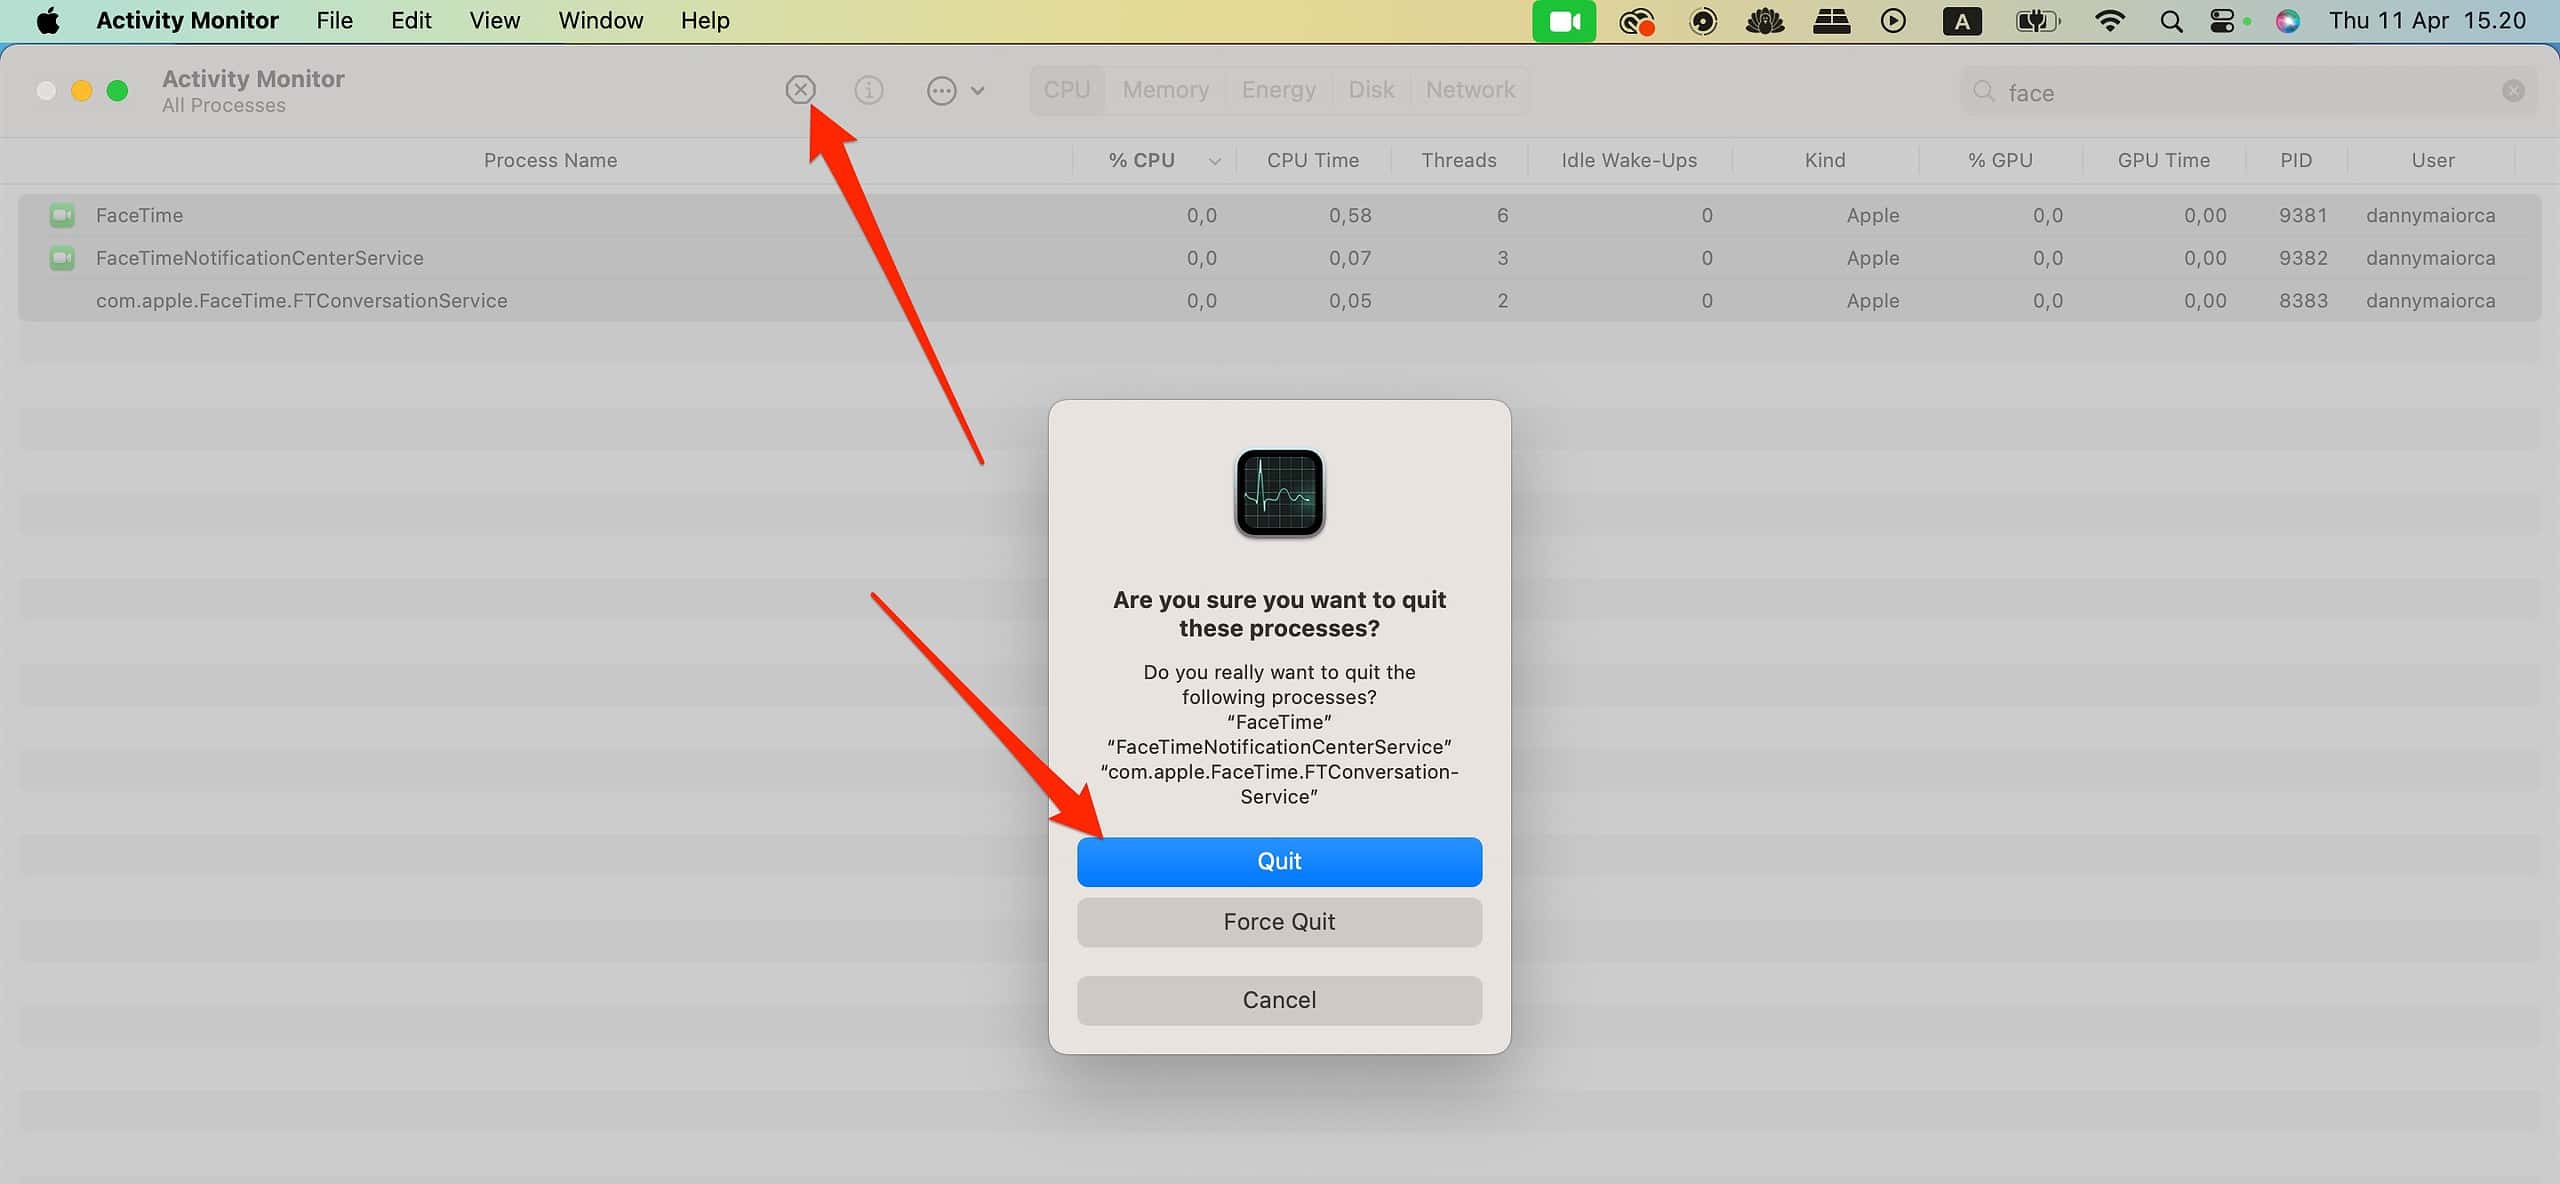
- Select the stop icon (x) close to the top of your screen.
- Tap Quit when you see the pop-up window—if that doesn’t work, press Force Quit instead.


4. Restart Your Mac
Restarting my Mac has helped me solve countless glitches in the past—follow these instructions to do that.
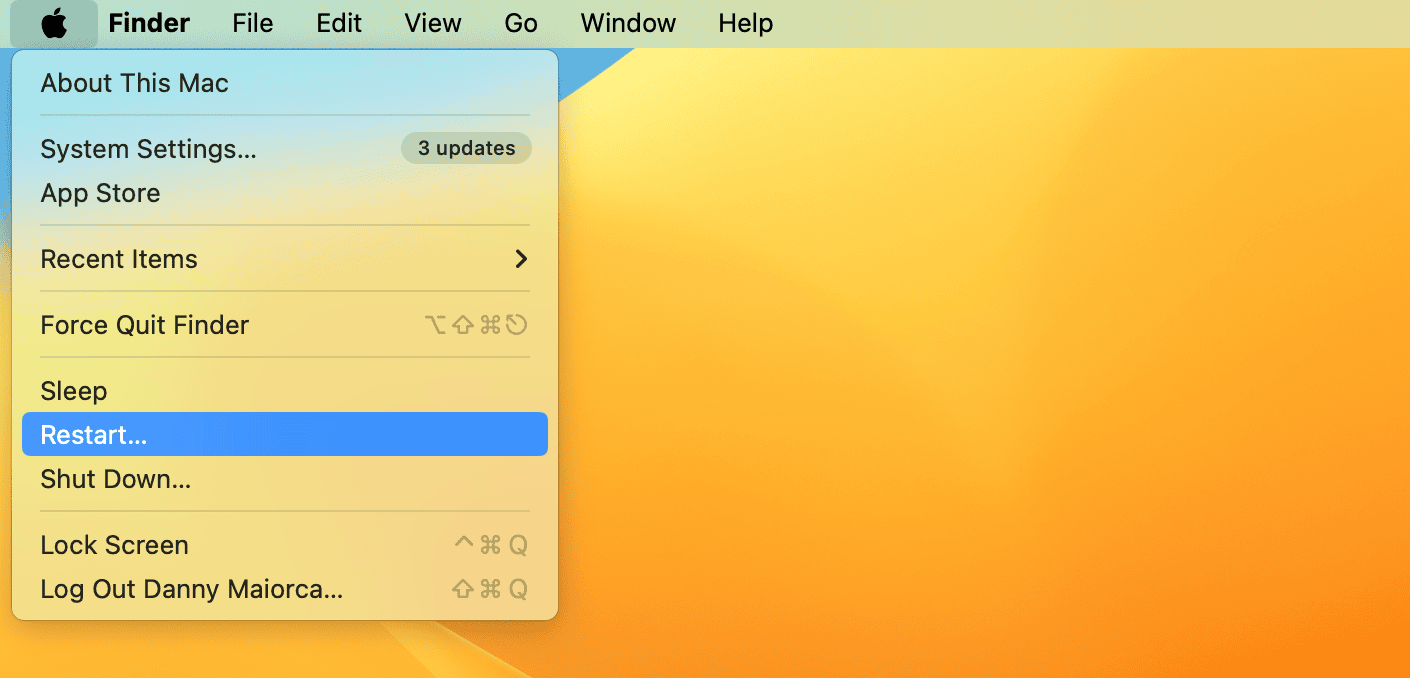
- Click the Apple logo and select Restart.
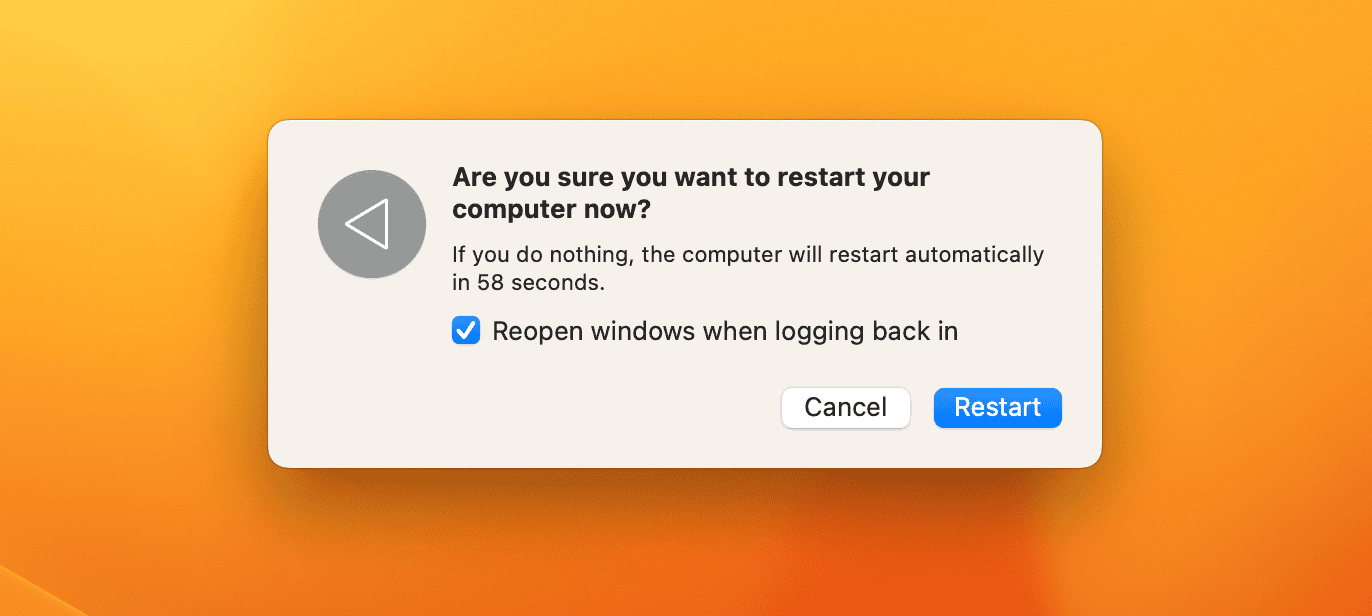
- Click the blue Restart button in the pop-up window.
- Press the power button to switch your Mac on, before logging in and checking your menu bar.


5. Update Your macOS Software
As with any software update bug, the best approach is to install the latest macOS version available.
- Go to System Settings > General > Software Update.

- If there’s an available upgrade, press Update Now.
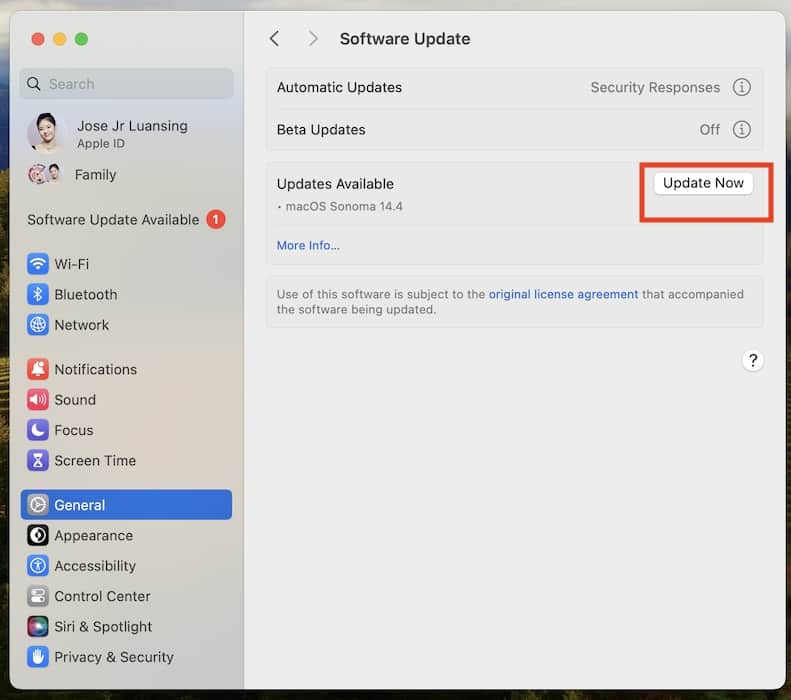
- Once you’ve approved the licensing agreement, wait for the software to download.


If you don’t see a software update, then your device is probably already up-to-date. You’ll see a message in System Settings confirming that. However, you can also try checking your internet connection and rebooting your machine.
6. Turn Off Your Camera and Microphone Settings for Associated Apps
Should none of the basic solutions above work, it’s time to get more technical. Temporarily revoking camera or microphone access may fix your menu bar, and it’s as simple as tapping a few toggles if you don’t want to completely disable your Mac camera.
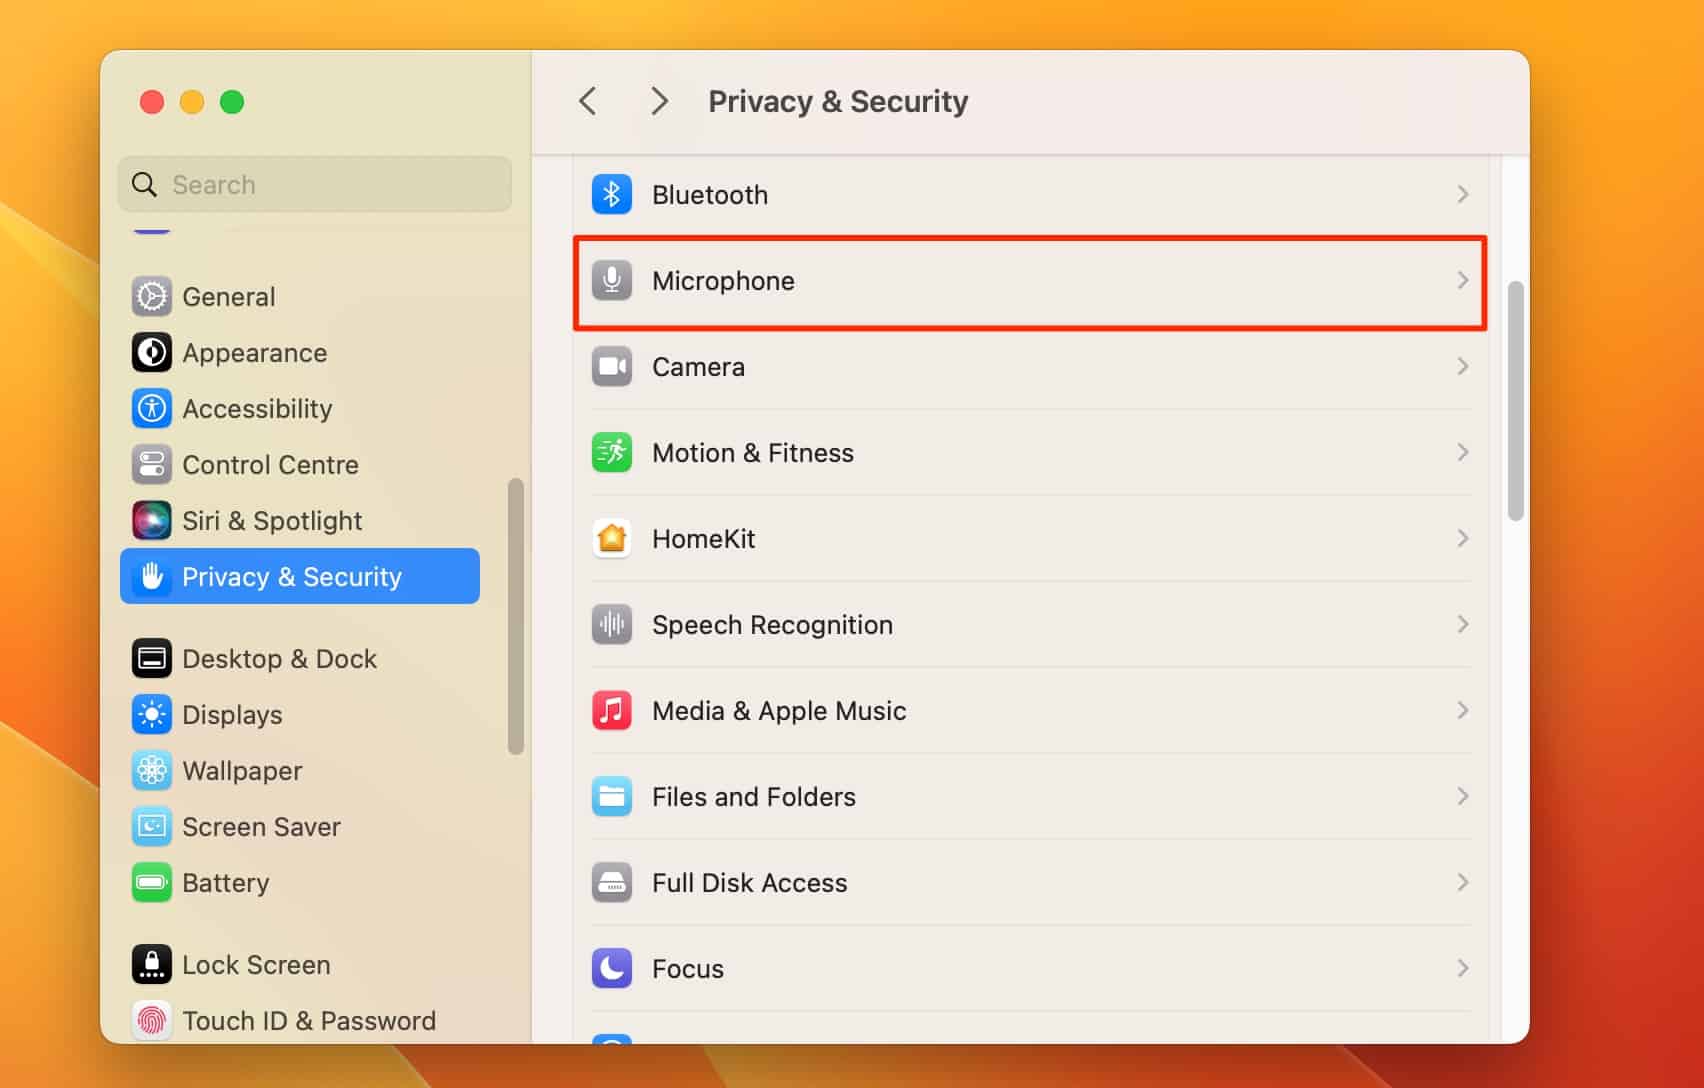
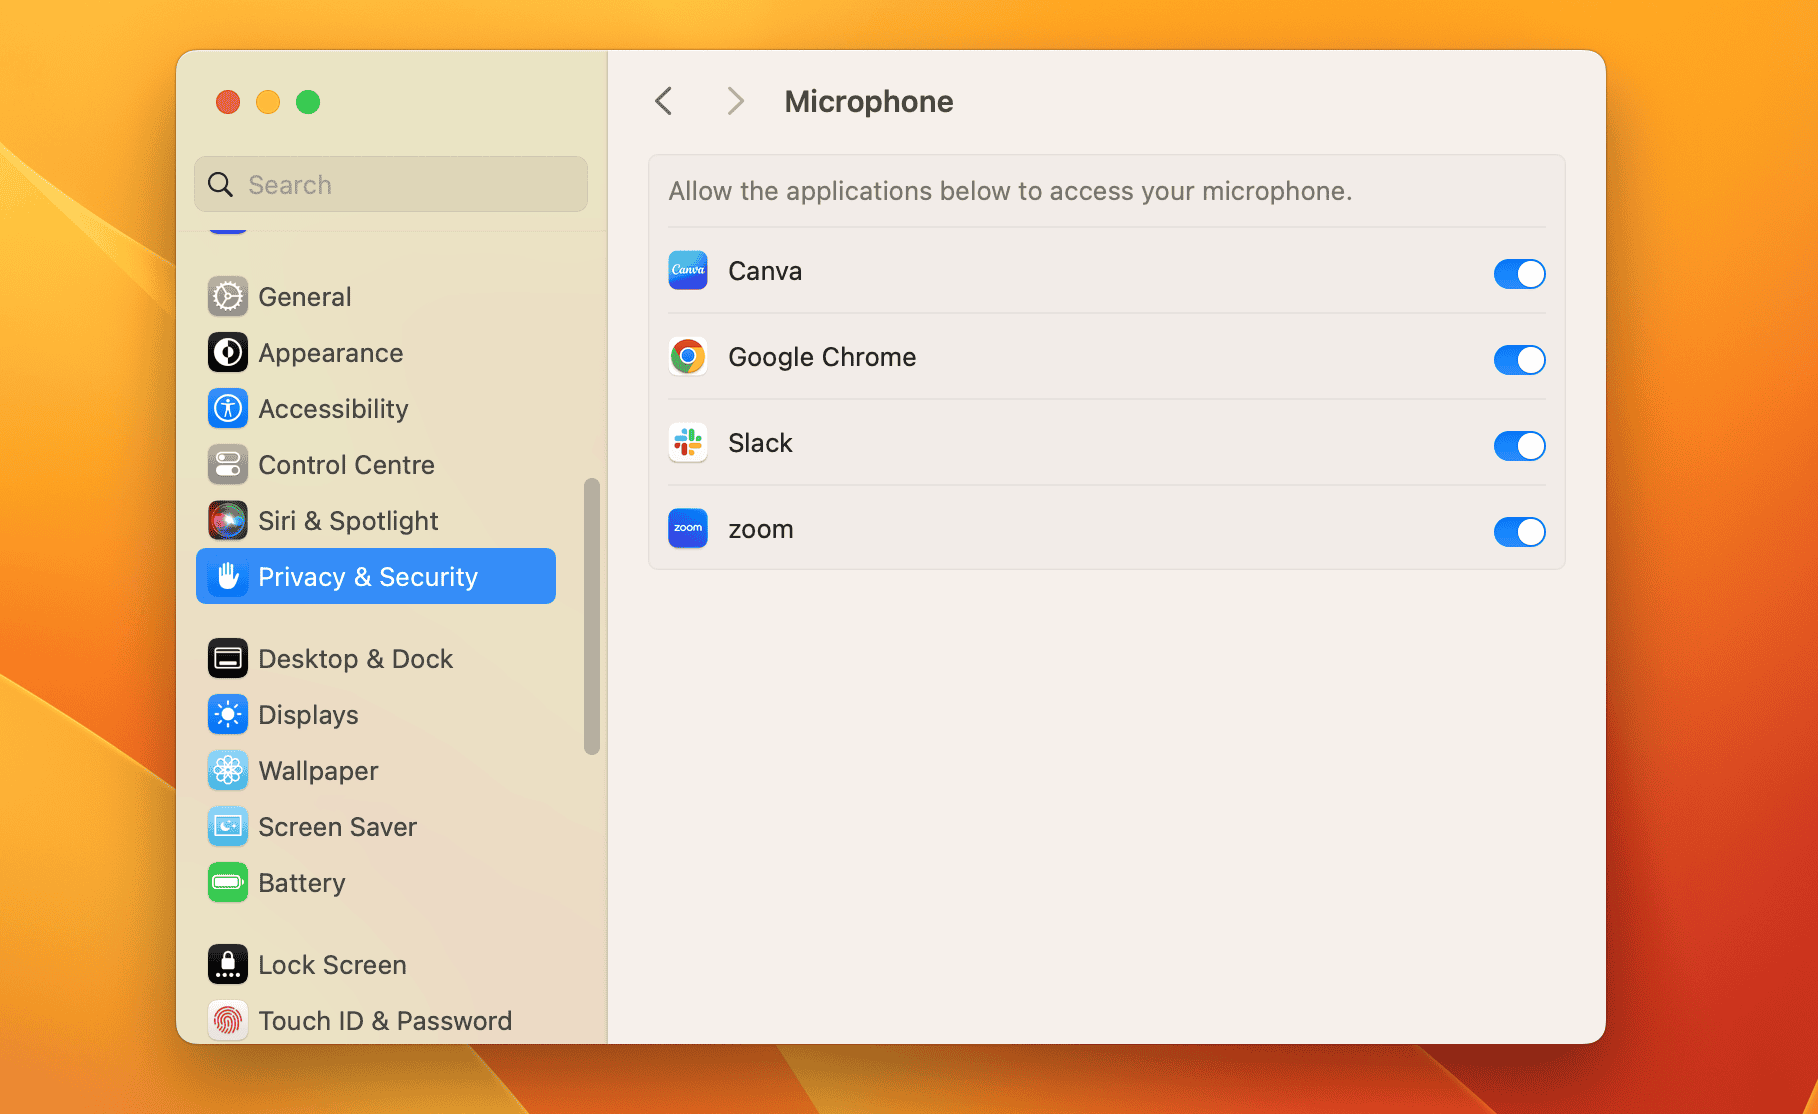
- Open System Settings and choose Privacy & Security.
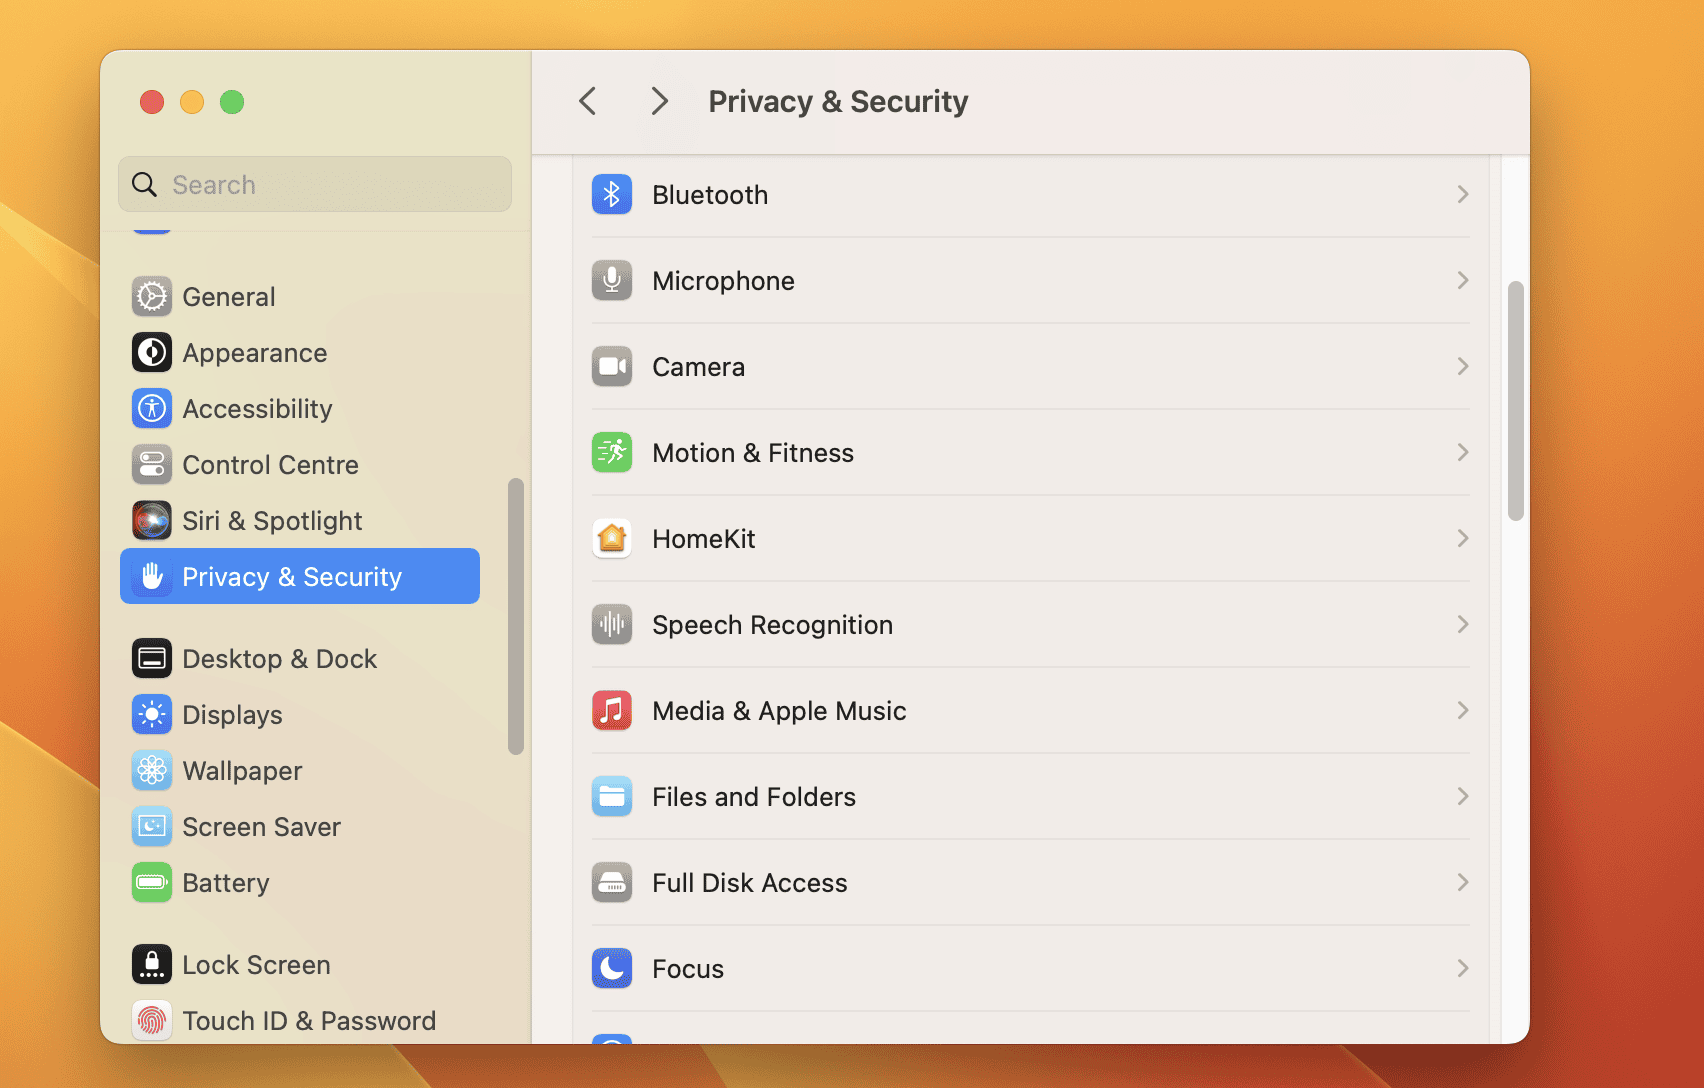
- Start by clicking the Microphone tab.
- Switch the toggles off for every app you previously granted permission to.
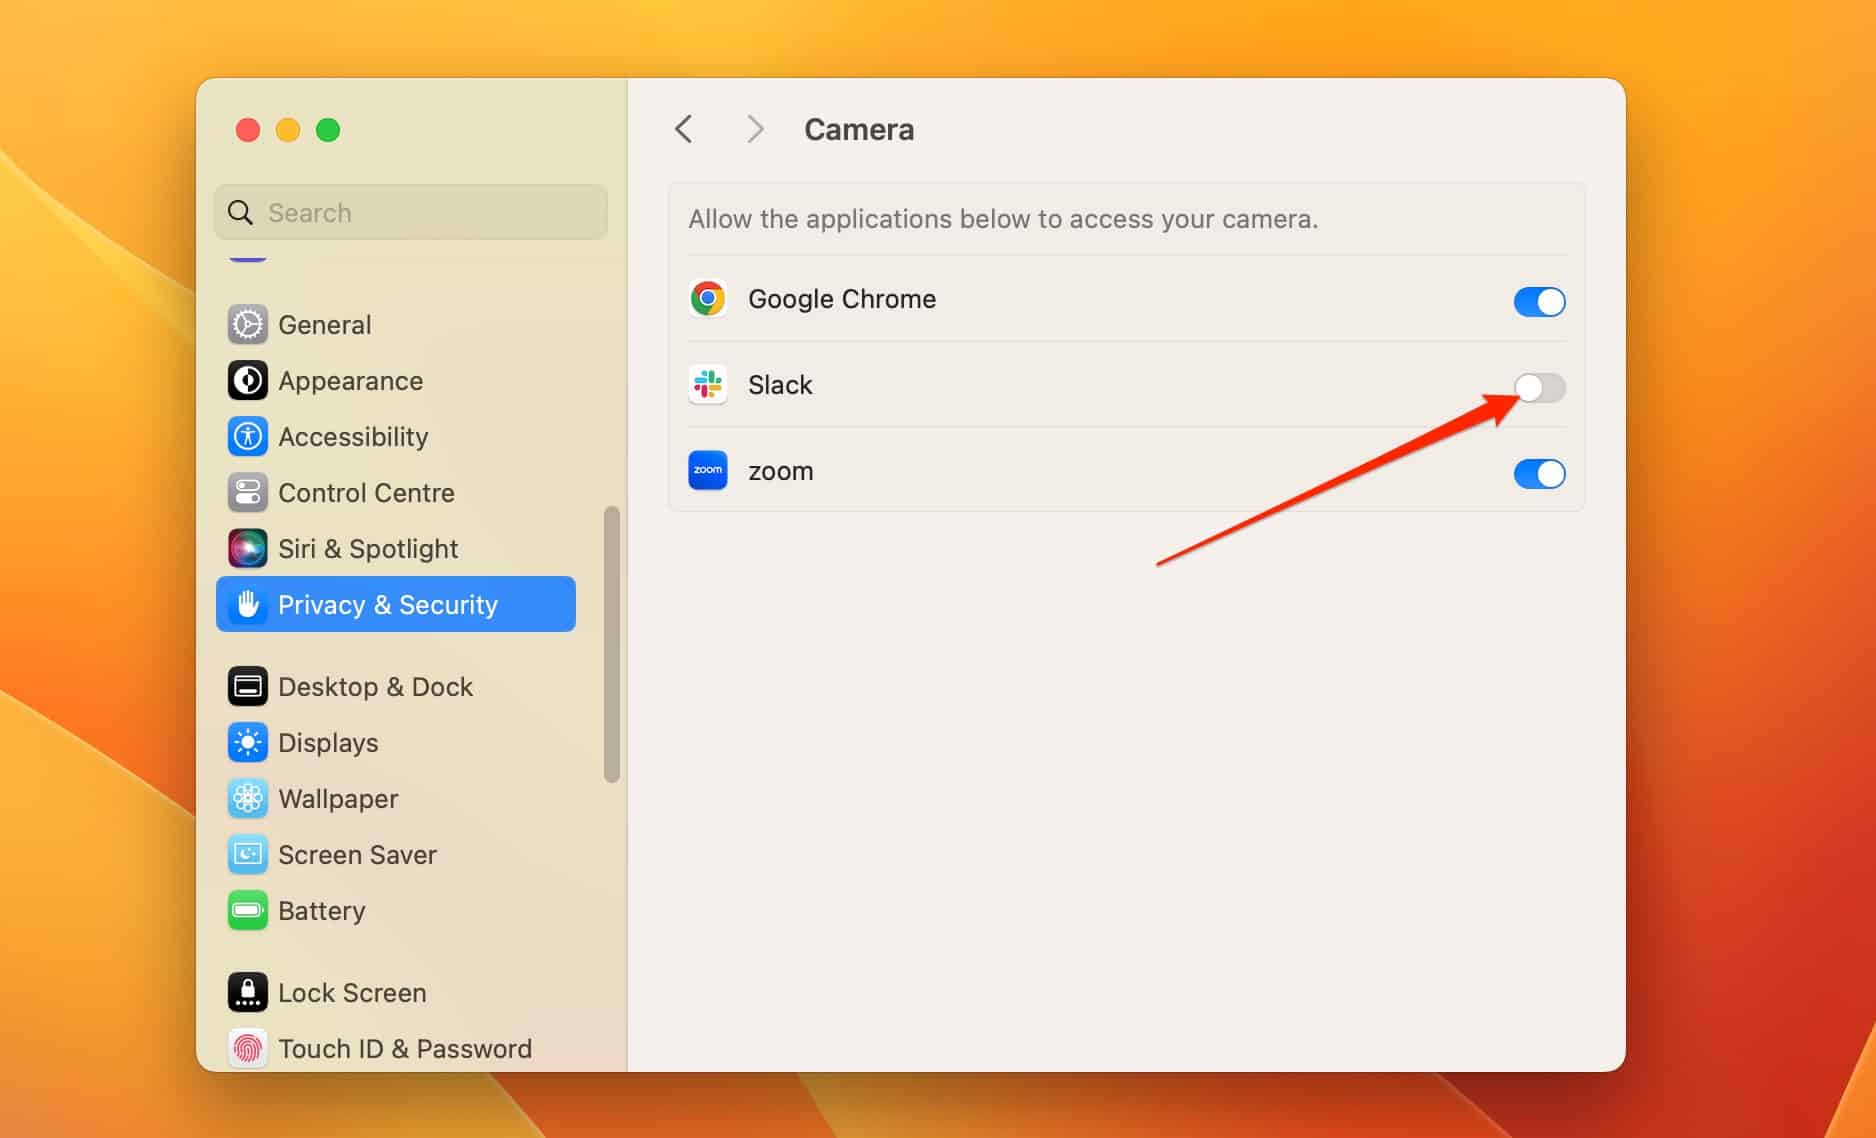
- Go back, select Camera, and do the same.
- Turn your Mac off and on again. If you solved the problem, re-enable camera and microphone access to each app.


7. Uninstall and Reinstall Apps That Use Your Camera and Microphone
The least convenient way to make the constant menu bar dot in macOS Sonoma disappear is to delete and re-download the apps potentially causing this problem. While you can’t uninstall FaceTime, you can remove third-party apps.
Here’s the easiest choice, although it may not work for all devices:
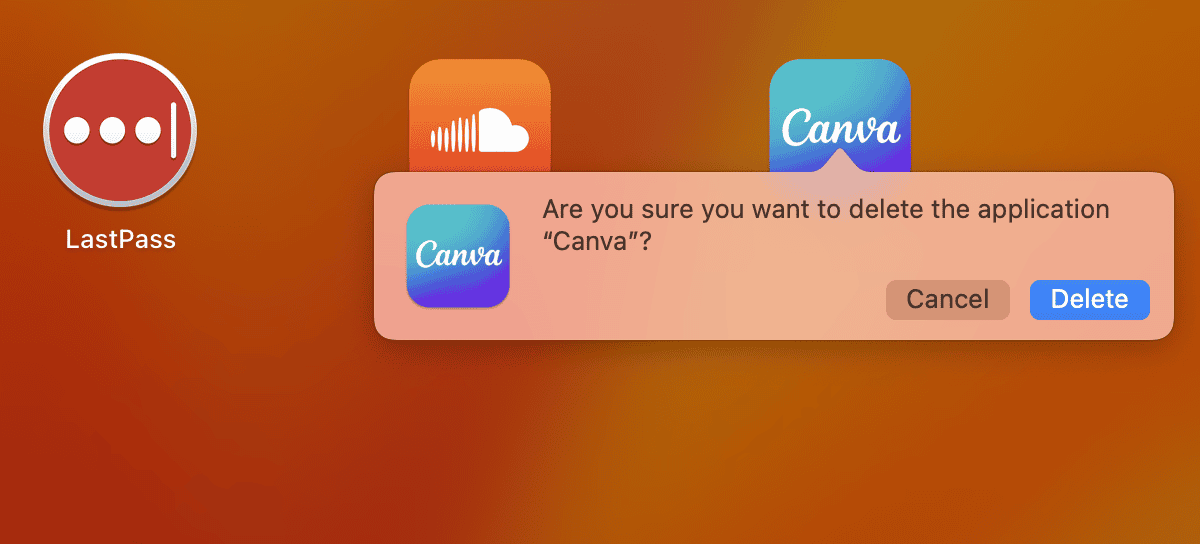
- Drag and drop your app(s) to the Trash folder.
- Tap Delete when asked to confirm your choice.

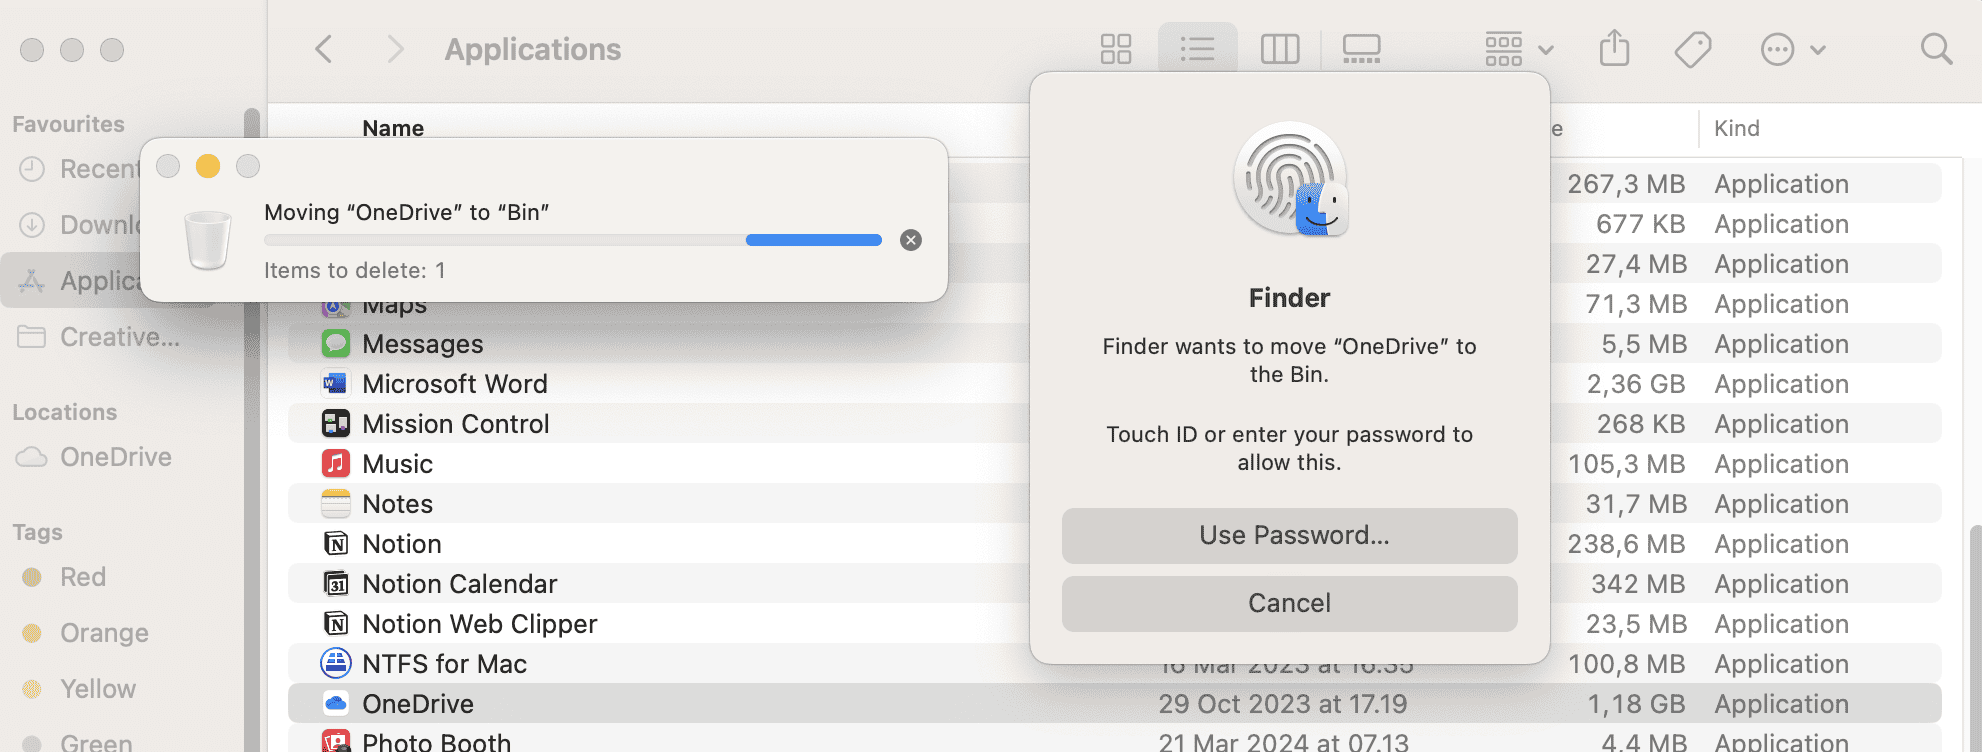
If that doesn’t work, try deleting the app from Finder instead.
- Go to Folder > Applications, before dragging and dropping your apps into the Trash.
- Enter your password or use Touch ID if prompted.
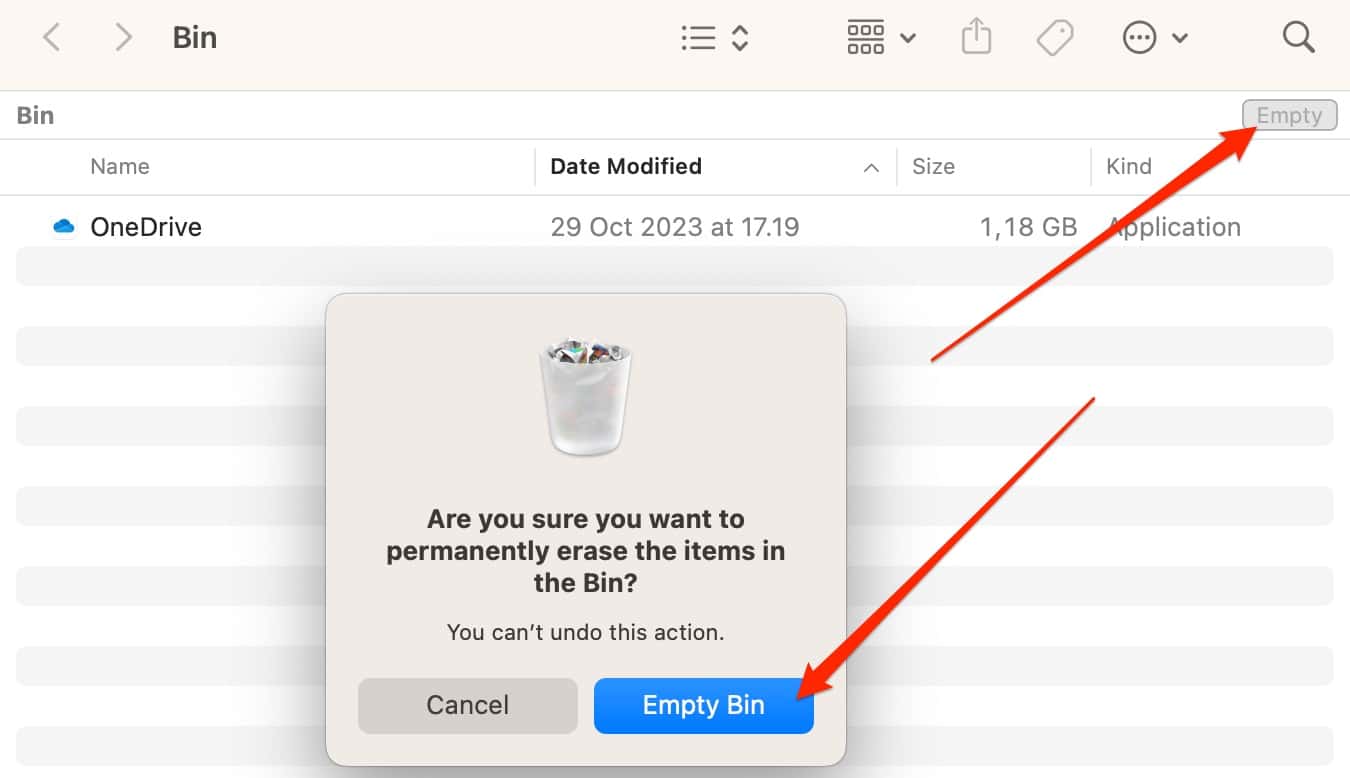
- Open your Trash folder and click Empty. Confirm your choice when asked.


Some third-party apps may require you to use their official uninstallers. You can also remove these in Finder by following these steps.
- In Finder > Applications, expand the arrow next to apps that you wish to delete and have uninstallers.
- Double-click Uninstall [App Name] and follow the instructions for that specific tool.


Once you’ve removed your apps, turn your Mac off and on again. You can then re-download them if you successfully solved the problem.
In most cases, menu dots will disappear when you finish using whichever app prompted them in the first place. You can quit these with minimal effort. But if none of the above troubleshooting steps work, contact Apple Support for possible repairs.


