
If you have ever wanted your music to sound like it is coming from all around you, Dolby Atmos is the answer. This spatial audio feature creates an immersive listening experience that feels much deeper than standard stereo. It places instruments and vocals in 3D space, making you feel like you are right in the recording studio with the artist. Whether you are using AirPods or other compatible headphones, enabling this setting is a quick way to upgrade your listening experience instantly.
Table of contents
What You Need to Turn On Dolby Atmos
Before diving into the settings, you should ensure you have the right gear. Generally, you need an Apple Music subscription and a compatible device. This works on iPhone, iPad, Mac, and even Android phones. While the feature is designed to work automatically with Apple and Beats headphones (like AirPods Pro or AirPods Max), you can actually use any headphones if you change the settings to “Always On.”
Don’t miss the best of The Mac Observer
Set us as a preferred source and our Apple reporting ranks higher in your Google Search results and Discover feed — one tap, no account changes.
Make sure your device is updated to the latest software version to avoid any glitches. If you are new to the platform, you might want to check out a guide on Apple Music and how to use it to get familiar with the basics before tweaking advanced audio settings.
Here’s How to Turn On Dolby Atmos
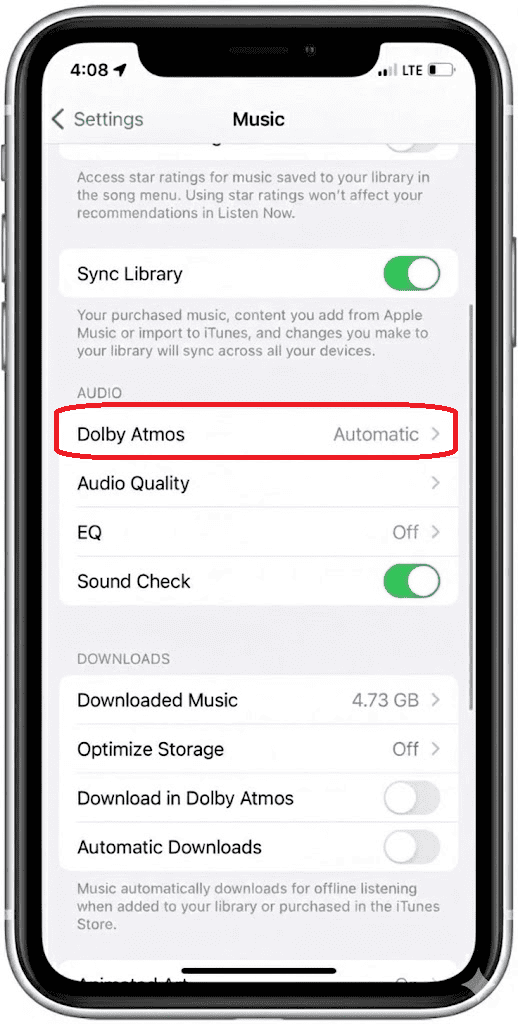
1. On iPhone and iPad
Using Dolby Atmos on your mobile device is the most popular way to listen.
- Open the Settings app on your iPhone or iPad.
- Scroll down and tap on Music.

- Under the Audio section, tap on Dolby Atmos.
- Choose Automatic if you are using AirPods or Beats headphones. Select Always On if you are using other wired headphones.


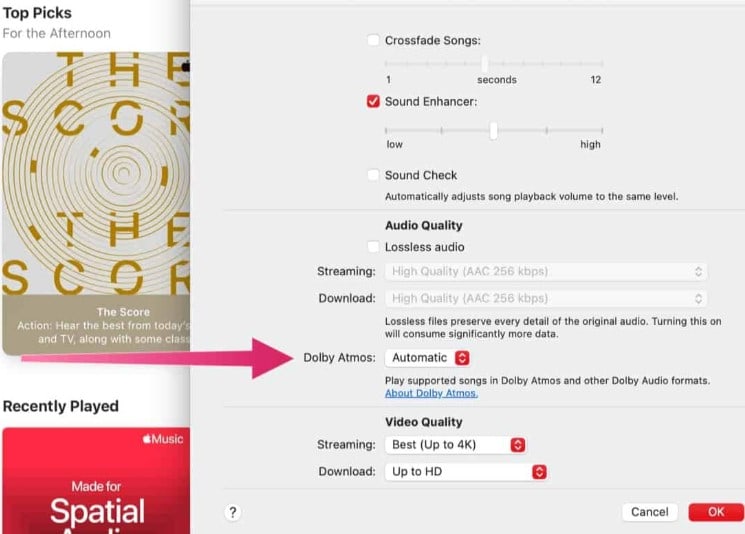
2. On Mac
For desktop users, the process is handled directly inside the Music app.
- Open the Apple Music app.
- In the menu bar at the top, click Music and then select Settings (or Preferences).
- Click on the Playback tab.
- Find the Dolby Atmos dropdown menu and set it to Automatic or Always On.

3. On Android Devices
Android users can also enjoy spatial audio, provided their specific phone supports it.
- Open the Apple Music app on your Android phone.
- Tap the three dots (More) button and select Settings.
- Tap on Dolby Atmos to toggle it on.
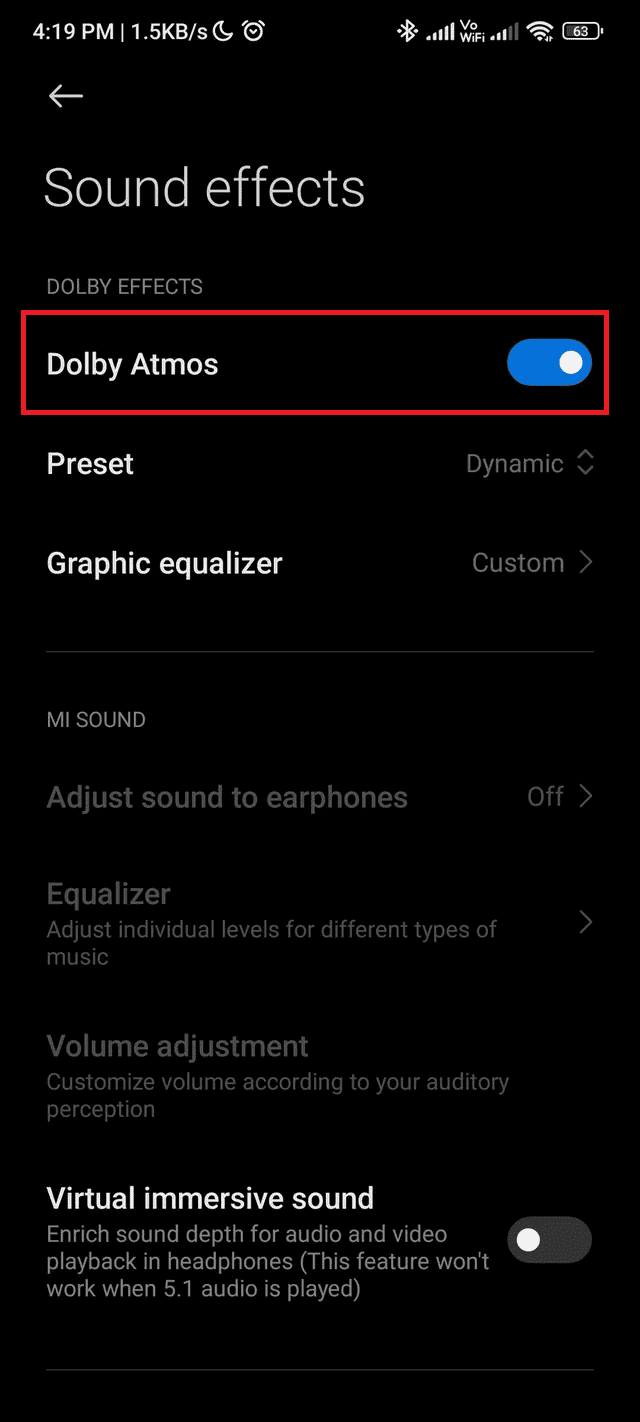
- Note: You may also need to enable Dolby Atmos in your Android system sound settings.

4. On the Web Player
If you use the browser version, options might be more limited compared to the app. You can learn more about the capabilities of the Apple Music Web Player in this comprehensive guide. generally, the web player relies on your browser and system audio settings to deliver the best possible sound.
Additional Tips
- Download for Offline Listening: Streaming high-quality audio uses more data. If you have a limited data plan, it is smart to download your favorites over Wi-Fi. You can learn how to download all songs on Apple Music, so you always have your spatial audio tracks ready without buffering.
- Check the Logo: When playing a song, look for the “Dolby Atmos” logo on the “Now Playing” screen. If you do not see it, the track might not be mixed in spatial audio yet.
- Annoying Transitions: Sometimes the volume difference between Atmos and stereo tracks can be jarring. If you find the crossfading weird or automated mixing bothersome, you might be interested in our guide on how to turn off DJ mode on Apple Music to keep things simple.
Final Thoughts
Enabling Dolby Atmos is one of the easiest ways to get more value out of your Apple Music subscription. It transforms flat audio into a rich, surround-sound experience that brings new life to old favorites. We recommend sticking to the “Automatic” setting if you are in the Apple ecosystem, as it works seamlessly. Give it a try today and hear the difference for yourself.
FAQs
Yes, streaming in Dolby Atmos requires more bandwidth than standard compressed stereo files. If you are on a tight data plan, consider downloading tracks over Wi-Fi first.
Not necessarily. While AirPods and Beats offer the seamless “Automatic” experience with head tracking capabilities, you can enable “Always On” to force the spatial audio signal to any pair of stereo headphones.
Spatial audio has a higher dynamic range, meaning the difference between the quietest and loudest sounds is greater. This often results in the overall volume feeling slightly lower than standard stereo tracks, so you may need to turn up your volume a bit.


Discussion