
When Find My Mac was first introduced, it was welcomed as a terrific way to locate a lost or stolen Apple computer. If you haven’t enabled it on your Macbook, you really should do so. If you try enabling Find My Mac and find that the option to turn it on is grayed out, it might mean you have a damaged or missing recovery drive.

Enabling Find My Mac
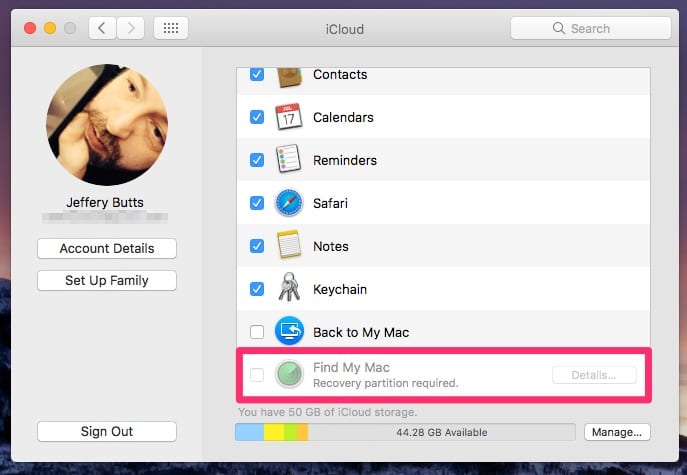
Turning on this security feature is normally pretty simple. All you need to do is open System Preferences, and then click on iCloud. After that, scroll down until you see Find My Mac, which is usually the final option. Just click the checkbox next to Find My Mac and it’ll be turned on. Find My Mac has been around since OS X Lion, so this should work in earlier versions of the operating system.
Don’t miss the best of The Mac Observer
Set us as a preferred source and our Apple reporting ranks higher in your Google Search results and Discover feed — one tap, no account changes.
This is also a great time to set a firmware password, since the feature can otherwise be easily circumvented.
What If “Find My Mac” Is Grayed Out?
If you try to enable Find My Mac, you might discover that you can’t. You could see the option grayed out with either “Recovery system update required” or “Recovery partition required.” That second option is what I’m currently seeing, and it likely means that I will need to completely reinstall macOS Sierra, unfortunately.
If all you see is “Recovery system update required,” here’s what you need to do.
- First, run all updates from the Mac App Store. If you’ve installed all the updates and still have Find My Mac grayed out, keep following these steps.
- Restart your Mac and immediately hold Command-R on the keyboard. In a few seconds, your Mac should start up from the macOS recovery partition.
- From the options that appear, choose Disk Utility.
- Click your macOS volume, usually named Macintosh HD. Note that if FileVault 2 is enabled, you will need to unlock the drive first by clicking Unlock on the toolbar and entering your admin password.
- Click the Repair Disk button, then allow Disk Utility to complete a repair of the drive.
- Restart your Mac and let it start up normally.
- Download and install the manual update Recovery Update from Apple’s website.
So What If That Doesn’t Work?
If that method doesn’t work out, you’ll likely need to completely reinstall macOS Sierra. There is another workaround that may help here, and might even resolve my issue with my recovery partition, but I haven’t tested it yet. I plan on running that possible solution in the coming days. If it works, I’ll follow up this article with a new Deep Dive tip.


Discussion