

The Apple Mail app works across macOS, iOS, and iPadOS. It’s a popular tool for managing digital mail. While primarily an Apple product, users can also find ways to access Apple Mail on Windows. Over time, your inbox fills up with old newsletters, spam, and expired messages. You need to know how to efficiently delete unwanted emails. This keeps your mailbox clean, fast, and organized. I will show you different ways to delete single messages, multiple messages, and whole mailboxes.
Table of contents
Essential Methods for Removing Unwanted Mail
Keeping your inbox tidy is simple. Apple Mail has built-in features that help. Whether you use a Mac, iPhone, or iPad, these basic techniques quickly eliminate emails. This frees up valuable storage space.
1. Deleting a Single Email on Any Device
When you want to remove one message fast, use this method. Apple Mail provides an intuitive process. This action works across all versions. It’s the simplest way for immediate inbox cleanup.
Don’t miss the best of The Mac Observer
Set us as a preferred source and our Apple reporting ranks higher in your Google Search results and Discover feed — one tap, no account changes.
- Select the Message: Click the email you want to delete to highlight it on your Mac. Alternatively, swipe left on the message in the list on iOS or iPadOS.
- Use the Delete Command (macOS): Press the Delete key on your keyboard. Another option is to click the Delete icon (a trash can) in the Mail toolbar.
- Use the Swipe Action (iOS/iPadOS): If you swiped left, tap the Trash icon that appears. Also, you can customize the full left swipe. Go to Settings > Mail > Swipe Options to Move Message to the trash bin.


2. Deleting Multiple Emails at Once (macOS)
Tackling many messages requires efficiency. Deleting them in batches is far more effective. This is especially helpful for clearing out bulk marketing emails or old notifications.

- Select Adjacent Messages: Click the first message you want to delete. Hold down the Shift key. Then, click the last message. All emails between those two clicks will be selected.
- Select Non-Adjacent Messages: Hold down the Command key instead. Click individual messages you want to select across the list.
- Execute Deletion: Press the Delete key after selecting all desired emails. Alternatively, use the Delete icon in the toolbar.
3. Deleting Multiple Emails at Once (iOS/iPadOS)
Mobile versions of Apple Mail allow you to select and delete several emails. This key function aids quick inbox maintenance while you’re away from your desk.
- Enter Edit Mode: Tap the Select button. It’s usually located at the top of the mailbox view.
- Select Messages: Tap the circle next to each email you want to delete. A blue checkmark will show your selection.
- Move to Trash: Tap the Folder button at the screen’s bottom and select Trash or Bin. This sends all selected items to the trash folder.
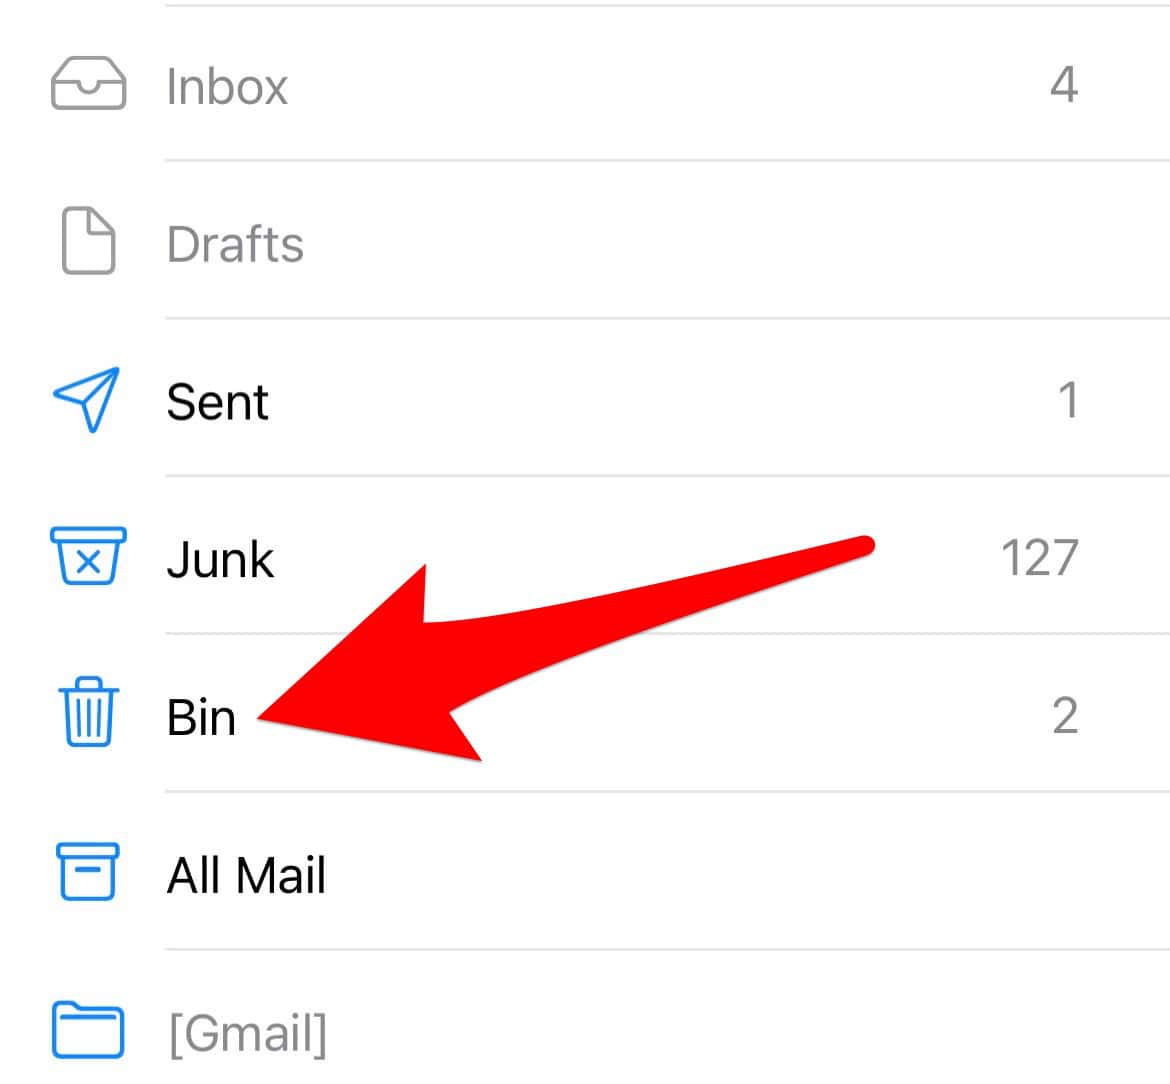

4. Emptying the Trash Mailbox
Deleted messages initially move to the Trash mailbox. Consequently, you can still recover them if necessary. However, you must empty this folder to permanently remove the emails and reclaim space. If you encounter errors, check if your Apple Mail app is not updating properly.
- Locate the Trash: Find the Trash mailbox in the Mail sidebar. It is linked to the specific email account.
- Empty the Folder (macOS): Right-click (Control-click) the Trash mailbox. Then, choose Erase Deleted Items… or Empty Trash.
- Empty the Folder (iOS/iPadOS): View the contents of the Trash mailbox. Tap Select in the top-right corner, tap Select All in top-left corner, followed by the Trash icon in the bottom-right corner.
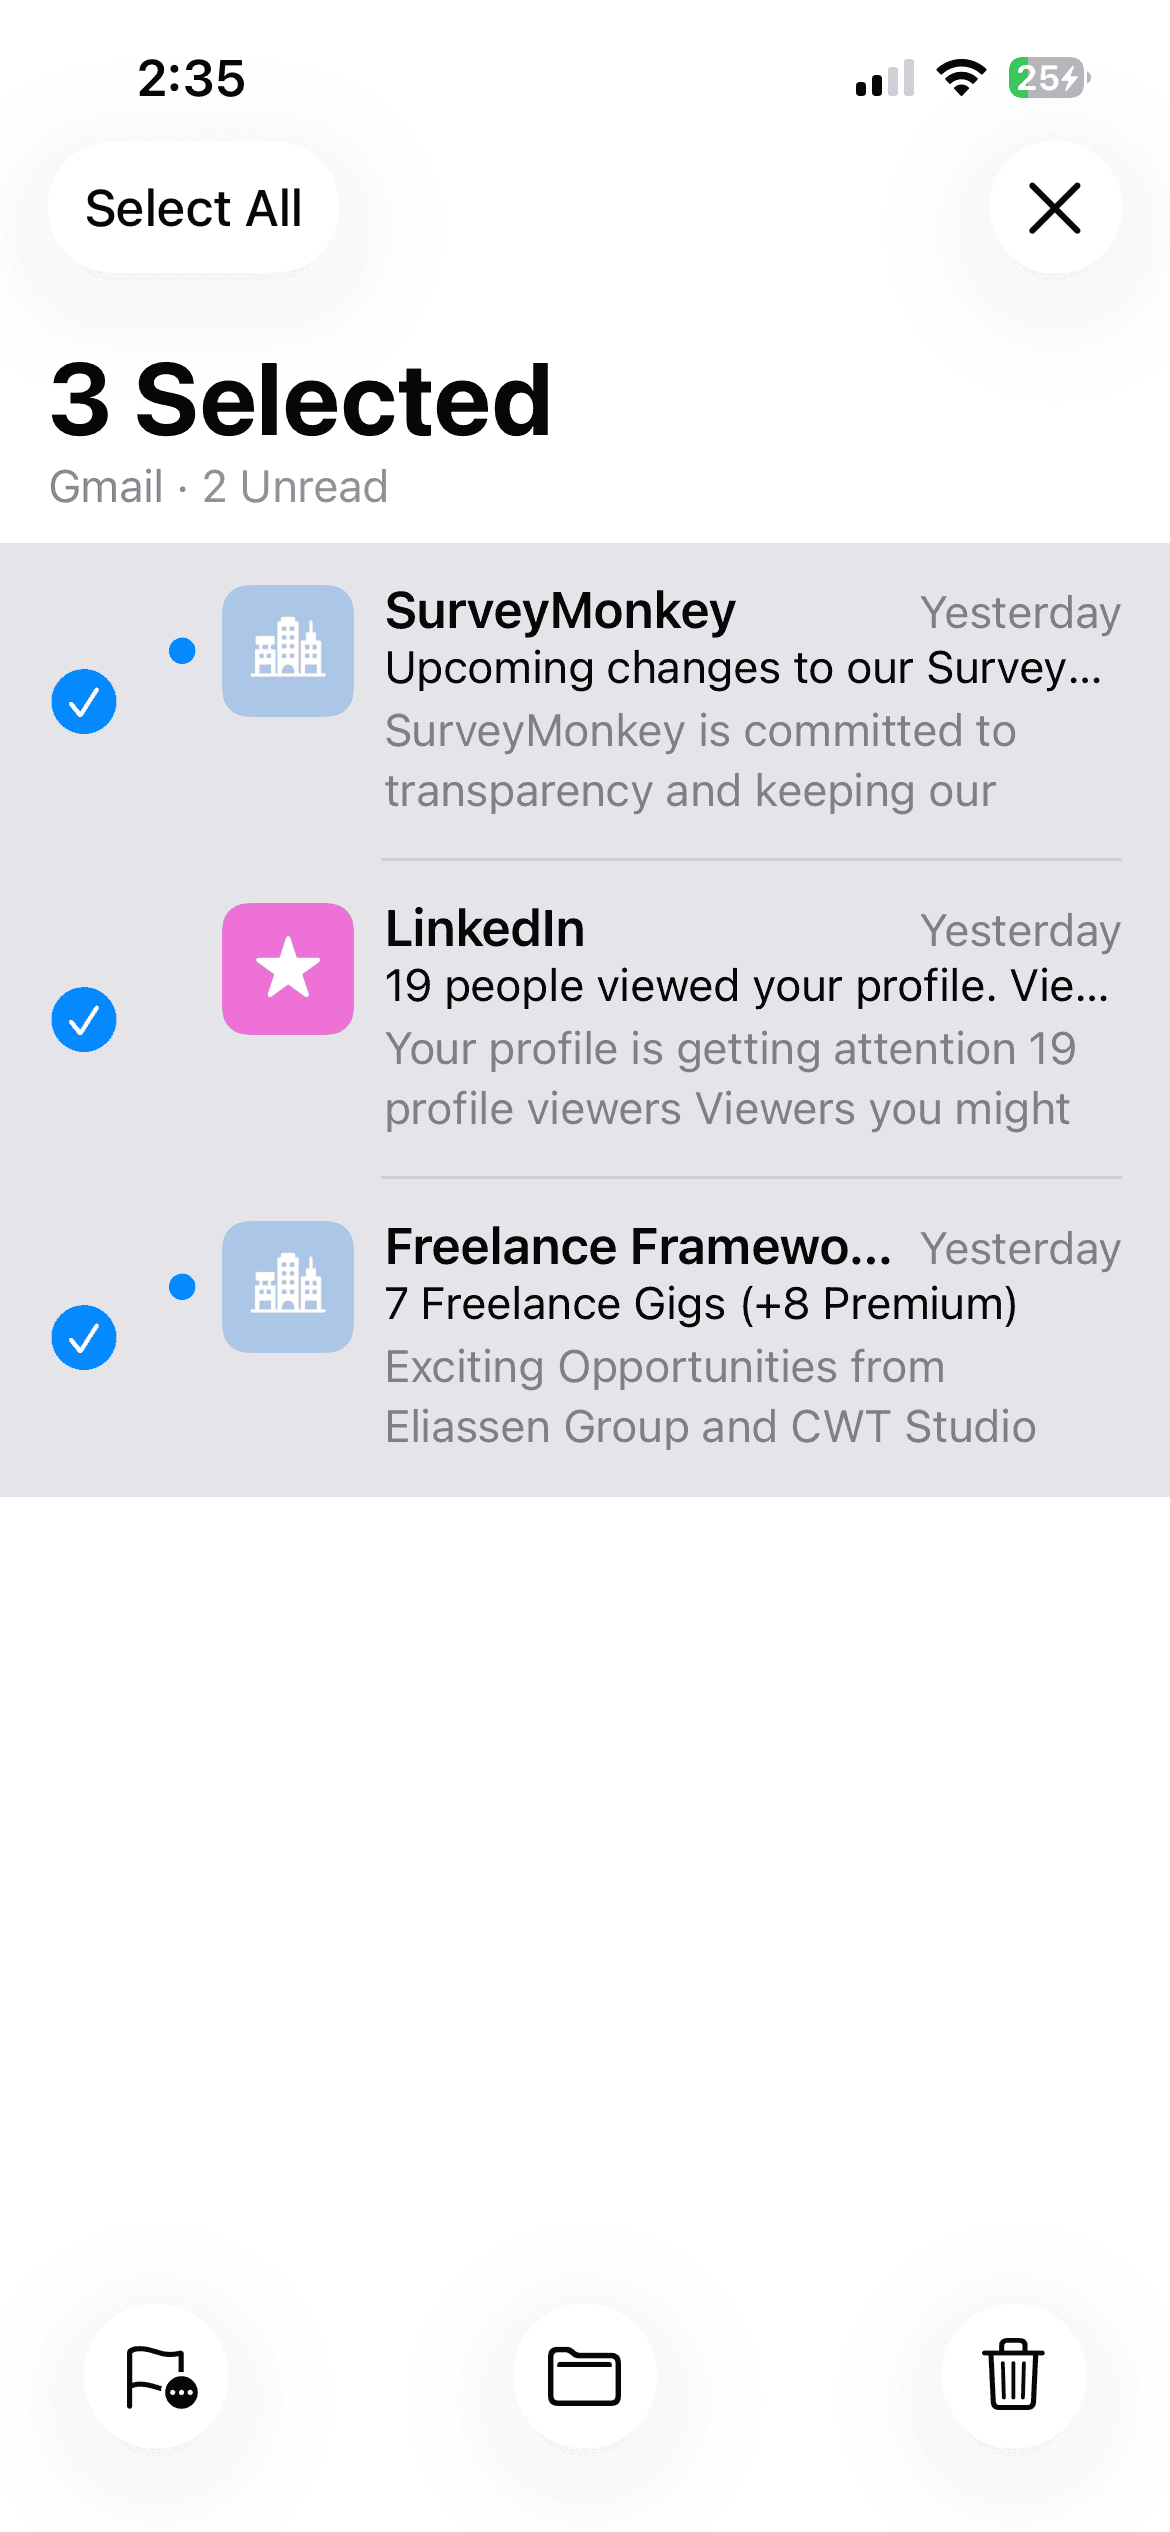

5. Permanently Deleting Spam or Junk Mail
The Junk mail folder often accumulates many unwanted messages. Therefore, regularly clearing it out keeps your main inboxes cleaner. For more functionality, consider third-party options. For example, check out the best Apple Mail client list.
- Open the Junk Mailbox: Find and select the Junk mailbox in the Mail application.
- Use the Erase Function: Right-click the Junk mailbox on macOS. Tap Select in the top-right corner, tap Select All in top-left corner, followed by the Trash icon in the bottom-right corner.


FAQ
Emails move to the Trash mailbox. They stay there for a period of time. Mail settings on your device usually set this timeframe. They only disappear permanently after you manually empty the Trash. Alternatively, they leave when the set time period expires.
Yes, you can recover it. The email must still be in the Trash mailbox. You must not have permanently emptied the mailbox yet. You can then move the message back to your Inbox or another folder.
On macOS, go to Mail > Settings (or Preferences). Select Accounts. Choose your account. Click the Mailbox Behaviors tab. Adjust the setting for Trash Mailbox. This changes how often the system erases deleted messages.
Streamlining Your Apple Mail Management
You must maintain a clutter-free and efficient Apple Mail application. Consequently, mastering the deletion methods is fundamental to that goal. Implement these simple steps regularly. Delete single emails, use bulk selection, and clear your Trash and Junk folders. You ensure your email remains a productivity tool. It won’t become a source of stress. This routine keeps your interface clean. Furthermore, it helps the overall performance of the Mail app. For help adding new addresses, you can also learn how to add an account in Apple Mail.


Discussion