
Upgrading your Apple operating system should be an exciting experience, but for many users, the transition to macOS Tahoe 26 has caused the built-in Mail application to stop working. Whether you cannot send emails, you are not receiving new messages, or the app is crashing, the issue often stems from corrupted system files or account conflicts introduced during the update process. Fortunately, a number of systematic troubleshooting steps can quickly restore your essential email service.
Table of contents
Essential Troubleshooting and Quick Fixes for Mail on macOS Tahoe
When your email client suddenly fails after a major operating system update, it usually points to a data indexing error or a security credentials mismatch. It’s a common issue that occurs because the update may fail to correctly migrate existing account settings or the Mail application’s local database. These straightforward solutions target the most frequent causes of Mail failure in macOS. It is also important to remember that these issues are specific to your Mac’s application, and you can still access Apple Mail on Windows via webmail in the meantime.
Don’t miss the best of The Mac Observer
Set us as a preferred source and our Apple reporting ranks higher in your Google Search results and Discover feed — one tap, no account changes.
1. Force Quit and Restart the Mail Application
A simple restart is often the fastest way to clear temporary memory glitches or resolve an unresponsive application state. Force-quitting the app ensures that all associated background processes are terminated, providing the Mail application with a completely fresh start when you relaunch it. This minor action can resolve many initial syncing problems.
- Press Command + Option + Esc simultaneously to open the Force Quit Applications window.
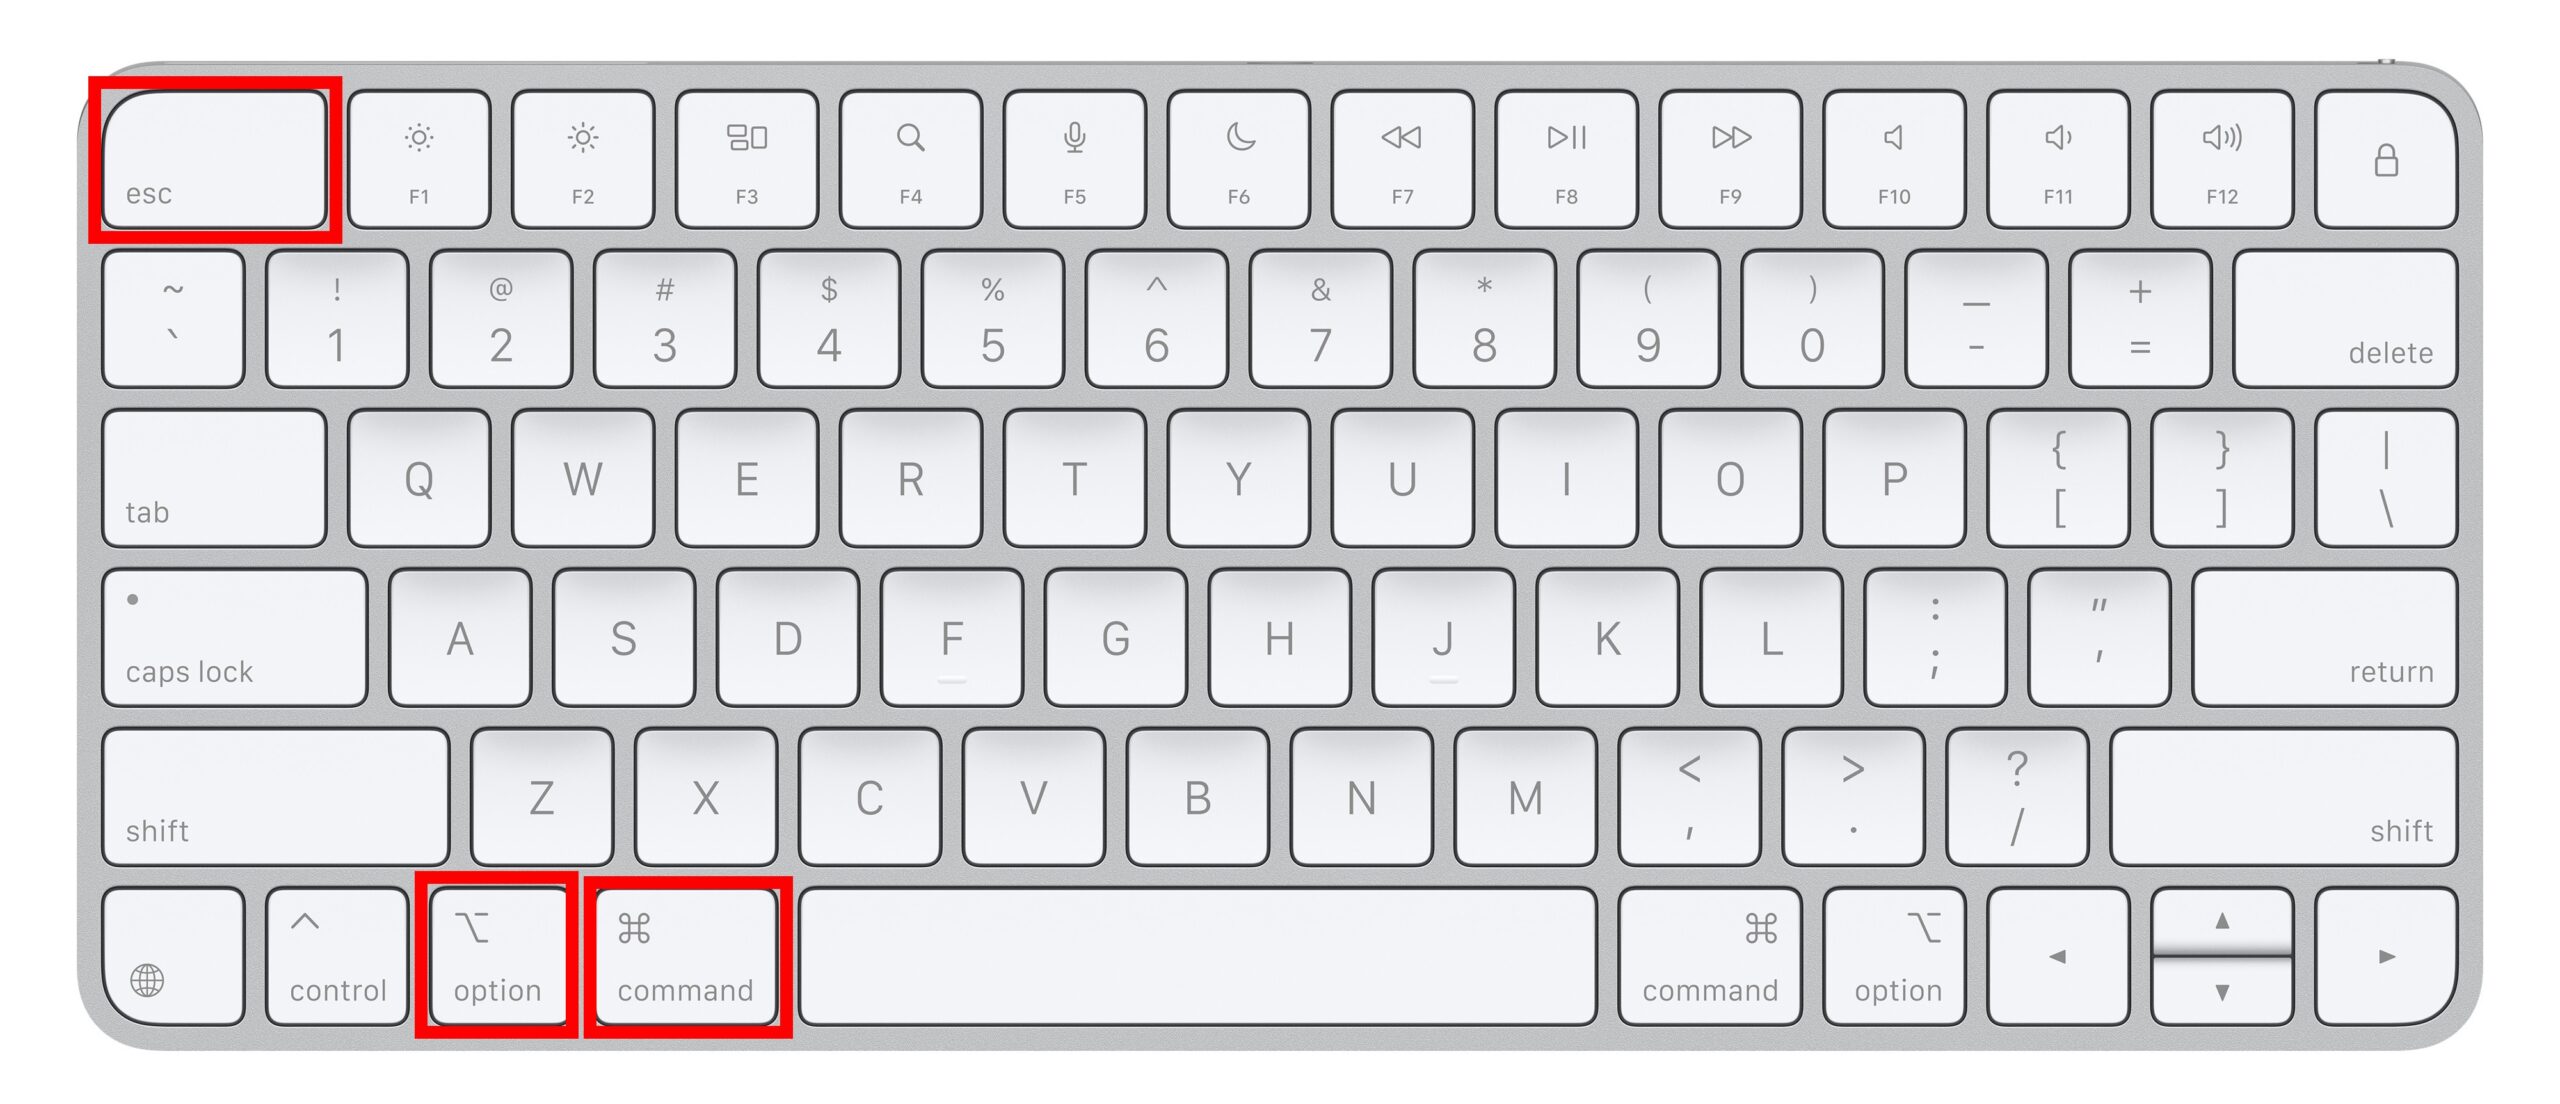
- Select Mail from the list of running applications.
- Click the Force Quit button.
- Wait a few moments, then relaunch Mail from your Applications folder or the Dock.
2. Rebuild Corrupted Mailboxes
The Mail application relies on local index files to display your messages efficiently, and a macOS update can corrupt these indices, causing messages to disappear or fail to load. Rebuilding a mailbox forces the application to re-download message headers and content from the server, repairing its internal database.
- Open the Mail application and select the problematic mailbox (e.g., Inbox, Sent).
- In the menu bar, click Mailbox.
- Select Rebuild. The process may take a few minutes, depending on the number of messages.
3. Check and Adjust the Spell Check Setting
Some macOS versions have experienced a specific bug where the “Check Spelling: When I Click Send” option causes the Mail application to freeze or prevents the email from actually being sent. Changing this preference avoids the conflict and can immediately restore your ability to compose and dispatch new messages successfully.
- In the menu bar, click Mail, then select Settings (or Preferences on older macOS versions).
- Navigate to the Composing tab.
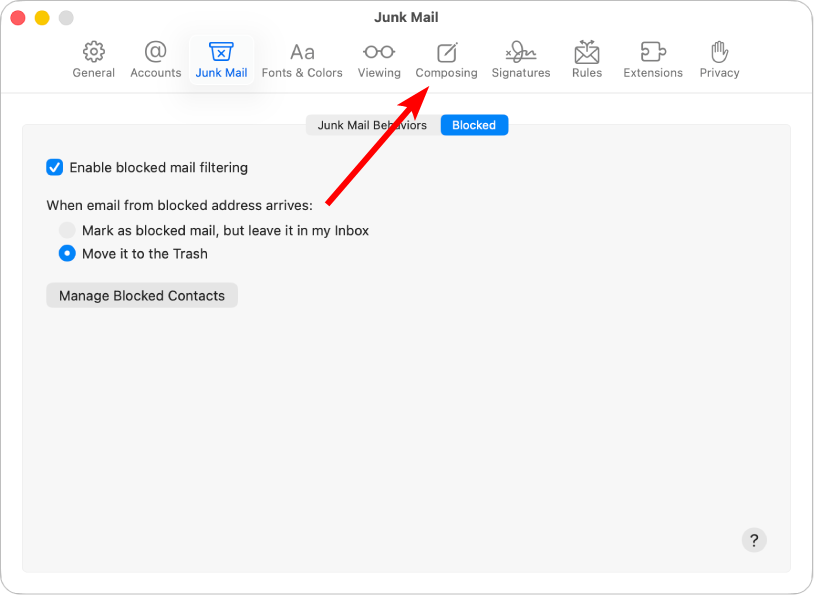
- Find the Check Spelling dropdown menu.
- Change the selection from “When I Click Send” to either As I Type or Never.
- Close the Settings window and test sending a new email.
4. Disable and Re-enable Your Email Account
If Mail fails to authenticate with your provider, the account may need a quick refresh to prompt the keychain to re-authenticate the password. Temporarily disabling and re-enabling an account is a low-impact way to achieve this without deleting the entire setup. This process can be helpful if you have a complex setup, such as when you need to set up your iCloud email with Outlook on your Mac.
- Open System Settings and go to Internet Accounts.
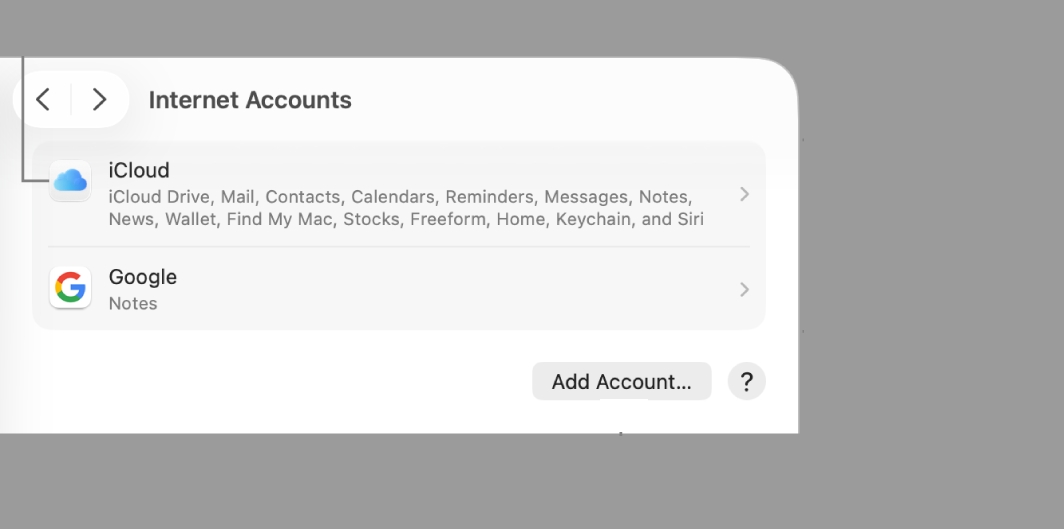
- Select the account that is having trouble.
- Deselect the Mail checkbox to disable the account in the Mail app.
- Wait about 30 seconds, and then reselect the Mail checkbox to re-enable it.
5. Start Up Your Mac in Safe Mode
Starting your Mac in Safe Mode helps determine if an issue is caused by third-party software that loads when your Mac starts up. When in Safe Mode, your Mac prevents non-essential software, login items, and fonts from loading, and performs a basic check of your startup disk. If the Mail app works correctly in Safe Mode, you know the conflict lies with non-macOS software.
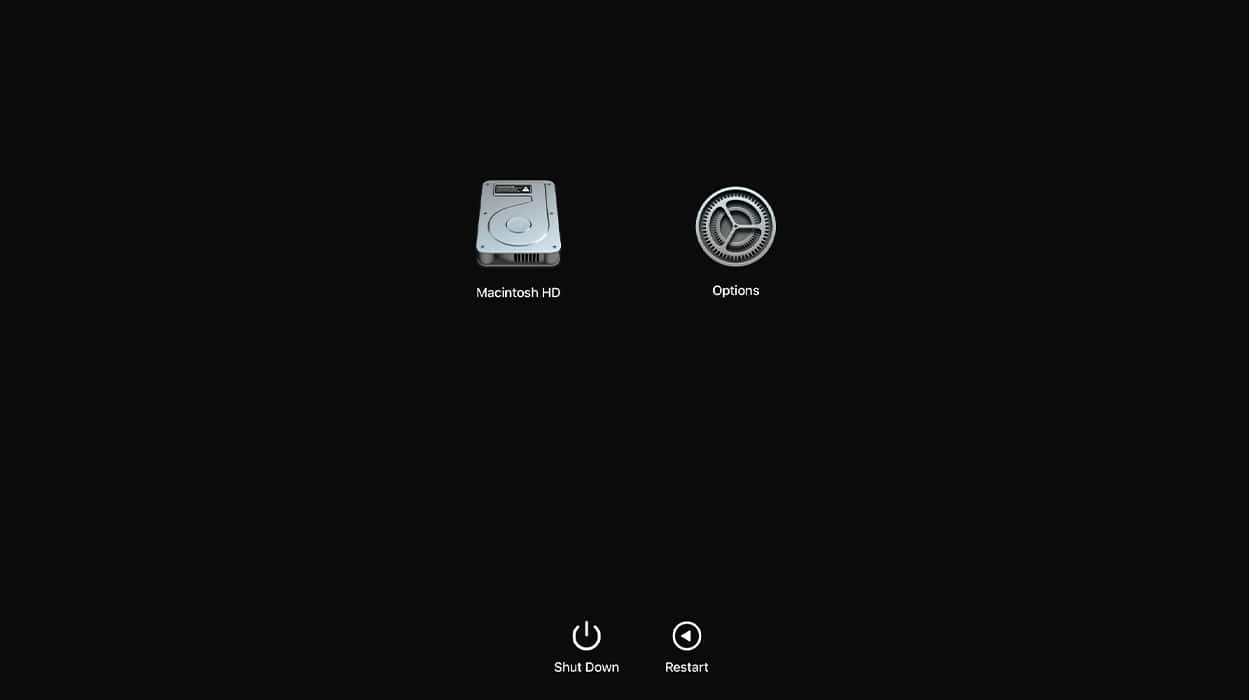
- For Macs with Apple Silicon: Shut down your Mac. Press and hold the power button until you see “Loading startup options.” Select your startup disk, press and hold the Shift key, and click Continue in Safe Mode.
- For Intel-based Macs: Turn on or restart your Mac, then immediately press and hold the Shift key as it starts up. Release the key when you see the login window.
- Once in Safe Mode, open the Mail app and check if it functions correctly.
- To leave Safe Mode, simply choose Apple menu > Restart.

FAQ
System updates, especially major ones like the move to macOS Tahoe 26, can sometimes change underlying system file structures or security protocols. This causes pre-existing configuration files, which govern how Mail accesses your accounts, to become incompatible or corrupted, leading to various operational failures.
No, the Mail application is a core component of macOS and cannot be deleted or reinstalled separately like a third-party app. The correct approach is to focus on repairing or resetting its associated user data and account settings, as outlined in the solutions above.
Restoring Email Functionality After a Major macOS Update
These systematic fixes address the vast majority of issues encountered by users with a malfunctioning Mail application following the macOS Tahoe 26 upgrade. By moving through these steps, from simple restarts to troubleshooting in Safe Mode, you can isolate the root cause and ensure your ability to send and receive messages is fully restored. Addressing account data problems is key to a stable email experience. If your account issues are specific, such as a problem with message visibility, you can find focused help on topics like Mail on Mac not showing all Gmail emails.


OMFG it was the spelling checker. I haven’t been able to send email for a week but turning that off fixed it instantly. T%#%$^% if this is a known issue why is Apple silent?