
For those that like to write their essays in Google Docs on their iPad, there is a way to create hanging indents. While most of the time, the vast majority of people will need to use hanging indents for formatting academic citations, there’s several other reasons why a user may need to generate them as well. While this how-to will primarily show how to create hanging indents using academic citations as an example, users can follow these steps to create them for other purposes as well.
Usually, the most common reason someone is using hanging indents is for citation purposes within certain academic writing styles. For example, both APA and MLA require hanging indents for citations, as do a good majority of the other academic formats as well. When it comes to the reference or bibliography page of an essay, having hanging indents can create a more professional look.
Can You do Hanging Indent on iPad?
As someone who has been on both sides of academic writing, both grading and writing, I can tell you with honesty that creating hanging indents is something of a nuisance. While the methods of actually creating a hanging indent are rather simple, it’s usually just a matter of making sure that your text is willing to play along with what you are trying to accomplish.
If you are having issues with hanging indents even after following these steps, I’ll be sure to go over a rather simple solution. Typically, it is an issue with how the text was placed into the processor.
Create a Hanging Indent with Google Docs on iPad
To create a hanging indent in Google Docs, simply follow these steps.
Time needed: 2 minutes
Create a hanging indent on iPad with Google Docs.
- First, ensure that you have the Google Docs app on your iPad.
Once you have it, open the document that you want to create a hanging indent for.
- Click the Pencil icon in the bottom-right corner of your screen to begin editing the document.
You can also double-tap anywhere onscreen.
- Next, in the document where you plan on having a hanging indent, make sure your cursor is in that position by clicking on the area.
- Add your citation to the document.
- Highlight the citation.
- Tap A in the top right corner of the app.
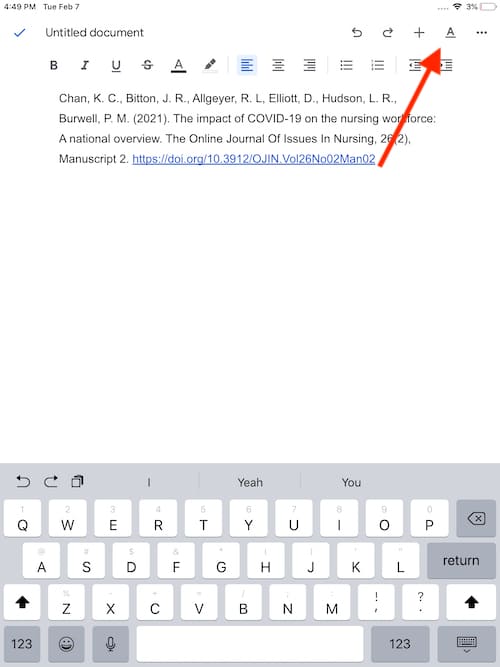
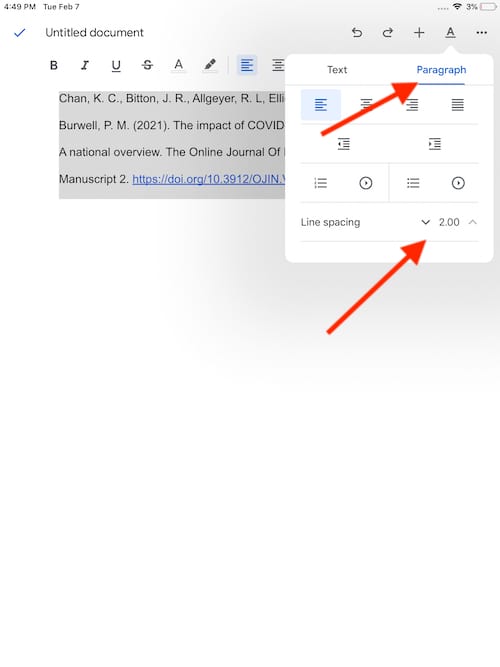
- Once the option appears, tap the Paragraph option.
- Should your line spacing say 1.5 and you are doing this for a citation, tap the arrow until it reads 2.0. This will double space your citation, which is crucial for most academic formats.
You can also view my guide on how to generate double-spacing in Google Docs from an iPad. - Tap the center of your screen to exit this option.
- Then, tap after the very last letter within the first line of your citation. Press the Return button on your keyboard.
This should automatically place your cursor at the front of the second line within your citation. You can also long-press to bring up the magnifying glass to put the cursor there manually.
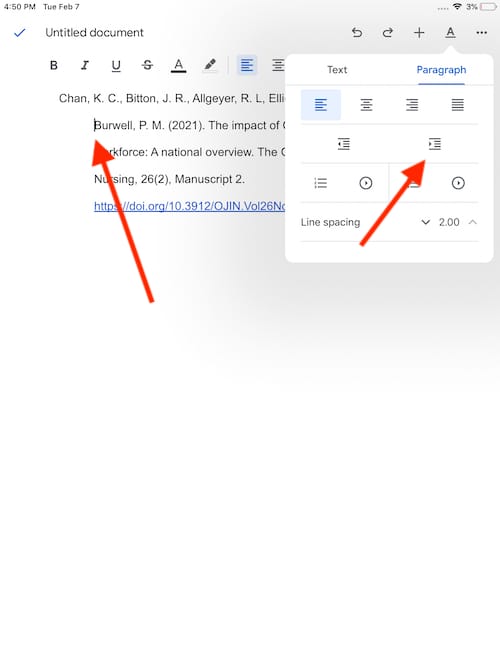
- Once again tap the A in the corner of your screen.
- Within the Paragraph options, select the Right Indent button.
The Right Indent button is also appears directly on the main screen.
- This should create a hanging indent for your citation. You can once again tap the center of your screen to close the paragraph options.


It may take a couple of tries to get exactly right. Additionally, if you are having issues getting the hanging indent, you may need to retype the text and try again. This will be especially true if you copied and pasted the citation from somewhere else.
How Do You Indent on Google Docs Using an iPad?
Of course, not everyone needs to use hanging indents. Some may just be looking for the regular indent. Fortunately, users are also able to create a standard indent using Google Docs on their iPad. To accomplish this, simply follow the same steps as above. However, rather than selecting an entire area of text, you simply need to ensure that the cursor is at the first line of text that you want to indent. 
Once the cursor is at the first line of text, you can once again use the same Right Indent button to indent the first line of your paragraph. Again, it may take some getting used to, but once you have it, you should be good. The largest thing is to remember to make sure that your cursor is at the first line of text.
Conclusion
When it comes to hanging idents in Google Docs, practice makes perfect. For those that absolutely need hanging indents, it may take a couple of tries to perfect, but once you do, you should have no issues creating hanging indents.
As someone who has worked extensively both with writing and helping others with academic essays, I can say with all honesty that creating hanging indents for an academic essay can be something of a headache. Sometimes, your word processor simply doesn’t want to play well with you. However, once you get used to creating hanging indents, they should be rather simple to create. Using them with Google Docs on your iPad, you can ensure that your essays can be held to the standards of academic writing.


