
Many podcasters – and especially podcast listeners – have come to appreciate having chapters in podcast episodes. The benefits are numerous: if the current topic isn’t of interest to the listener, the ability to skip to the next chapter is very convenient. Conversely, if a particular topic or tip was of value, being able to jump back to that later for review is super-helpful.
Putting chapters into a show can be a real chore for podcasters, though, especially for a show that’s recorded live. For shows that are pieced together after the recording, finding the timestamps for chapters is often just a natural part of that assembly process. For a show that’s recorded live and released immediately, though, logging those chapters either involves a lot of post-production listening and legwork or a distracting process of finding and jotting down those timestamps while recording.
Don’t miss the best of The Mac Observer
Set us as a preferred source and our Apple reporting ranks higher in your Google Search results and Discover feed — one tap, no account changes.
When you’re recording a podcast, you have enough to worry about. You don’t need to also have to worry about typing timestamps into a file, especially not at the moment you’re changing topics!
Keyboard Maestro Macros To The Rescue
For all the podcasts I host (Mac Geek Gab, Small Business Show, GigGab and occasionally TMO’s Daily Observations), I employ a few Keyboard Maestro macros that, used together, allow me to have an internal clock running that simply pastes the existing timestamp wherever my cursor is. I position the cursor in front of the next agenda item in my text document and trigger the macro. Voilà, timestamp appears.
The basics of this involve two macros, one to start the clock running and another to calculate and paste in the timestamp.
- Start the clock running. The first two steps here are actually triggers to activate Audio Hijack and start the recording. At that very moment it then initializes my variables. You’ll note that in addition to the Start Time and ET Offset variables, I’m also setting variables for ET Pause and ET Resume. That’s to allow you to use two extra macros to pause and resume the recording and properly account for the difference there, too.
- Paste in the Timestamp. I use the HH:MM:SS timestamp format that’s common to Auphonic, because that’s the service I use to insert my chapters (and process my audio). If you want a different format, you can modify this last step easily enough inside Keyboard Maestro.
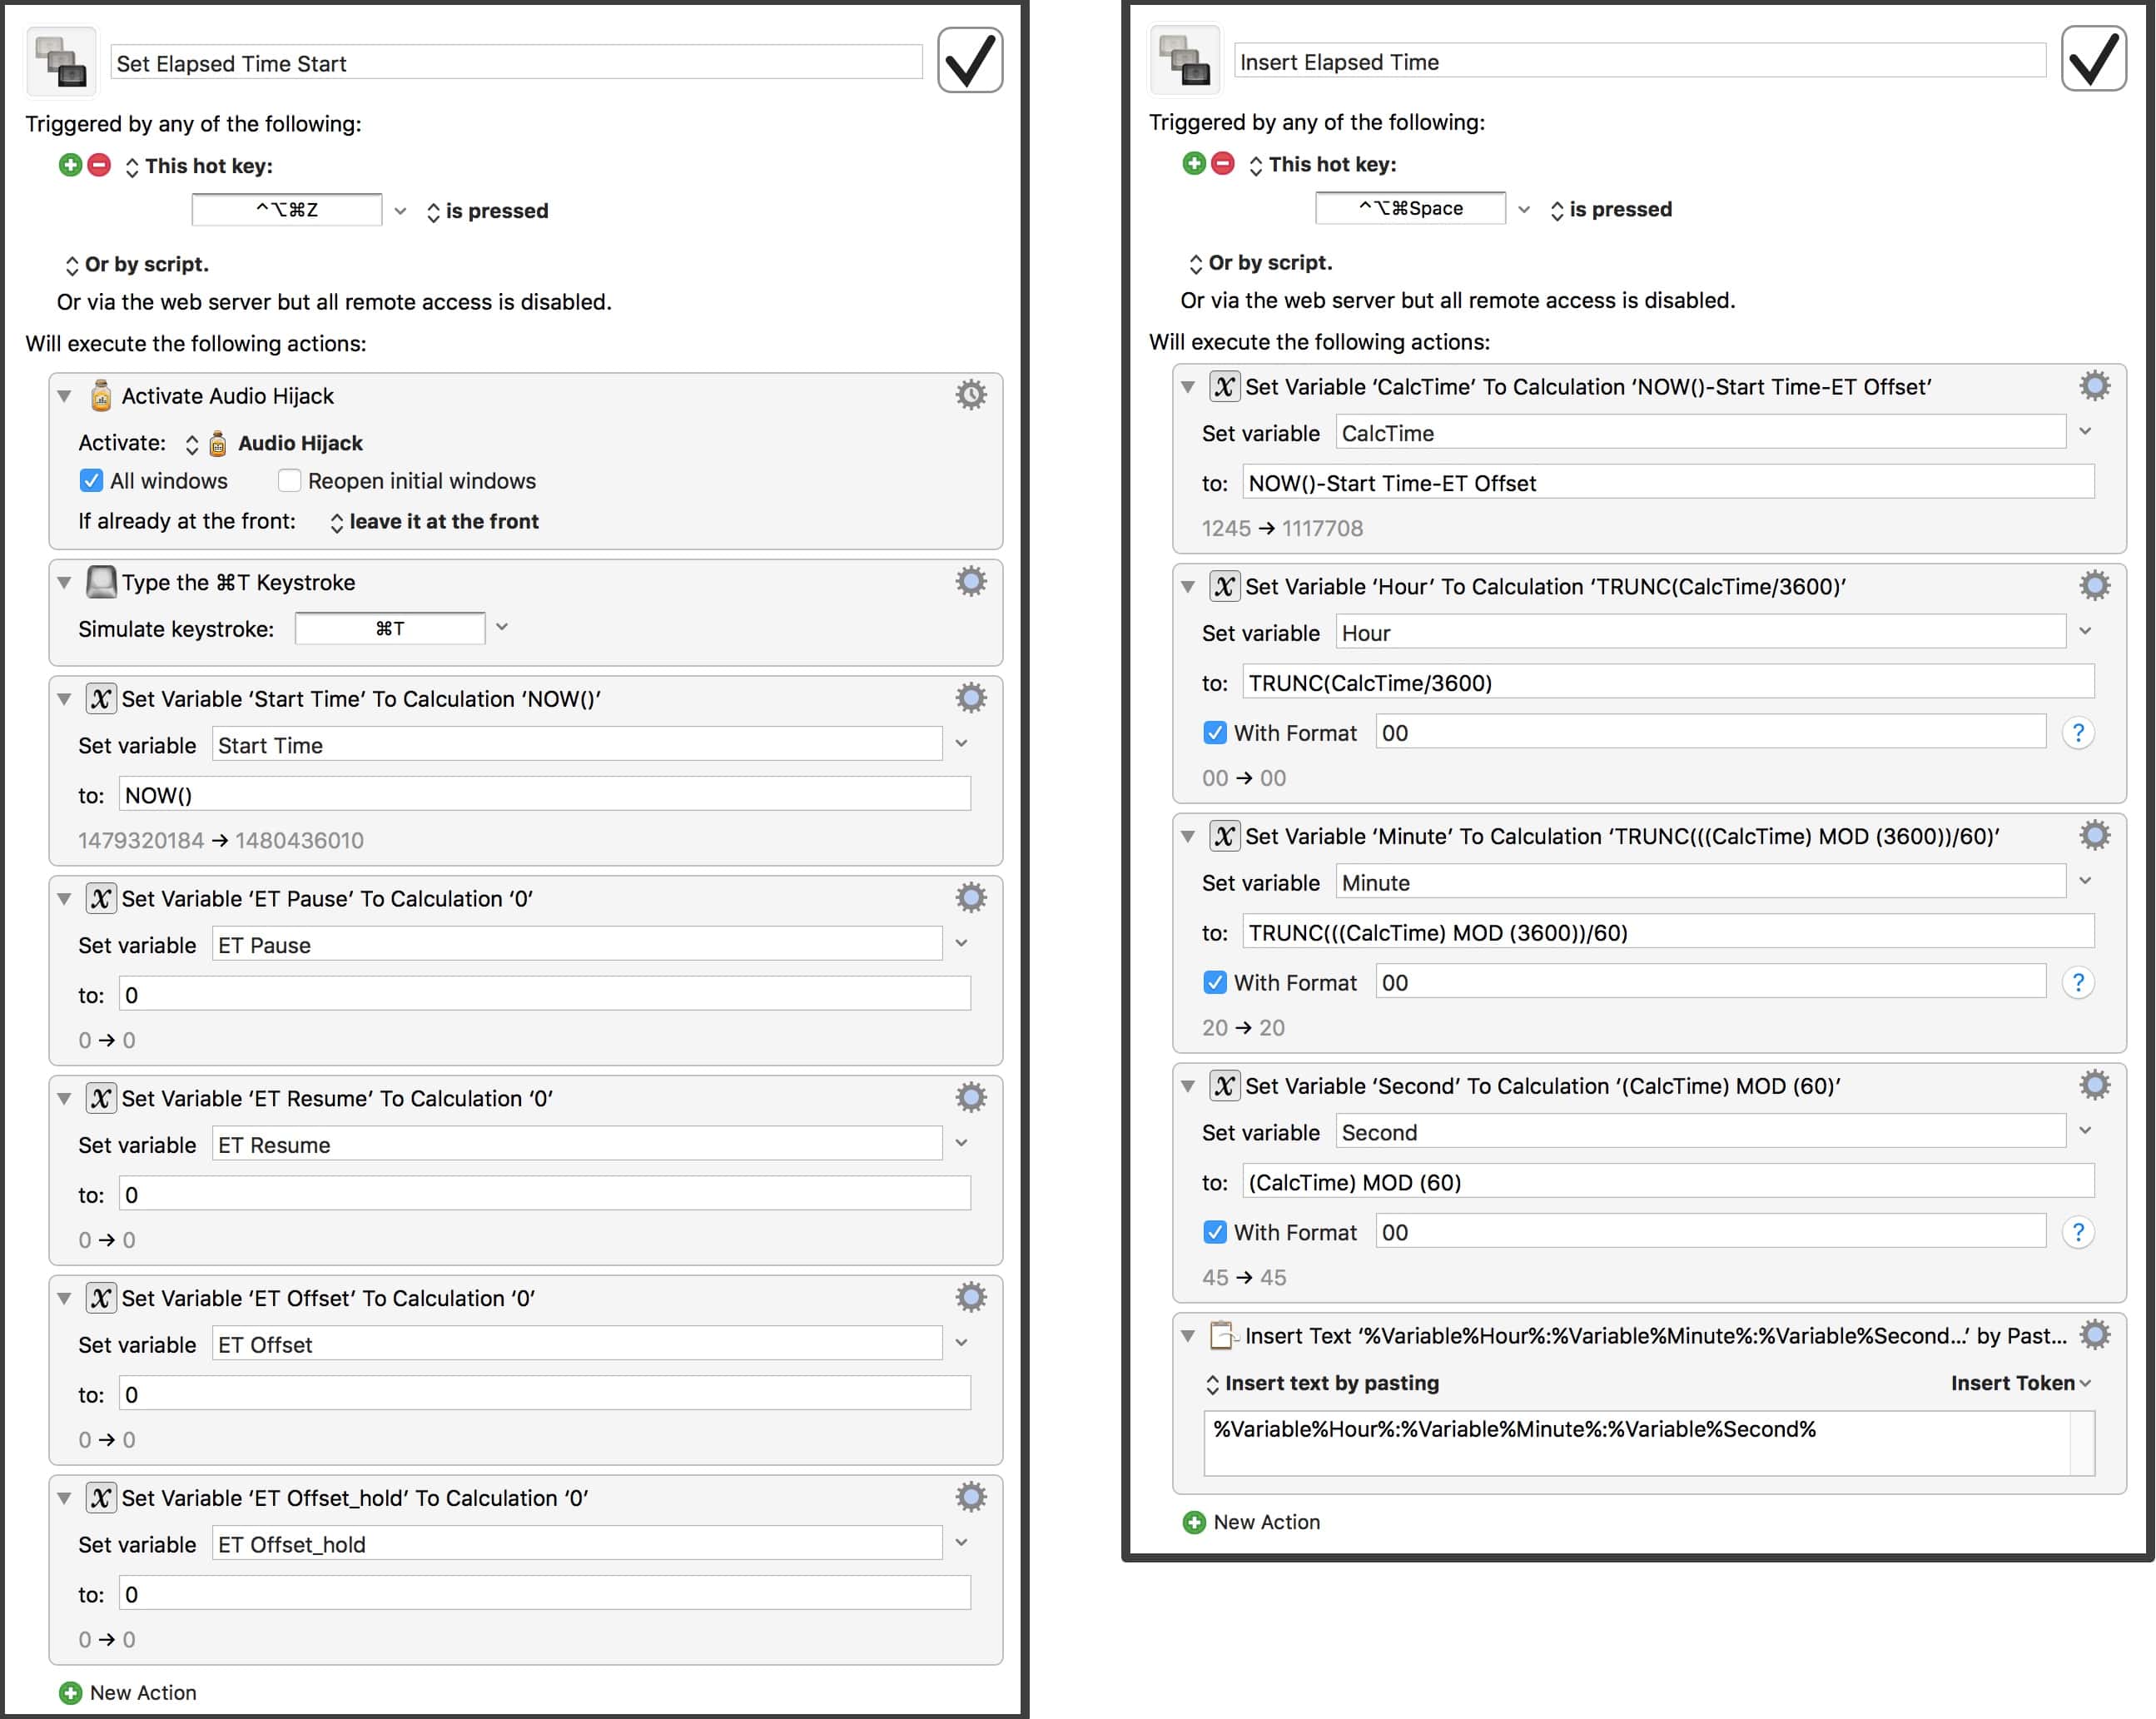
Don’t worry, you don’t have to create these macros yourself unless you really enjoy that. I have posted all four of these macros (Start, Insert, Pause, Resume) as a Keyboard Maestro library in the files section of our Mac Geek Gab Facebook group. Come join us and download. All are welcome!
Adding Podcast Chapters On-The-Fly
Once you’ve got these installed inside Keyboard Maestro, it’s as simple as hitting Control-Option-Command-Z to start your timer (and recording, if you leave my first two steps in place). Then I just keep a text file open (Google Docs works fine, too) with my show agenda. When moving on to the next segment, I make sure my cursor is at the beginning of the line and I hit Control-Option-Command-Space. Boom. In goes the timestamp and onward we go with the conversation!


Is there a way to download these KM macros still? The facebook link seems to be broken.
Thank you!
Hello Hagure and sorry for the delayed reply. I have sent them to your email.