
With iOS 16.3 and the accompanying HomePod Software 16.3, new features have opened up in the HomePod mini and newly announced full-size HomePod. That’s right, the temperature and humidity sensors that have been dormant for so long are enabled now. Here’s how you can use your HomePod’s temperature and humidity sensors for automation and information.
Using Automations With Your HomePod’s Temperature and Humidity Sensors
One of the most useful things you can do with the temperature and humidity sensors in the HomePod mini and second-generation HomePod is to set up automations. You can, for example, set an automation to activate a smart thermostat whenever the temperature goes above or below a certain threshold.
Time needed: 2 minutes
If you want to set up this kind of automation, just follow these steps.
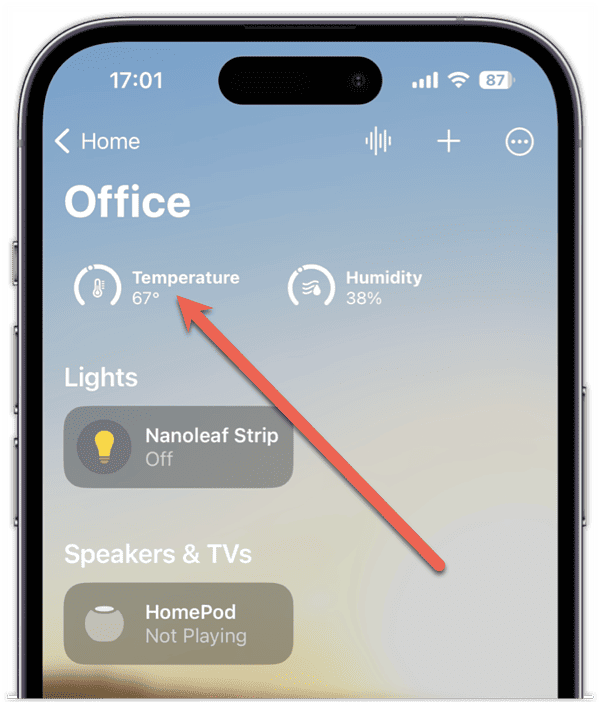
- Open the Home app and select the room where the HomePod mini or second-generation HomePod is located.
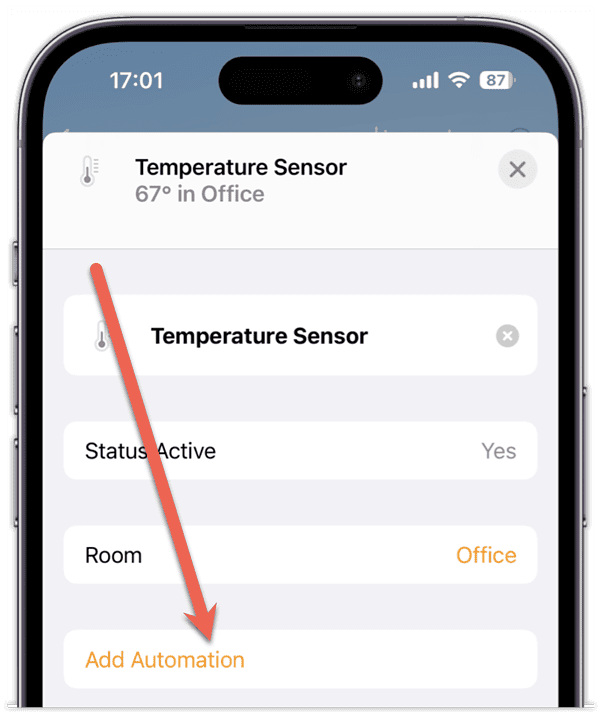
- Tap the Temperature Sensor button to access its settings card.
- Tap Add Automation
- On the provided dial, choose the temperature threshold.
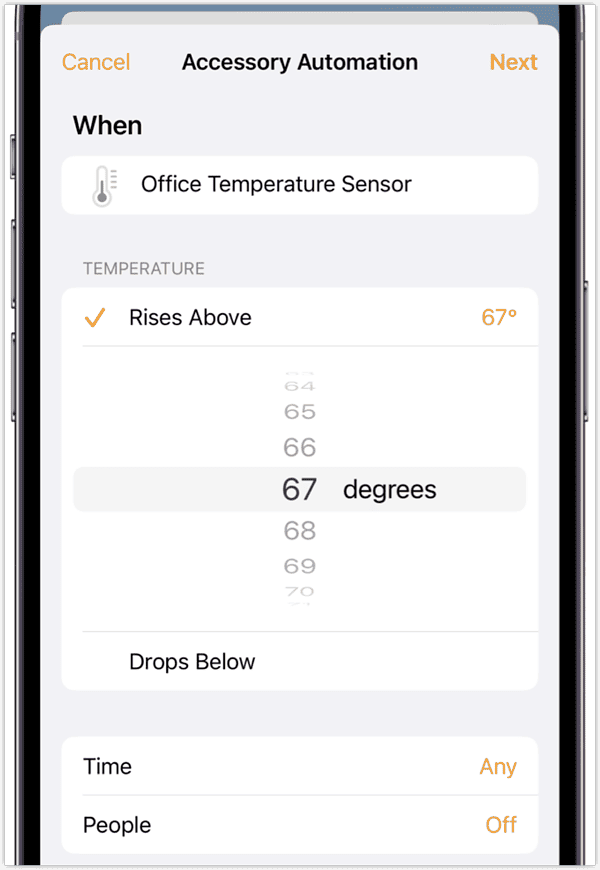
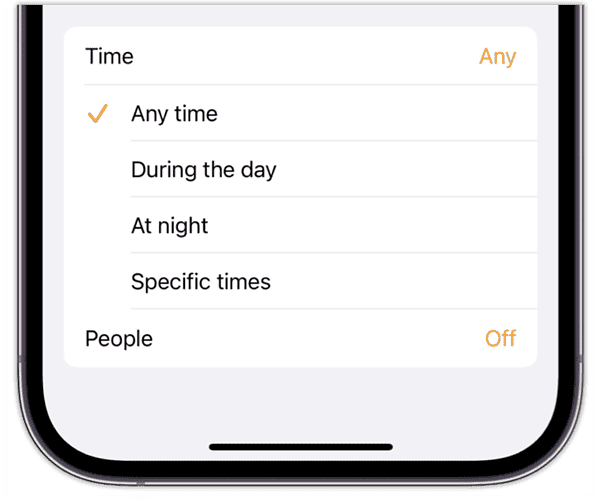
- Set up when the automation should be active.
Use the Time setting to choose from Any time, During the day, At night or Specific times. You can also access the People setting to fine-tune the automation even further. You can set it to only run when you’re at home or not at home.
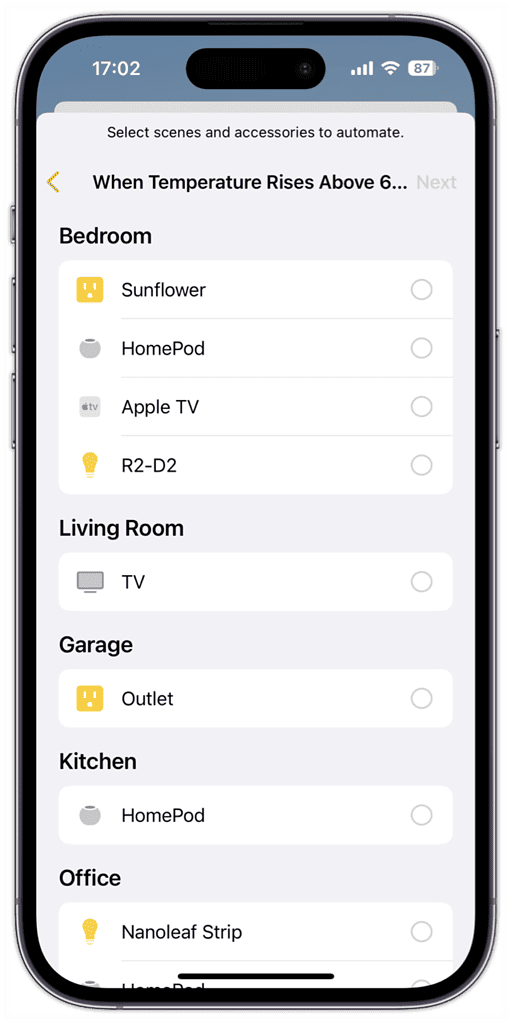
- Tap Next, and give your automation a name.
- Next, choose which accessory you want the automation to control.
You could set a thermostat to a certain temperature, for example, or activate a smart plug you’ve got a fan connected to.
- Tap Done, and your automation will run as you’ve configured it.


Checking Your Home Environment Quickly and Easily
You’ll also be able to check what the temperature and humidity is inside the room where you have your HomePod. You can do this from your iPhone, iPad, Apple Watch or Mac in the Home app.

For this to work, of course, you need to be running the right version of your device’s operating system.
- On the iPhone, you’ll need to be at iOS 16.3 or newer.
- From your iPad, the minimum version required is iPadOS 16.3.
- Macs need macOS Ventura 13.2 or newer for this to work.
- Your Apple Watch should be running at least watchOS 9.3.
From any of these devices, you can just open the Home app and see climate readings at the top. Tap on one of them and, if you have multiple compatible HomePod devices in different rooms, you’ll see each one’s reading.
You can also get this information by going to Home > HomePod > Settings (the gear icon) > Accessories.
Asking Siri for the Details
Of course, you can also ask Siri for the information. Whether you ask Siri on your HomePod, Apple Watch, Mac, iPhone or iPad doesn’t matter. Here’s how that works.
- Activate Siri however you normally do, whether it’s with a “Hey Siri” command or a button press.
- Say, “What’s the temperature in the office?”
- You should replace “office” with whatever room your compatible HomePod is located in.
- If you’re asking your HomePod itself, you can also just ask it, “What’s the temperature in here?”
Note that you can ask for humidity instead of temperature.
What To Do When My HomePod Doesn’t Give Me the Information
After you update to the right version of the HomePod Software, it takes some time for your smart speaker to calibrate its sensors. Siri may tell you to try again in a few minutes, but I had to wait almost two hours before it began working.
You should also note that the sensors’ accuracy could be decreased if you’ve had audio playing for an extended time at a high volume. After all, playing loud music generates heat that can throw off these ambient sensors.


