
Don’t panic if your webcam is not working on macOS Sonoma 14.1, it’s a common software update issue. In my case, my built-in camera stopped responding on the Zoom app. However, other users have reported webcam issues with various built-in and third-party applications. Fortunately, there are several troubleshooting steps to try. Unless your Mac camera has major underlying hardware issues, these workarounds should get it up and running.
How Can I Fix Camera Not Working in macOS Sonoma?
Try these quick fixes first before getting into more complex solutions:
- Disconnect all third-party accessories: Start by disconnecting all third-party accessories to isolate the issue to your built-in camera or an external device.
- Test your Mac camera on various apps: Click the Apple menu > Force Quit and select the ones where your Mac camera is malfunctioning.
- Reinstall programs: Try reinstalling the programs where your Mac camera isn’t working.
If your Mac camera is still acting up despite rebooting your device, disconnecting third-party accessories, force quitting background apps, and testing other external cameras, try these troubleshooting steps.
1. Review App Permissions To Your Camera
Check if your privacy permissions got reset after updating to macOS Sonoma. Mac will prohibit third-party applications and programs from accessing your built-in camera until you turn off the restrictions. It’s an obvious yet commonly overlooked fix.
Time needed: 2 minutes
Here’s how to give apps access to your Mac camera:
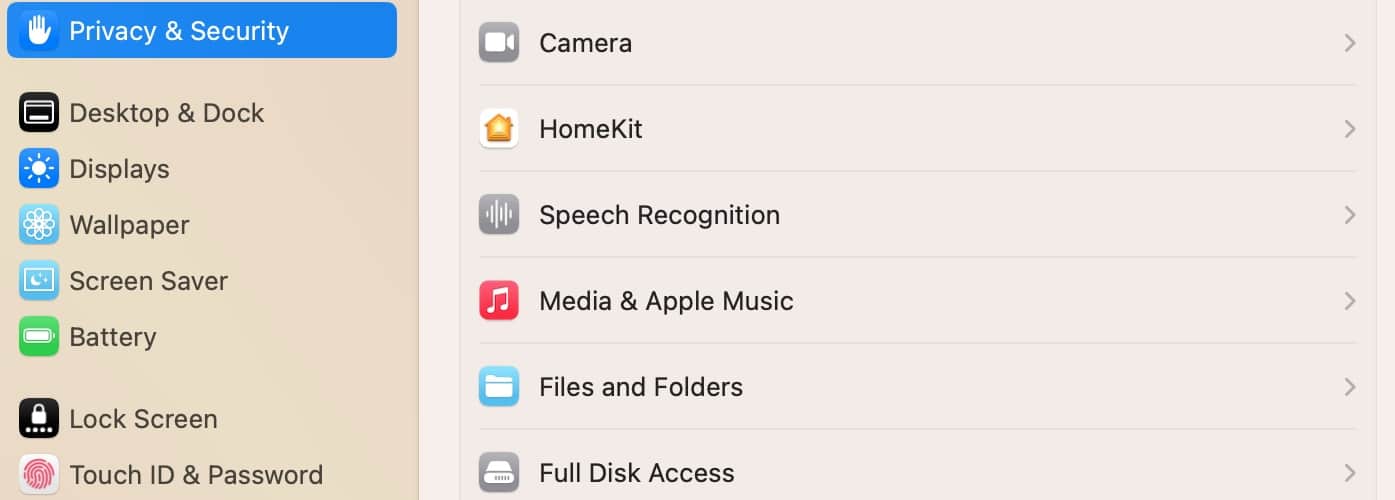
- Click the Apple menu > System Settings and scroll down to Privacy & Security in the sidebar menu.
- Go to the Camera section and see which applications can access your webcam. Just toggle on or off the buttons to change the settings.
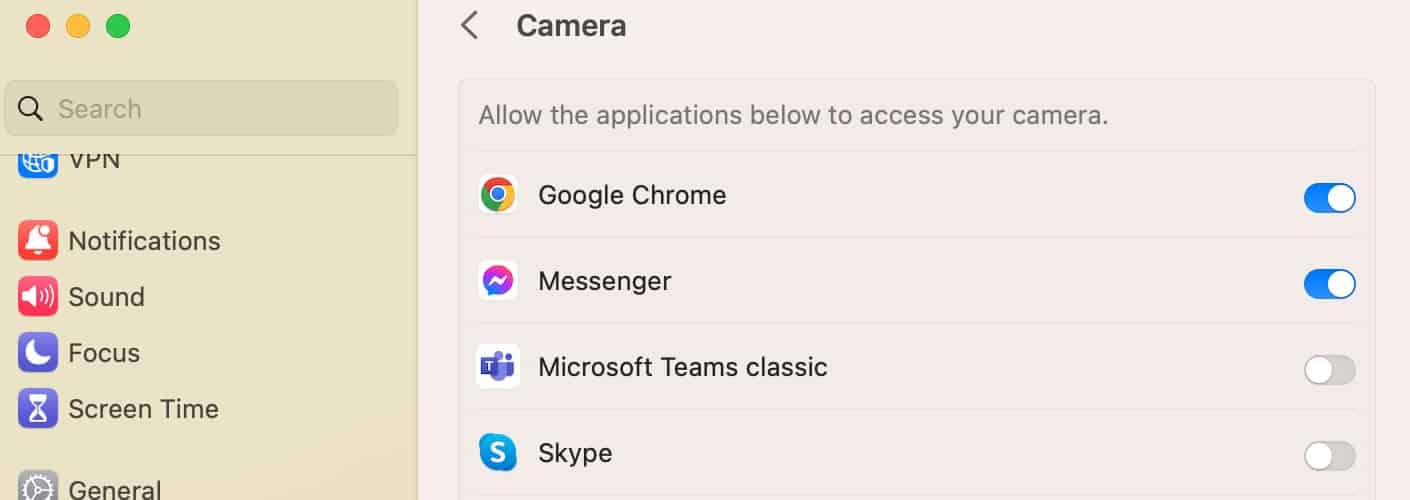
- Restart the apps you modified and test the webcam again. You should also see the Continuity Camera icon in the menu bar when running Photo Booth and FaceTime, among other apps.


2. Check Screen Time Restrictions
See if Screen Time is interfering with the apps that use your Mac camera. Generally, its privacy and security measures won’t change unless you touch them, but updating to the latest macOS might have set random limitations.
1. Click the Apple menu > System Settings > Screen Time. You should see the Screen Time section in the sidebar menu.

2. Go to Content & Privacy and see if it’s toggled on.

3. If the feature is running, open App Restrictions and toggle on Allow Camera in the Allow section.

4. Lastly, go back to Screen Time and check if the app you need to use has a set limit.

3. Try Other External Webcams
Try different external webcams on your Mac. Connect a third-party camera to your Mac, open Photo Booth, click the Camera icon at the bottom left corner of the screen, and choose the appropriate third-party accessories.
If they work, your built-in camera likely has a hardware issue. But if neither internal nor external webcams work, continue troubleshooting because a software or hardware issue might be affecting your entire device.
4. Kill All Camera Functions Through the Terminal
You can manually reset your Mac camera by terminating all webcam-related processes via Terminal. It’s a fairly straightforward process, ensure you input the correct commands, or else you might end the wrong functions. In this case, you’ll need to reboot your Mac or launch Safe Mode.
1. Force Quit all your webcam apps.
2. Open Launchpad > Terminal. You’ll likely find this app in the Other folder, although you can also access it through Finder > Applications > Utilities > Terminal.

3. Type sudo killall appleh13camerad into the window, press Return, and enter your user password.

4. Repeat with the commands sudo killall VDCAssistant and sudo killall AppleCameraAssistant (run these commands separately).
5. Reboot your Mac and test your Mac Camera again.
5. Launch Mac In Safe Mode
Reboot your Mac in Safe Mode for more in-depth software troubleshooting. It temporarily halts non-essential maintenance tasks and clears your system cache to expose internal issues. Detach all third-party accessories before starting because they might interfere with the process.
5.1 Apple Silicon Mac
Here’s how to launch an Apple Silicon Mac (macOS devices using the M1, M2, or M3 chip) in Safe Mode:
1. Shut down your Mac, let it rest for a few seconds, and then restart while holding down the power button.
2. Release once you see the Loading Startup Options page.

3. Choose the appropriate disk volume, hold down the Shift key, and then wait for the confirmation dialogue box to appear.
4. Click Continue to proceed to the login page.
5.2 Intel-based Mac
Here’s how to launch an Intel-based Mac in Safe Mode:
1. Restart your Intel Mac and quickly hold down the Shift key before the screen lights up.
2. Only release Shift once the login page appears. Just note that the reboot might take a little longer in Safe Mode.
To check if you launched Safe Mode successfully, press the Option key and click the Apple menu > System Information > Software. The Boot Mode line should say Safe instead of Normal.

6. Run Apple Diagnostics For Hardware Issues
You likely have a hardware issue if your webcam is still not working on macOS Sonoma even after launching Safe Mode and restarting all webcam apps. To scan your hardware components, run Apple Diagnostics. It spots defects and suggests potential fixes before redirecting you to Apple Support.
Here’s how to run Apple Diagnostics on an Apple Silicon Mac:
1. Turn off your Mac, let it rest for a few minutes, and then reboot by holding down the power button.
2. Only release the power button once the Startup Options page appears.
3. Press and hold Command + D until you see a black screen with a white progress bar load. Afterward, just follow the on-screen instructions.

Here’s how to run Apple Diagnostics on an older Intel Mac:
1. Restart your Mac and quickly hold down the D button before the screen lights up.
2. Only release it once you see a black screen asking your language preferences appear.
3. Wait for a white progress bar to load—just follow the on-screen instructions.
7. Restore Legacy Video Device Support
As a last-ditch resort, you can consider restoring legacy video device support. The process lets you downgrade to previous Mac camera systems while using macOS Sonoma. Just note that it’s merely a band-aid solution to your problem. Your webcam might start running again, but you’ll have to give up some new features, e.g., continuity camera and green privacy indicator.
1. Launch your Mac in Safe Mode and enter your login credentials.
2. Input this command system-override legacy-camera-plugins-without-sw-camera-indication=on into Terminal, hit Return, and enter your user password.

3. Restart your device and test your Mac camera again.
Conclusion
These DIY solutions already address various types of software issues, plus some minor hardware problems. You might have to call Apple Support for a more extensive checkup if your webcam is still not working on macOS Sonoma 14.1. Make sure to have them check for more serious underlying hardware defects. But before, back up your files on iCloud in case Apple’s technicians need to clear your Macintosh HD drive.


What do to if there’s an error “disk could not be mounted”