

Whether you’re sending files via email, organizing backups, or freeing up space, there are several reasons to compress files into a ZIP format. Back then, you’d have to download a file archiver utility app. It was a minor yet unnecessary inconvenience. But these days, you can create ZIP files straight from your Mac. It has a built-in tool that lets you zip files in seconds—no third-party software is needed. From single documents to entire folders, here’s how to get it done.
How Do I Create a ZIP File on a Mac

Creating a ZIP file on your Mac is simple and fast. macOS comes with a built-in tool called Archive Utility that lets you compress and unzip files. Keep in mind though that you will need to use one to open RAR files.
1. How to Compress a Single File
- Right-click (or control-click) on the file you want to compress.
- Click Compress [File Name] from the drop-down menu.
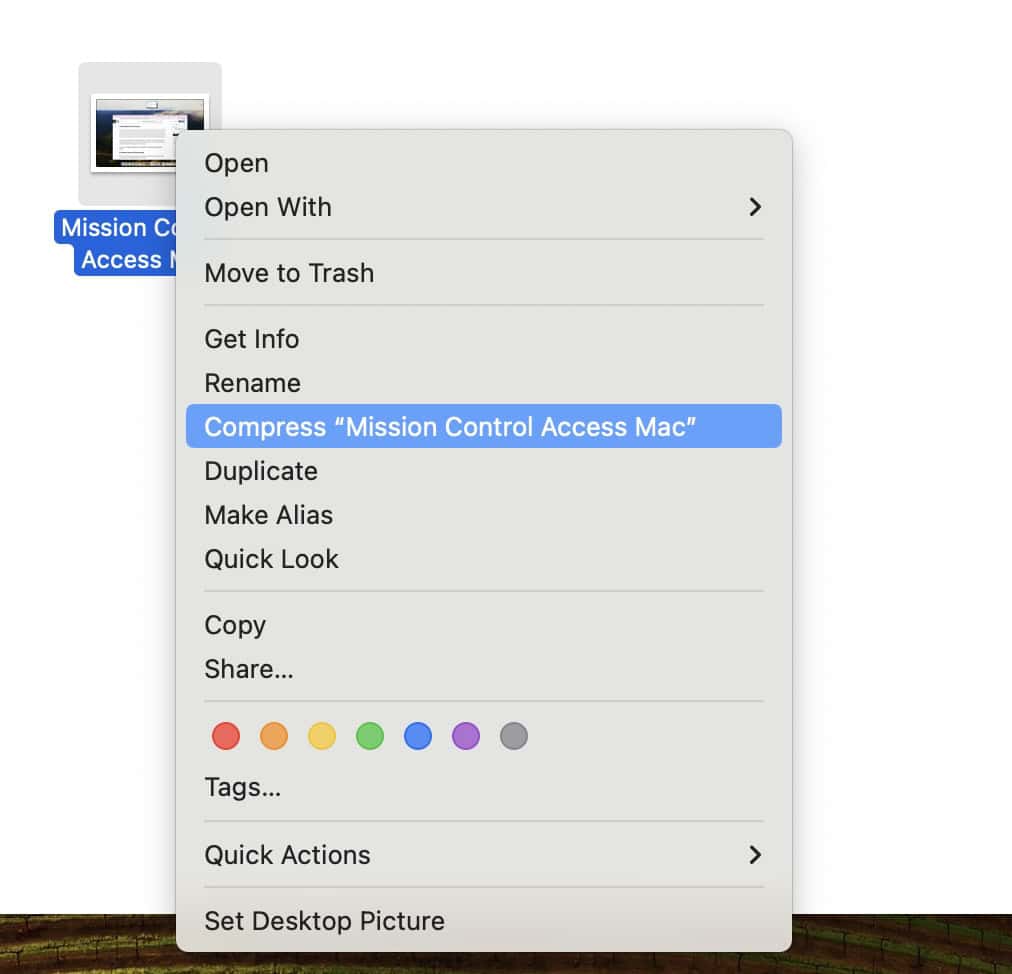
- A new ZIP file appears in the same folder, while the original file remains unchanged.


2. How to Zip Multiple Files
- Select all the files you want to compress by drawing a box around them using your mouse or trackpad. Alternatively, you can also hold the Command key and click to select the files.
- Right-click (or control-click) and select Compress from the drop-down menu.

- A new ZIP archive will appear in the folder while the original files stay intact.

Don’t miss the best of The Mac Observer
Set us as a preferred source and our Apple reporting ranks higher in your Google Search results and Discover feed — one tap, no account changes.


Discussion