
You’ve almost certainly seen the “Passwords Are Locked” pop-up on your Mac if it has Touch ID. Most of the time, this feature is a reliable way to secure sensitive information. While it’s comforting to know that others can’t easily view your data, seeing this message multiple times a day quickly becomes annoying
Fixing this issue is pretty straightforward, and as a Mac user with Touch ID, I’ve already experimented with multiple ways. Today, I’ll give you my eight best solutions — we’ll go in order from most to least convenient.
How To Remove the Constant “Passwords Are Locked” Pop-up on Your Mac
1. Turn Off the Autofill Feature
Time needed: 2 minutes
Switching off the Autofill feature, which is turned on by default, is the first step I recommend. While this tool is a little hidden, you’ll have no problems finding it if you follow the steps listed below.
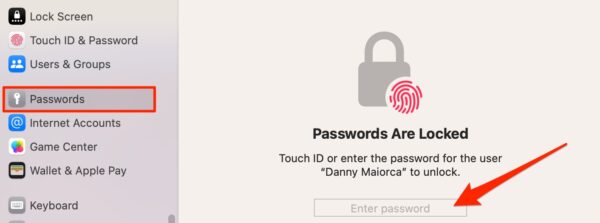
- Click the Apple menu icon > System Settings.
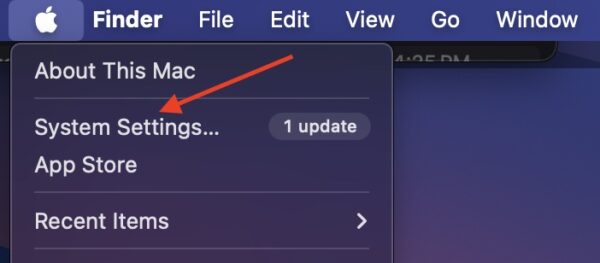
- Select Passwords. You’ll then need to either enter your login password on the right-hand side or verify who you are with Touch ID.
- Tap Password Options. You’ll find this tab close to the top of your screen.
- Switch off the toggle button for AutoFill Passwords and Passkeys.


Hopefully, this error message no longer pops up once AutoFill is disabled. You can still protect your information in other ways; for example, there are plenty of Mac software tools that can encrypt your sensitive data.
2. Restart Your Mac
If turning off the AutoFill feature doesn’t work, try restarting your device first. Manually turning it off and on will have the same result, so pick whichever one you prefer. Follow the instructions below to restart your Mac:
- Click the Apple menu icon and select Restart your Mac when you see the dropdown menu.
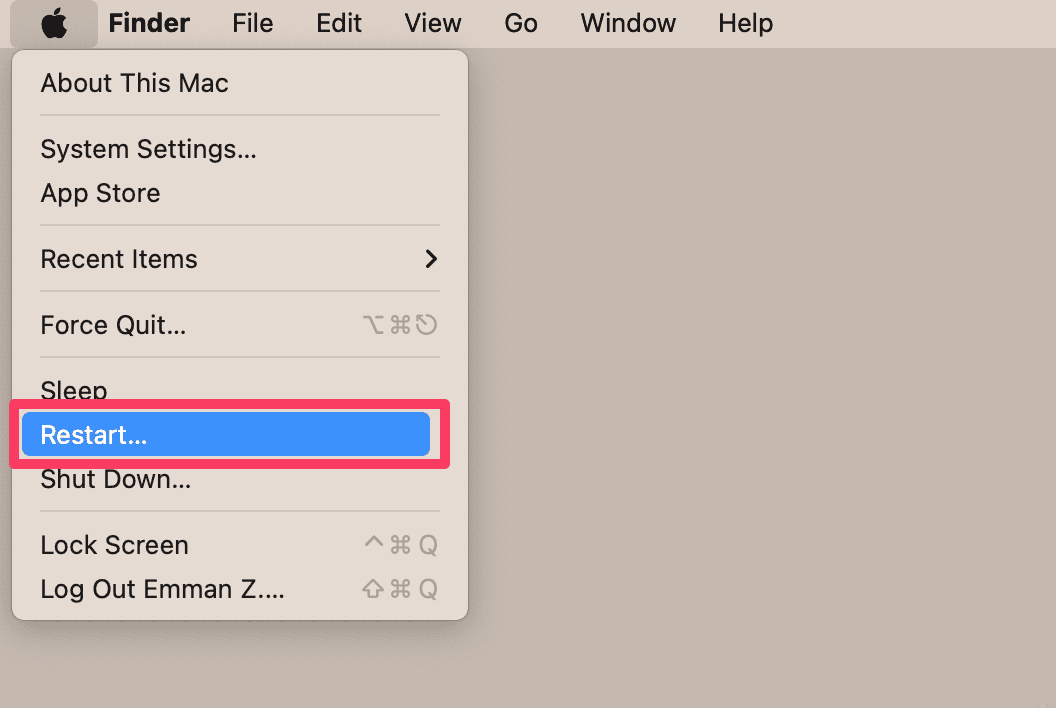
- When the pop-up window appears, tap the Restart button and wait for your Mac to turn off.
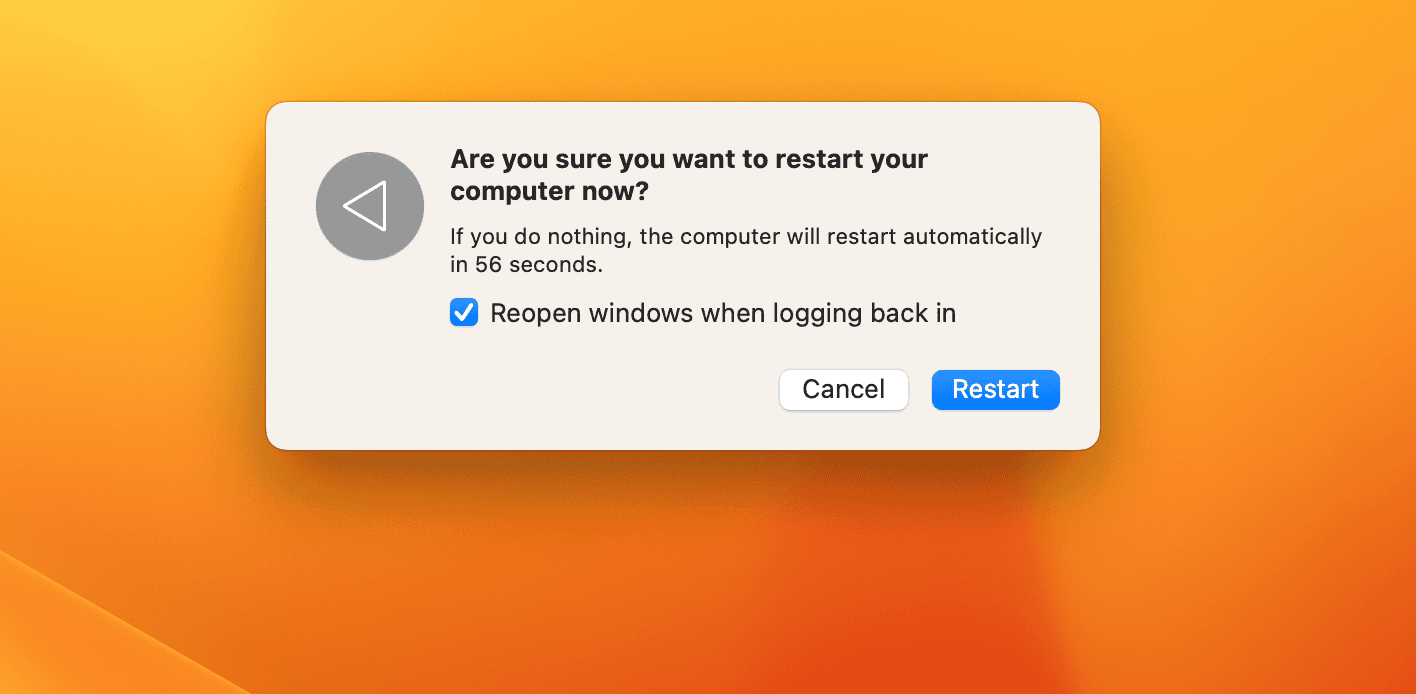
- Within a few seconds of your screen going black, your device should turn back, on and you’ll see an Apple logo. Wait for the reboot to complete—enter your login password when it does.


If you’d prefer to use your keyboard, check out this complete guide on how to restart a MacBook with your keyboard.
3. Hit the Escape Key on Your Mac
One quick, short-term solution is to hit the Escape key each time this pop-up appears. Simply hit the esc key in the top left-hand corner of your keyboard — you should be able to use your Mac normally afterward.
This step only works if the pop-up is a glitch rather than a feature. If you use this while AutoFill is still enabled, you won’t be able to access your passwords. You’ll still need to enter your login details or use Touch ID. It’s also just a workaround, so while you can continue working as normal for a bit, you should still look for a more permanent solution with one of the other steps in this guide.
4. Turn Off “Use Touch ID to Unlock Your Mac”
Since Touch ID is switched on as a default login method for MacBook Pro computers, you probably haven’t considered turning it off. However, it’s actually pretty easy to do.
- Re-open System Settings by going to the Apple menu icon and selecting System Settings.
- Click on Touch ID & Password in the left-hand toolbar.
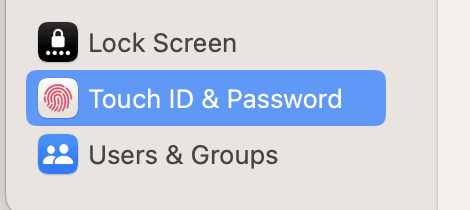
- Turn off Use Touch ID to unlock your Mac. It’s the first toggle beneath your fingerprint settings and options.
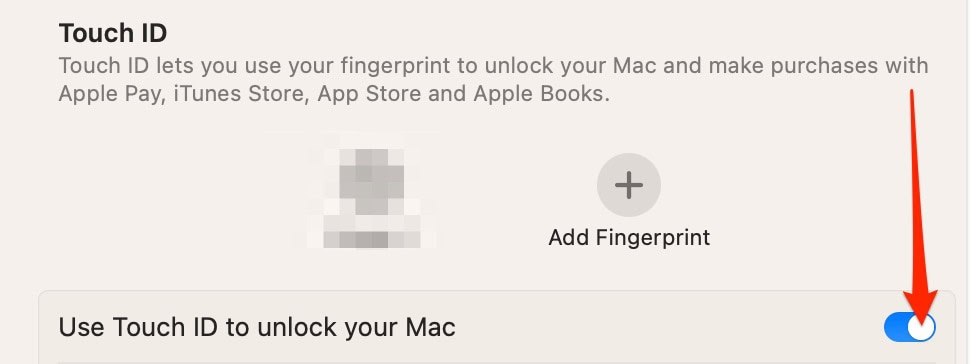
- Restart your Mac and test to see if your changes have taken effect.


5. Turn Off Use Touch ID for Autofilling Passwords
If disabling Touch ID doesn’t work, turn off the Use Touch ID for autofilling passwords feature is the next step. Follow these instructions to do that.
- Return to System Settings > Touch ID.
- Scroll through your list of toggles. When you see Use Touch ID for autofilling passwords, turn off the feature. Then, restart your Mac again and see if you were able to solve the problem.


If you later decide that you want to use Touch ID more regularly on your Mac, check out this guide on how to set up fingerprints on your Mac and use Touch ID.
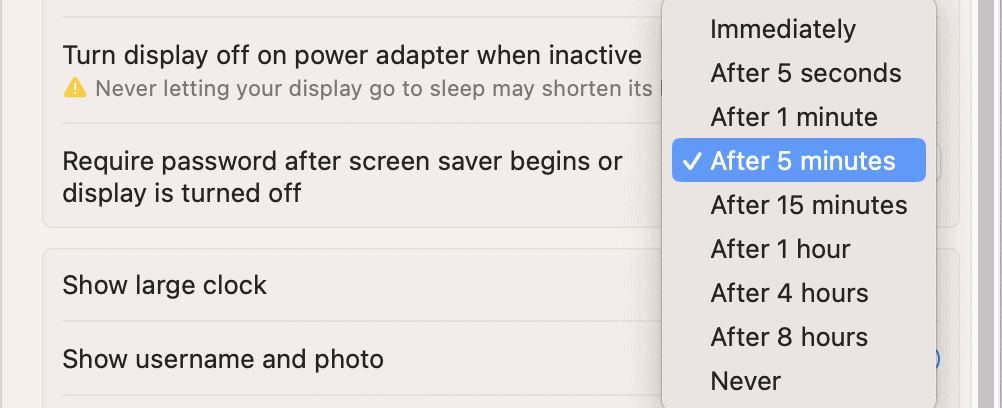
6. Check Your Lock Screen Settings
Try configuring your Lock Screen settings. More specifically, you probably need to change the Require password after screen saver begins or display is turned off setting. You want to strike a balance between practicality and security. Setting the duration to 5 to 15 minutes will probably get rid of the pop-up while still keeping your files and folders secure.
- Open System Settings and select Lock Screen.
- Look for the Require password after screen saver begins or display is turned off tab.

- Expand the dropdown menu and choose your new preferred time.


7. Log Out of Your Apple ID and the Log Back In
I’m hoping that you’ll have solved the problem by this point because signing out and back into your Apple ID is pretty inconvenient. Nonetheless, it’s a necessary next step if you’ve had no success so far. Here’s how to log in and out of your Apple ID:
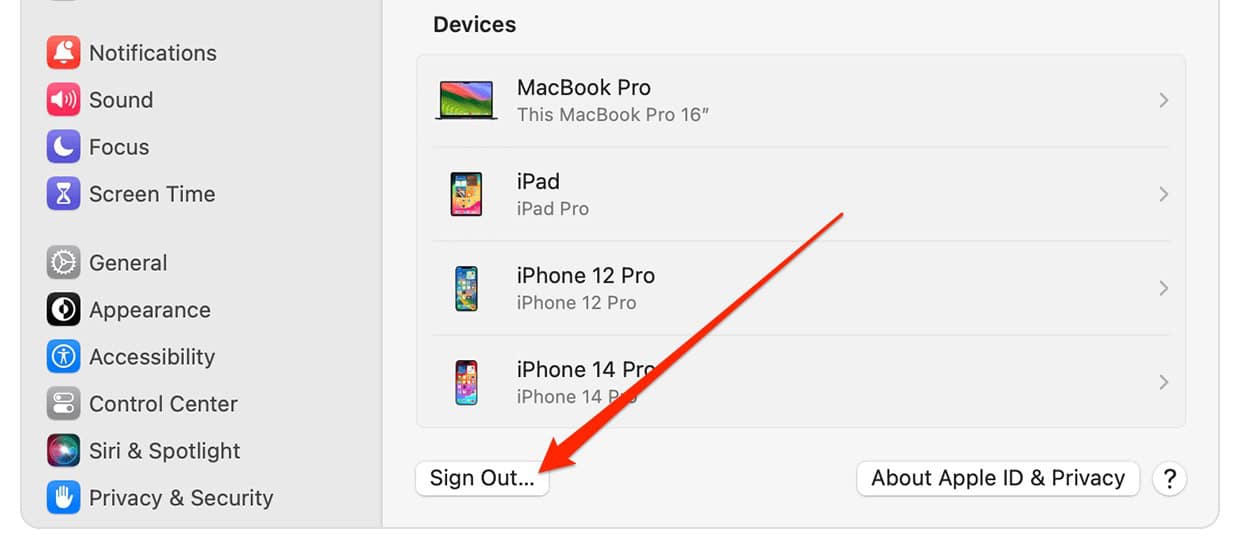
- Open System Settings and click your Apple ID profile at the top of the side navigation pane.

- Scroll down to the bottom of the right-hand window and select Sign Out.
- Re-enter your iCloud credentials after your Mac has logged you out.


You may sometimes see a grayed-out Sign Out button, meaning that you can’t log out of your account. In this case, our guide explaining what to do if you can’t log out of your Apple ID account should help.
8. Update Your Software
If none of the previous steps worked, you’re probably constantly seeing this message because of a glitch. Installing the latest macOS version might fix the problem.
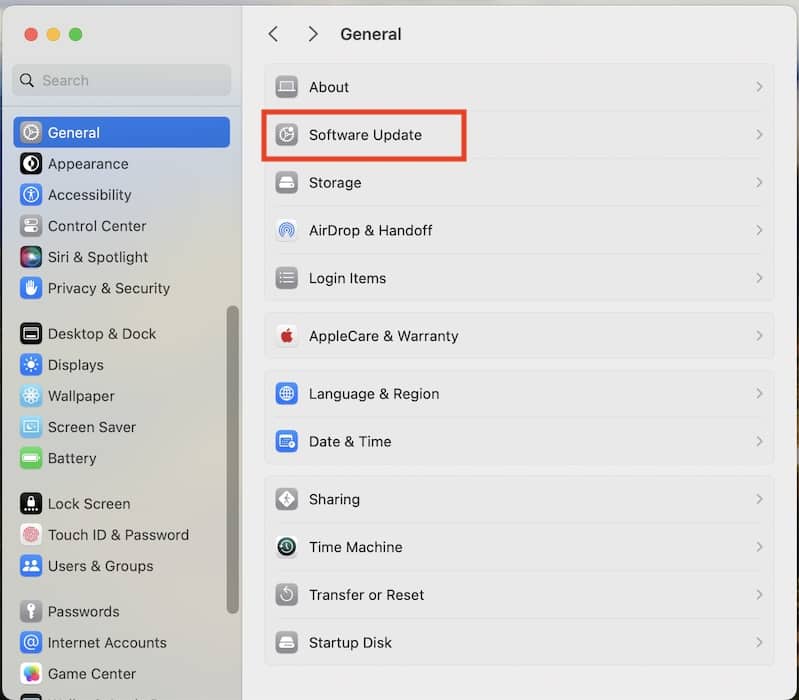
- Open System Settings and go to General > Software Update.
- Wait for your Mac to find a software update. This shouldn’t take longer than around 20 seconds. If an update is available, select Update Now.
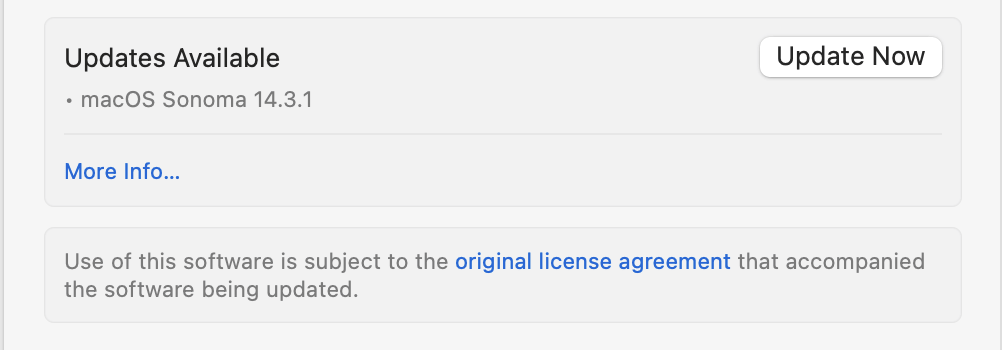
- Let your Mac update your software. Download times depend on your internet connection speed. If your Mac is unable to check for updates, follow these steps and try again.


After following the steps in this guide, you should no longer see the “Passwords are Locked” pop-up appear on your Mac. However, you should still take steps to ensure that others can’t access your sensitive information. You’d do well to consider investing in Apple antivirus software.


