
Now that the public beta program has begun for macOS 13 Ventura, just about anybody can install the latest test version of the Mac operating system. Let’s walk through what you need to know before you jump in. We’ll also cover some important first steps, then walk through how to install the macOS 13 Ventura public beta.
Make Sure Your Mac Is Compatible
First things first, you’ll need to be sure your Mac can run the newest operating system. Unlike in the past, Apple is really tightening down on which models can upgrade to Ventura. A big part of this is closing the gap between older Intel Macs and the Apple Silicon lineup.
These Macs are compatible with macOS 13 Ventura:
- 2017 iMac and later;
- 2017 iMac Pro and later;
- 2018 MacBook Air and later;
- 2017 MacBook Pro and later;
- 2019 Mac Pro and later;
- 2018 Mac mini and later;
- 2017 MacBook and later;
- 2022 Mac Studio
Once you’ve made sure you can run the beta on your Mac, there are a few things you should do to prepare.
Getting Your Hard Drive Ready to Install the Beta
You will, of course, need to enroll in the Apple Software Beta program. Just go to https://beta.apple.com/sp/betaprogram/ and sign up, or log in if you’re already enrolled.
Next, make sure you have a complete backup of your Mac. You can (and should) use Time Machine to do this, but a second backup is always nice. I prefer Carbon Copy Cloner, but SuperDuper is also a good option. Both of these will help you create a clone of your drive, a fully bootable backup.
Now, you should create a volume specifically for the beta software. I definitely don’t recommend installing any macOS beta on your main computer. You certainly can, but beta software often contains bugs that could make it impossible to use your Mac the way you need.
Instead, you should create a second volume and use it for testing. Here’s what you’ll need to do.
- First, launch Disk Utility from Applications > Utilities.
- Your primary macOS partition, usually called Macintosh HD should appear within an APFS container. Click it if it isn’t already selected.
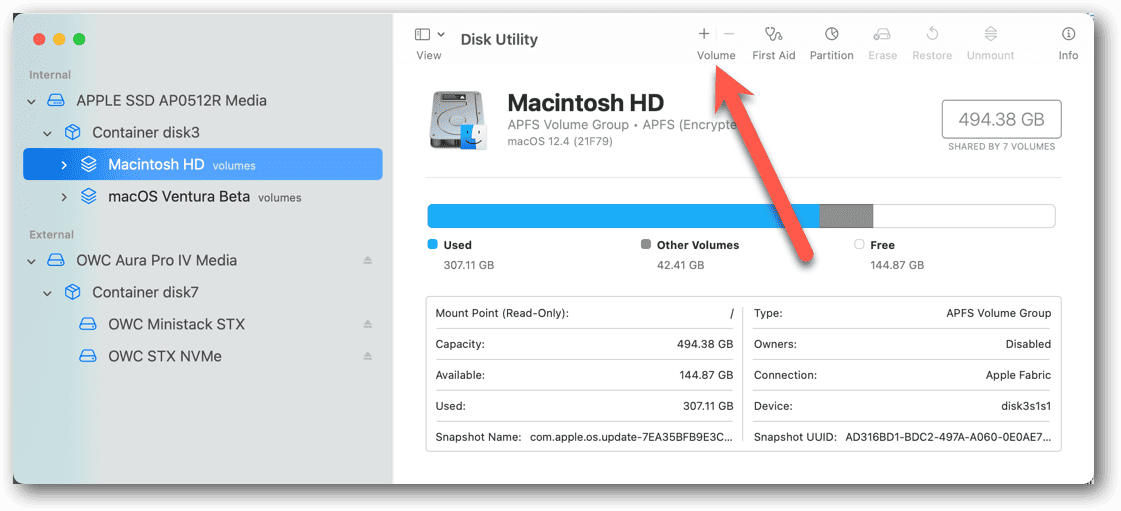
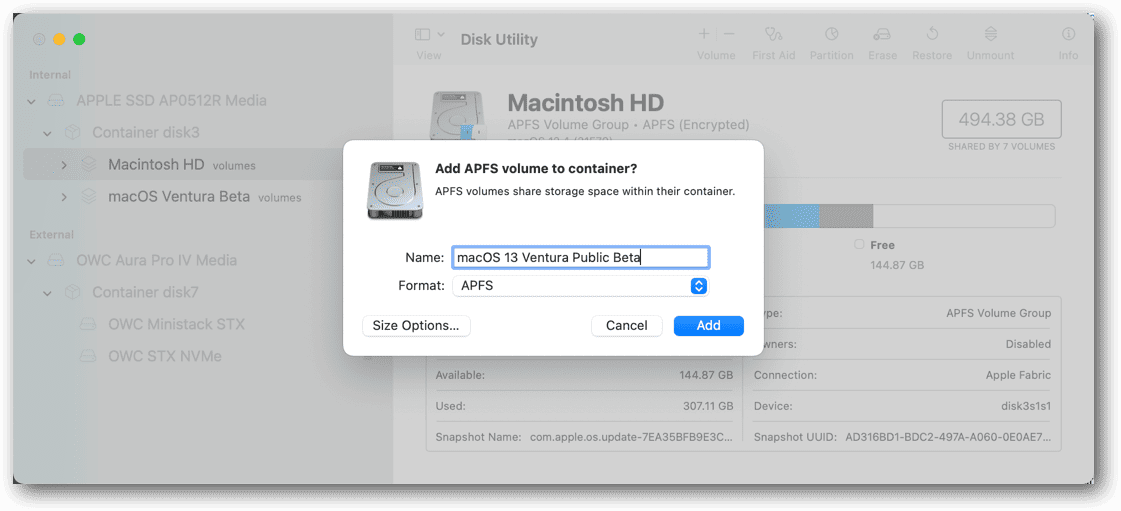
- We’re going to add another volume to that container for our beta install. Above the details of your hard drive, click the + symbol above Volume.


Next, you should install macOS Monterey on the new volume. I know, you’ve already got that installed, but you won’t be able to install the beta version until you have the new volume bootable.
Install macOS Monterey On Your Newly-Created Volume
Open the App Store, and search for macOS Monterey. Download and run the installer, choosing to install the operating system on the volume you just created.
At this point, you may want to grab a coffee and put on the latest episode of Loot or Severance. This part takes a while, and your Mac will reboot several times. Once it’s done, though, we can move on to installing the Ventura public beta.
Time to Install the macOS 13 Ventura Public Beta
Now, once you’re installed and booted up with macOS Monterey on the new volume, it’s time to revisit Apple’s software beta page. Log in and go through the enrollment process for your Mac. As part of that, you’ll download the macOS Public Beta Access Utility.

When you open the downloaded file, you’ll see an icon labeled macOSPublicBetaAccessUtility.pkg. Double-click that to launch the installer.

Since you’ve already made a backup of your Mac and you’re using a fresh install anyways, you can ignore the warning about not detecting a Time Machine backup.
From here, just follow the instructions in the installer. Once again, this may take some time. Grab a chai tea and stream an episode or two ofMythic Quest while you wait.
Test the Newest Features
Once the install completes, you can start testing all the new features. Stage Manager still needs some work, but Continuity Camera is definitely nice. The great thing about installing the beta this way is you aren’t making any changes to your primary macOS installation.
To get back to that install, you need only launch System Settings and find Startup Disk in the General tab. Choose your daily driver hard drive, and restart.
If you want to stop testing the Ventura beta, you can simply delete its volume from Disk Utility. Just make sure you’ve copied over any files you want to hang on to.


Did they fix Messages? A return should add a new line, not send the message.
Not so far, no. Return still sends…you have to hit Shift-Return to add a new line.
Install macOS Monterey On a Second Drive? Do you mean on the newly created volume on the first drive? Having said that, is it safer to install it in a different drive?
The newly created volume. Either option, a new volume or an altogether different drive, would work fine and be equally safe.