
With the waning interest in YouTube videos created by budding content creators, many are switching their interests to streaming instead. Streaming became popular thanks to the proliferation of game streamers who broadcast their experiences on platforms like Twitch and YouTube Live. Streaming can either be live streaming or game streams, although it can also be used for educational and marketing purposes. So, if you’re planning to stream, whether live streaming or game streams, you need a tool such as OBS Studio to do so. Read along to learn how to install and set up OBS Studio on Mac.
What is OBS Studio?
Open Broadcaster Software (OBS) Studio is a free open-source app that helps you stream from your desktop to various online streaming platforms. With OBS Studio you can cast video and audio into the live streaming service that you prefer. There are various options for live streaming services that you can use, the most popular of which are Twitch, YouTube, and Facebook.
When streaming, you can cast live videos from your camera and webcams, screen capture your Mac and the apps that you are currently using, and audio from a microphone or other audio sources. OBS Studio’s role is to combine all those content before streaming them out to your viewers.
What You Need to Run OBS Studios
With software as powerful as OBS Studio, you would think that it would require too many resources for the average Mac owner. On the contrary, you may already have the requirements to run a decent stream through OBS Studio. Does OBS Studio work on Mac? Yes, it does. OBS Studio is compatible with both Intel-based and Apple Silicon Macs. You also need a decent microphone and camera to cast a decent stream through OBS Studio. Still, wondering if OBS Studio is safe to download on Mac? Well, I just did and so far it has not caused any issues on my M2 MacBook Air.
How to Install OBS Studio
Now, how exactly do you install and set up OBS Studio on your Mac?
Time needed: 3 minutes
Follow the steps below to download and install OBS Studio on your Mac.
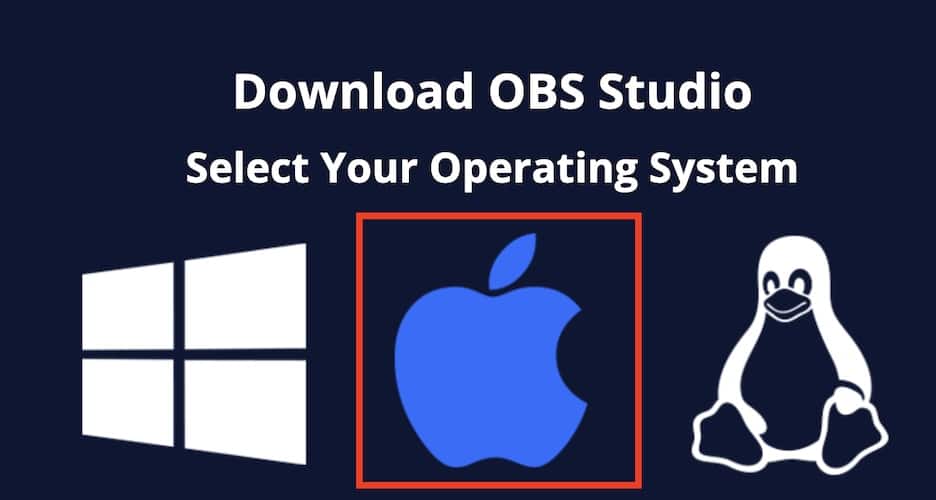
- Go to obsproject.com and download OBS Studio.
- Install OBS Studio on your Mac.
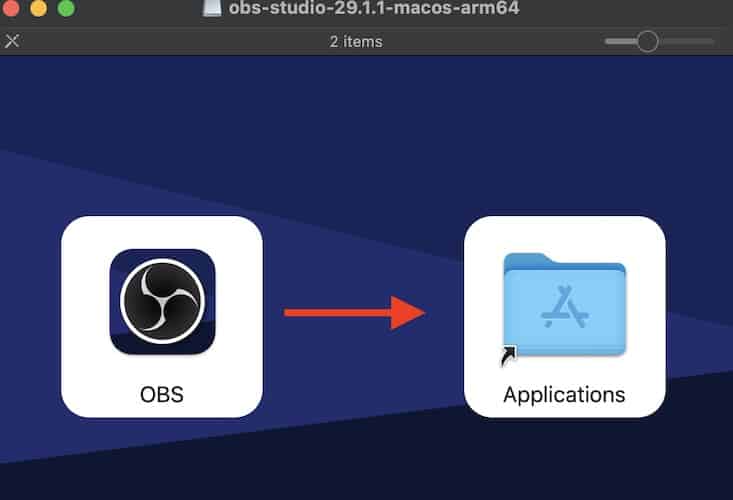
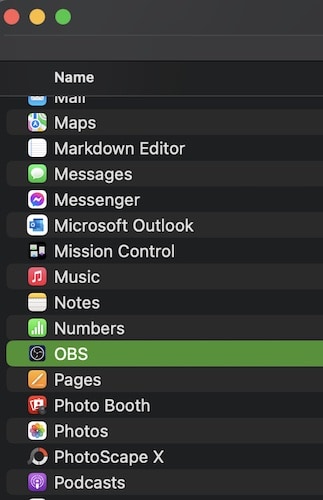
- Once done, you can launch the app as you would normally do with other Mac apps.


After successfully installing OBS Studio, you can start streaming or recording right away. But to maximize the features of the software, you may want to consider following some optional steps to tweak the app’s settings.
Optional Settings When Using OBS Studio on Mac for Recording
- Click OBS Studio from the Menu bar of your Mac.
- Click Preferences > Output.
- Set your desired settings based on whether you streaming or recording.
- Check Output Resolution and ensure that its value is lower than or matches your Mac’s native screen resolution (1920 x 1080, in this case).
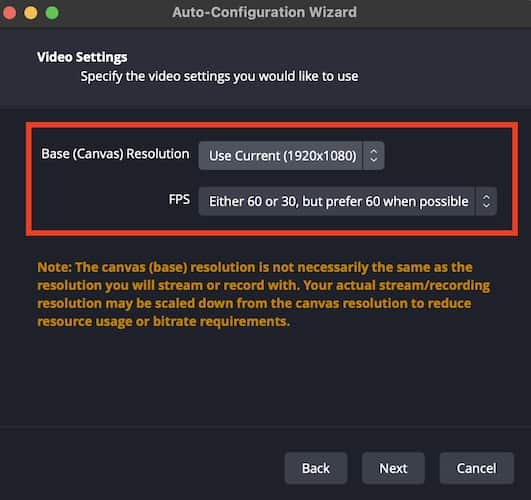
- Check if Aspect Ratio matches to ensure that your video quality will not be too stretched out.

Optional Settings When Using OBS Studio on Mac for Streaming
- Click OBS Studio from the Mac Menu Bar.
- Click Preferences > Stream.
- Select your Streaming Platform from the “service” drop-down menu.
- Click “Connect Account (recommended).”
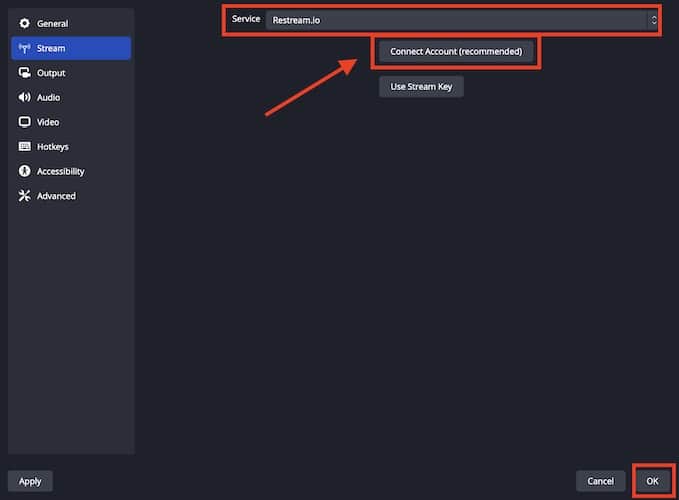
- Click Ok.
- This opens up a browser window where you will need to log in to your streaming platform.

Once the setup is done, you can now start streaming using OBS Studio.
Final Words
There you have it folks. If you’re planning to do live streaming or game streams, you need to download and install OBS Studio on your Mac. Casting your content on streaming services using OBS Studio will not only enhance the quality but will make it easier for you to do the task as well.


