
For those who are asking if Mac has a repair tool, yes it does. All Macs come with a built-in repair tool which Apple called Disk Utility. Mac’s Disk Utility is useful for checking if your Mac’s hard disk is damaged. But it can do a lot more, so read along through this guide to know its other features.
Does Mac Have a Repair Tool?
Buried within your Applications folder, under Utilities is your Mac’s built-in repair tool named Disk Utility. Simply put, Disk Utility lets you check whether a disk is damaged and then repair it. Aside from that, Disk Utility also lets you do other things as outlined below:
- Erase, format, and partition an internal or external disk.
- Encrypt storage devices or add a password to protect a drive.
- Mount, unmount or eject a disk.
- Change file system.
- Create disk images of files.
But one of the most important functions of the Mac Disk Utility is diagnosing and fixing startup disk problems.
How to Access Disk Utility
If you haven’t used it before, you can access Disk Utility by following the steps below:
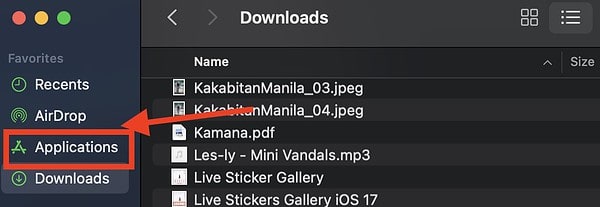
- Open the Finder app.
- Navigate the left sidebar and click Applications.

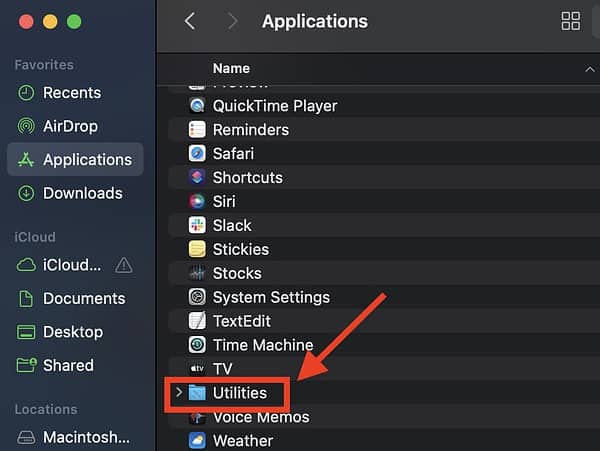
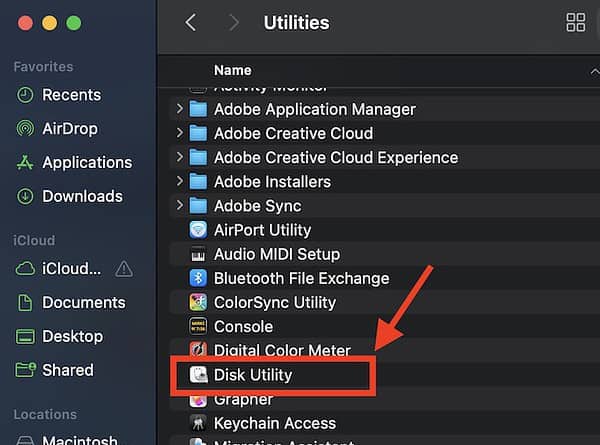
- Click Utilities > Disk Utility.

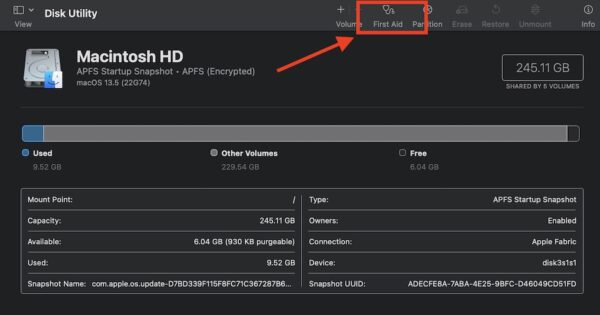
Once you are in the Disk Utility window, the default Mac hard drive will be highlighted from the left sidebar. Over at the main window, you can see various pieces of information about your Mac’s HD.
For instance, you can see a graphical representation of the hard drive’s storage capacity. These include the storage space used, Other volumes if your hard drive is partitioned, and the remaining free storage.
In the top-right corner of the Disk Utility window, you’ll find several options. Here’s an outline of what each of the features can do:
1. Volume: Click this option if you need to format and manage volumes on physical storage devices.
2. First Aid: Use this option to diagnose and fix disk errors.
3. Partition: Click this option if you want to partition hard disk (e.g. Time Machine, Photo Storage, etc.)
4. Erase: This option is used for erasing all content of the storage device in preparation for formatting.
5. Restore: Use this option to restore a volume from another volume. By using this recovery tool, you are creating an exact copy of the original volume.
6. Unmount: One of the additional tools that you can use to unmount a volume on your hard drive.
When to Use Disk Utility
Your Mac’s Disk Utility is very useful in various ways. If you experience your Mac being unable to start up, you can use Disk Utility to diagnose the problem and possibly fix the error. The same holds when an external storage device can’t be read by your Mac.
Other instances when you can use Disk Utility include when an app quits unexpectedly when your Mac has corrupted files in the hard disk, start-up disk won’t work, and when to repair a disk that you think is damaged.
How to Use First Aid to Repair Your Mac’s Hard Drive
One of the key features of Disk Utility is First Aid. You can use this option to check if your Mac’s hard drive has issues, First Aid will diagnose the drive and repair it.
Time needed: 2 minutes
Follow the steps below to use First Aid:
- Open the Finder app, then click Applications on the left sidebar.
- Scroll down then click Utilities.
- Scroll down then click Disk Utility.
- Click First Aid from the options on the top-right corner.
- Click Run and wait for the diagnostic tool to finish.
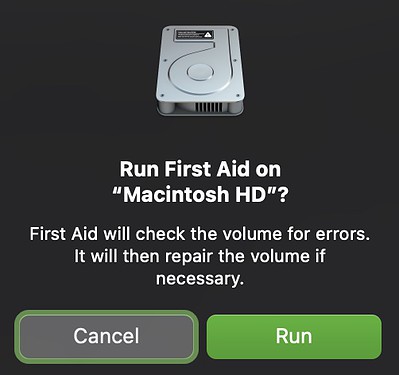


The repair process may take some time, during which you will not be able to use your Mac. If the issue is beyond repair, back up your Mac and contact Apple Support for proper guidance in fixing the issue.
How to Use Disk Utility to Repair Your Mac’s Startup Disk
You can also use Disk Utility’s First Aid feature to find out if there’s something wrong with your Mac’s startup disk. However, it won’t attempt to fix the problem. To fix the issue with the startup disk, you need to run Disk Utility in macOS Recovery Mode.
To review, here are the steps to start up in Recovery Mode, depending on which Mac model you have:
- If you have an M1-series Mac then shut down the Mac, then press and hold down the Power button as it boots.
- If you have an Intel Mac restart your Mac and hold down Command + R on the keyboard.
Once in Recovery Mode, open Disk Utility, select the startup disk, and then click “Run”. The diagnostic process will start and if there’s an error on your startup disk, Disk Utility will attempt to fix it.
Again, if the issue is beyond repair, back up your Mac immediately then ask Apple Support for guidance especially since this involves a hardware issue.
Other Mac Repair Tools
Aside from Disk Utility, there are other third-party Mac disk repair tools available online. For instance, you can also use the Mac Terminal commands to repair various issues.
Follow the steps below to perform low-level tasks and operations on volumes and containers:
- Boot your Mac into macOS Recovery Mode.
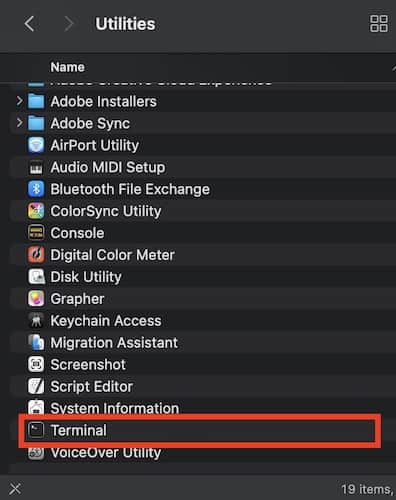
- Open the Finder app.
- Click Applications > Utilities > Terminal.
- Type
diskutillist, then hit Return.
- Note down the identifier of the hard disk.
- Type
diskutil verifyvolume SSD_ID, then hit Return.
- After verifying the status of your Mac’s disk, if issues are found, type
diskutil repairVolume_HDDand again, hit Return.
Mac won’t boot into Recovery Mode? Check out our dedicated guide to fix it.
Conclusion
As previously mentioned, the Disk Utility tool that comes built-in in every Mac is a very useful tool that everyone should know about. Although we hope you never have to use it, learning how to use it and what its features are would equip you if you encounter issues with your Mac’s hard drive. For more information about the Disk Utility, you can check out Apple’s extensive guide on using the Mac Disk Utility.
Feel free to share your experiences and other advice when it comes to repairing your Mac. Whether you’ve used third-party disk repair software, Mac’s built-in disk repair tool, and other steps to fix disk errors on your Mac would be very helpful to other Mac owners.


Such Disk Utility’s First Aid repair is useless most of the time and could even be dangerous, braking even more the disk. The correct way to do it is to “View – Show All Devices” and then start First Aid from the bottom up (first volume, then container and then disk). Unless Disk Utility prompts to do otherwise. As explained by Apple:
Disk Utility User Guide
https://support.apple.com/en-gb/guide/disk-utility/dskutl1040/mac