
iMovie is a fantastic free video editing tool that offers a lot of possibilities. You can split clips and adjust the sequence in which they play. You can also modify the length of individual clips, amongst other things. If you’re not sure how these features work, follow along. I’m going to show you how to trim a video in iMovie on a Mac, iPhone, or iPad.
How Do You Trim a Video in iMovie on iPhone or iPad?
First, of course, you’ll add video clips and pictures to the timeline of your project. Next, you will have the ability to adjust the length of a clip. You can make it longer or shorter or modify the order in which the clips appear. You can even split a clip into two independent pieces.
Don’t miss the best of The Mac Observer
Set us as a preferred source and our Apple reporting ranks higher in your Google Search results and Discover feed — one tap, no account changes.
Time needed: 2 minutes
Here’s how to adjust your clip lengths in iMovie on your iPhone or iPad.
- Open your project in iMovie then tap the video clip or photo in the timeline in order to display the yellow highlight that allows you to trim the selection.
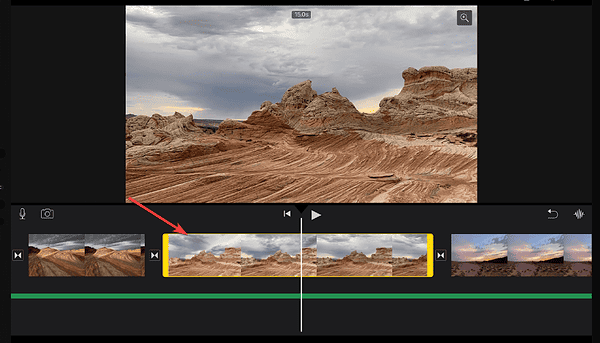
- If you zoom in, you’ll be able to see more of the clip’s details. This will make it simpler and quicker to edit. Use the pinch-and-open gesture in the middle of the timeline to achieve this.
- Drag the edge of the video closer to or further from the center to adjust its duration. To shorten the video, drag its edge (from the beginning or end, depending on your preference) towards the clip’s center.
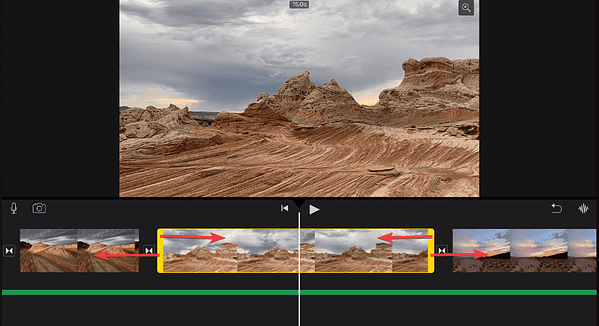
- To make the clip longer than it is, drag its edge (from the beginning or end, depending on your preference) away from the clip’s center.
Trimming Limitations in iMovie
If you’ve added a 10 second video clip, you won’t be able to make it any longer. You won’t be able to drag the clip’s edges. That’s because there is no more footage at the beginning or the end of that clip.
If you are trying to make the clip shorter than it is, but it seems like it’s not working, it’s possible the clip is exactly 0.3 seconds long, which is the shortest duration iMovie will allow.
However, if you’re still set on modifying the length of the video, you should try to slow down your clip in iMovie.
How Do You Trim a Video in iMovie on Mac?
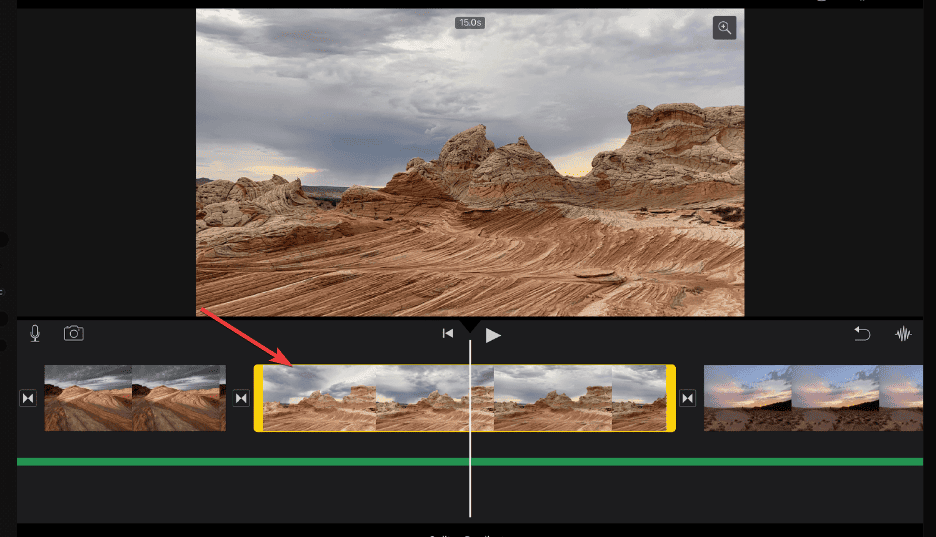
- Go through the timeline of your open project until you find the clip you want to cut and click on it.
- For a closer look at the clip, choose View > Zoom In then hit the Command and Plus sign (+). This will make it much easier to work with.
- Next, hover your pointer over the beginning or the end of your video until it becomes the clip trimmer tool. It will look like two arrows indicating the directions in which you can trim the clip.
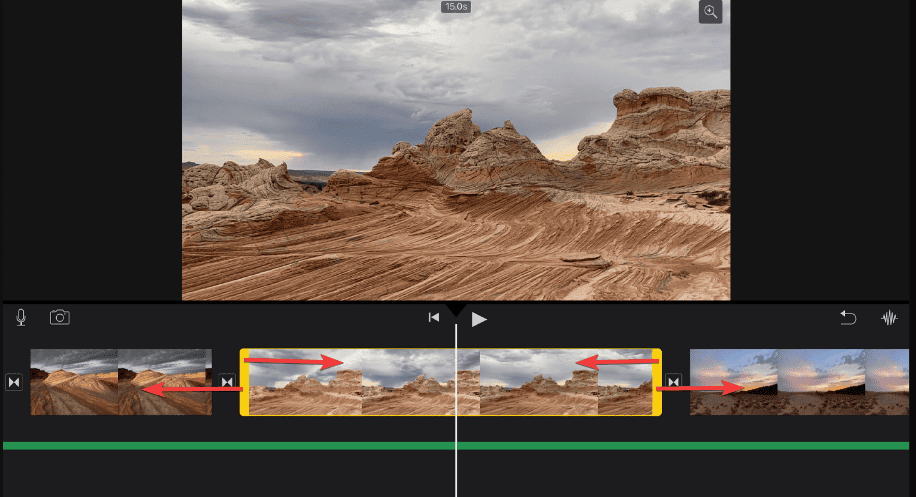
- To shorten the clip, drag the clip’s edges towards its center.
- To lengthen the clip, drag the clip’s edges away from its center.

(Image Credit: Apple)
Like before, you won’t be able to extend a clip beyond its initial limits because there won’t be any more footage to show.
The shortest time that iMovie supports is 0.3 seconds, so the app will not let you shorten a clip beyond that limit.
Once you’re done editing your video, you might need to know how to share an iMovie project on Mac and iOS.
What Is The Shortcut to Cut a Video in iMovie?
You can trim unwanted frames using the shortcut menu as follows:
- Press and hold the R key while dragging over a clip in the timeline of the iMovie project from your Mac, in order to choose the range of frames you wish to save.
- Control-click the clip, then select Trim Selection from the menu. The footage will be trimmed to match your selection.

(Image Credit: Apple)
How Do I Split an iMovie Project Into Two Movies?
In iMovie, when you split a clip, you have the option of modifying the length of each portion, removing areas that aren’t needed, or adding unique titles to each segment individually.
- Move the playhead, which is represented by the white line, to the point in the timeline where you wish the clip to be split.
- If necessary, choose View > Zoom In or press Command and the Plus sign (+) to take a closer look at the clip.
- To split the clip, select Modify > Split Clip or press Command-B.
For more information on this topic, I recommend that you check out our guide on how to arrange and split clips in iMovie.


Discussion