
The world of video conferencing has seen a monumental transformation with the advent of macOS 14 Sonoma. Gone are the days when virtual meetings felt distant and robotic. With features like Presenter Overlay and Reactions, macOS Sonoma has breathed new life into remote presentations and meetings. In this article, we’ll delve into how to use Presenter Overlay and Reactions in macOS 14 Sonoma.
What Macs Will Support Sonoma?
Before you get too excited, it’s essential to check if your Mac can support macOS 14 Sonoma. Generally, Macs older than five years may not be compatible. Ensure you check the compatibility list to see if your device can run the latest macOS.
How Do I Download Sonoma on My Mac?
For those who can’t wait to try out the new features, Apple offers early access to macOS 14 Sonoma through the developer beta version. However, since it’s an early release, there might be some bugs and issues. It is highly recommended to back up your data before upgrading. One common bug that you may experience after upgrading to macOS Sonoma is Steam crashing on startup.
How To Use Presenter Overlay in macOS Sonoma
macOS 14 Sonoma is Apple’s latest iteration of its famed operating system, and it comes loaded with features aimed at enhancing the user experience. A highlight of this version is the video conferencing enhancements that are designed to make remote presentations and meetings more engaging and immersive.
Presenter Overlay is an innovative feature that can transform the way you conduct remote presentations. This effect overlays your live video on top of the content you’re sharing, giving the illusion that you’re actually presenting in front of the screen, much like a newscaster.
Time needed: 1 minute
Keep in mind, macOS Sonoma is in developer beta; third-party app support may be limited for now.
- Open a video conferencing application compatible with Presenter Overlay, such as FaceTime.
- Initiate screen sharing within the app.
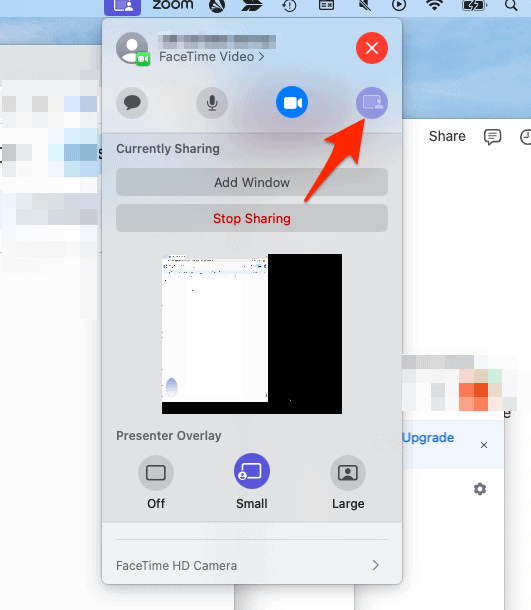
- Click the share screen icon in the menu bar and choose Small or Large under Presenter Overlay to see a preview of your video layered over the screen.
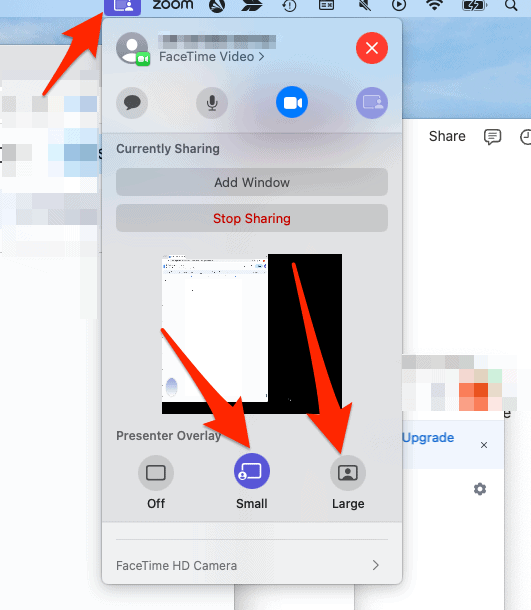
- In large mode, you’ll appear in front of the content, while in small mode, you’ll be in a resizable, movable bubble.
This feature is not only innovative but also brings a personal touch to the presentation, as it allows your audience to see you in conjunction with the content being shared.
How To Use Reactions in macOS Sonoma
Another delightful feature of macOS Sonoma is Reactions. This feature enables users to express themselves in video calls by integrating cinematic-quality effects, such as balloons, confetti, and hearts into their video.
- During a video call, locate the Reactions option in the video conferencing app.
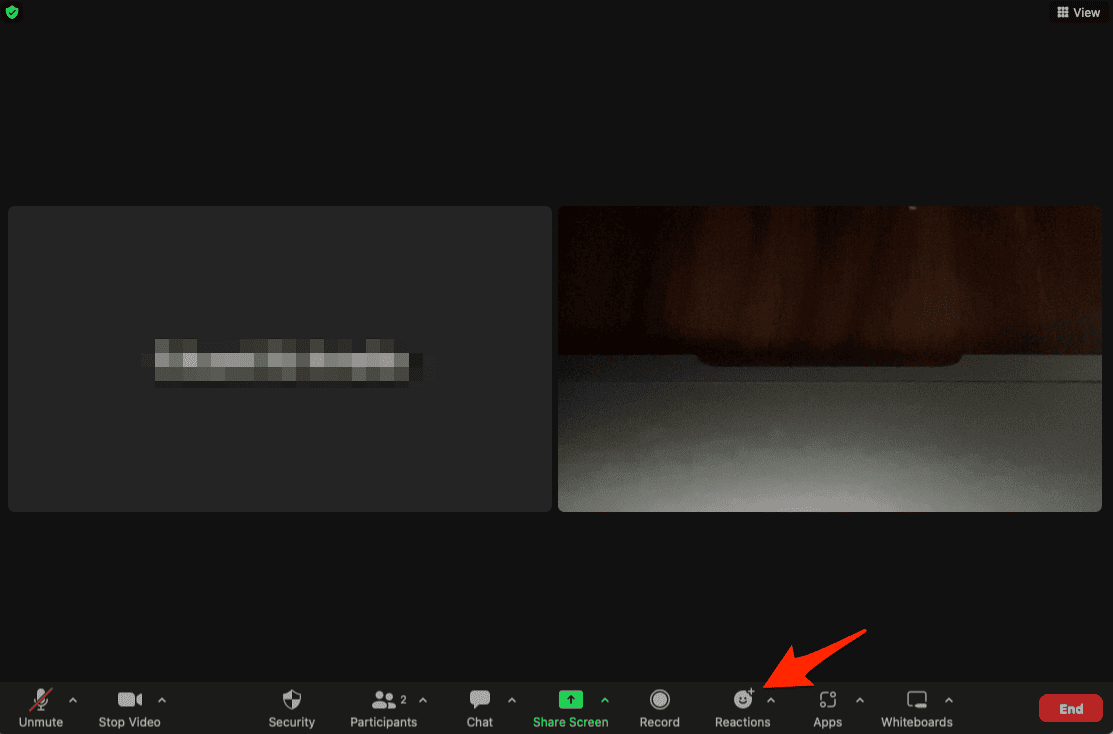
- Select the reaction you want to display in your video. You can also set up gesture-triggered reactions.

- Use hand gestures such as like (if set up), or click on the reaction to display it in your video.
macOS 14 Sonoma’s Presenter Overlay and Reactions are game-changing features that elevate the video conferencing experience. Whether you’re a professional giving a remote presentation or just catching up with friends, these features can make your calls more engaging and personal. However, don’t forget to check the compatibility of your Mac before diving into the new world of macOS 14 Sonoma. We also recommend that you check out how to share passwords through iCloud Keychain in macOS Sonoma.


