
Fonts are a great tool for setting the tone and ambiance of a text, as well as providing visual cues as to the order in which the document should be read and which sections are more significant than others. But, there are situations when the fonts that come pre-installed on a Mac aren’t sufficient, and you’ll want to install additional ones from external sources.
Follow along as I teach you precisely how to accomplish this, and also show you how to verify them so that you do not run into any problems while using those external fonts.
How Do I Add Fonts to My Mac?
It might come as a surprise that you can easily get new fonts for your Mac from Apple’s built-in program Font Book. All you have to do is launch the app and choose the fonts that are grayed out to add them to your Mac.
You also have the option to create your own fonts. You might also purchase new ones from third parties, either as a one-time purchase or by subscribing to a font service.
Time needed: 1 minute
Here’s how to install a new font using Font Book.
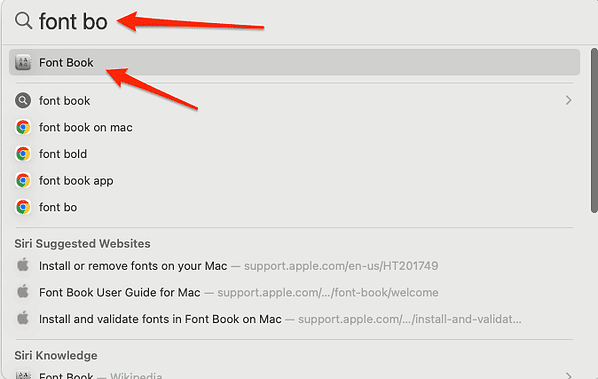
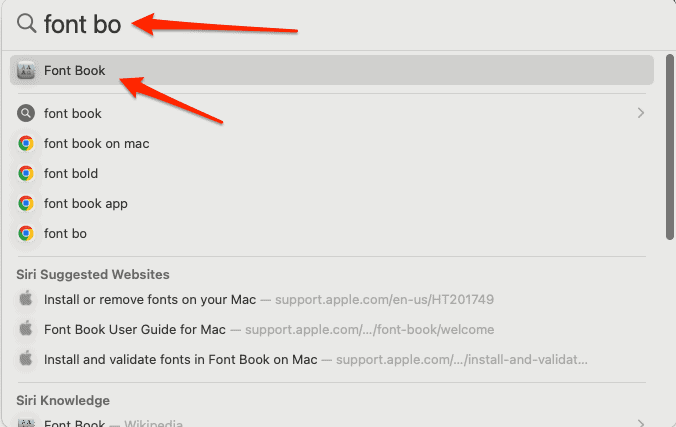
- Press Command + Space then type Font Book and click the most relevant result.
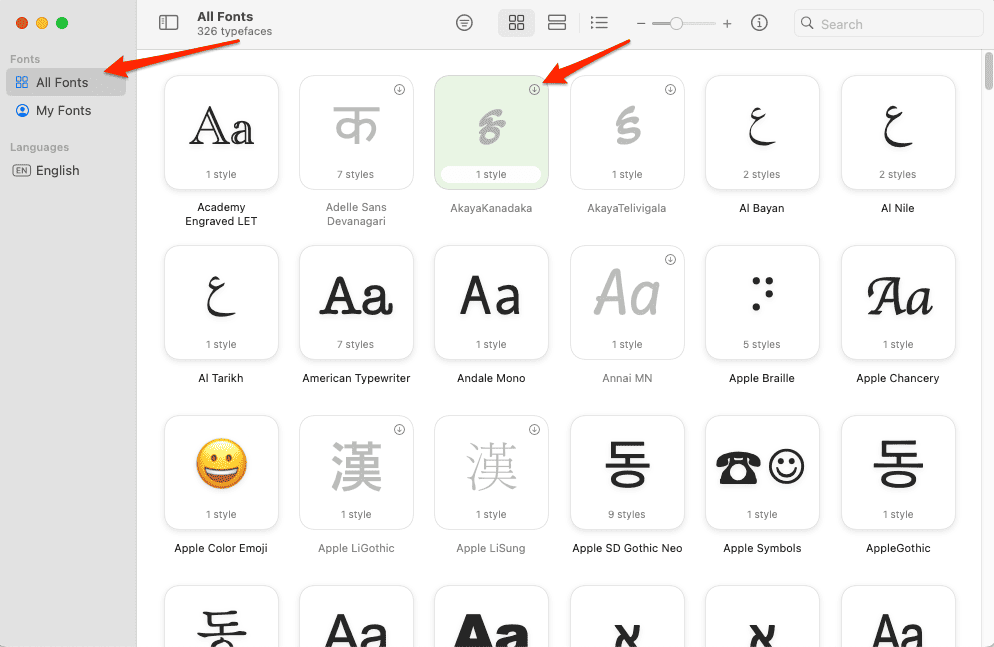
- For system fonts, go to the All Fonts page and click the Download button from the top right corner of the font you want to install.
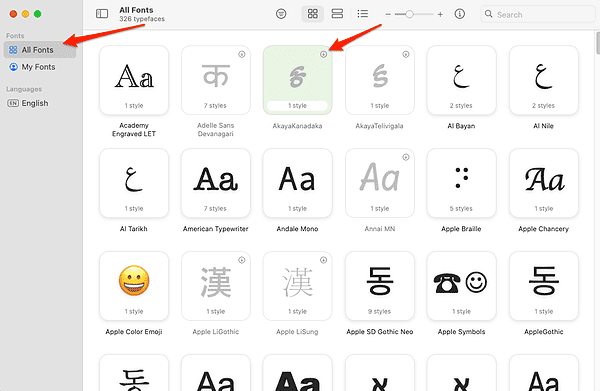
- Since these are system fonts, they will be ready to use and won’t need any validation or activation.
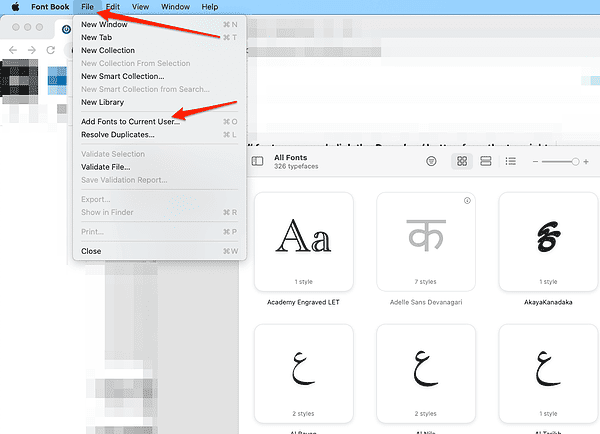
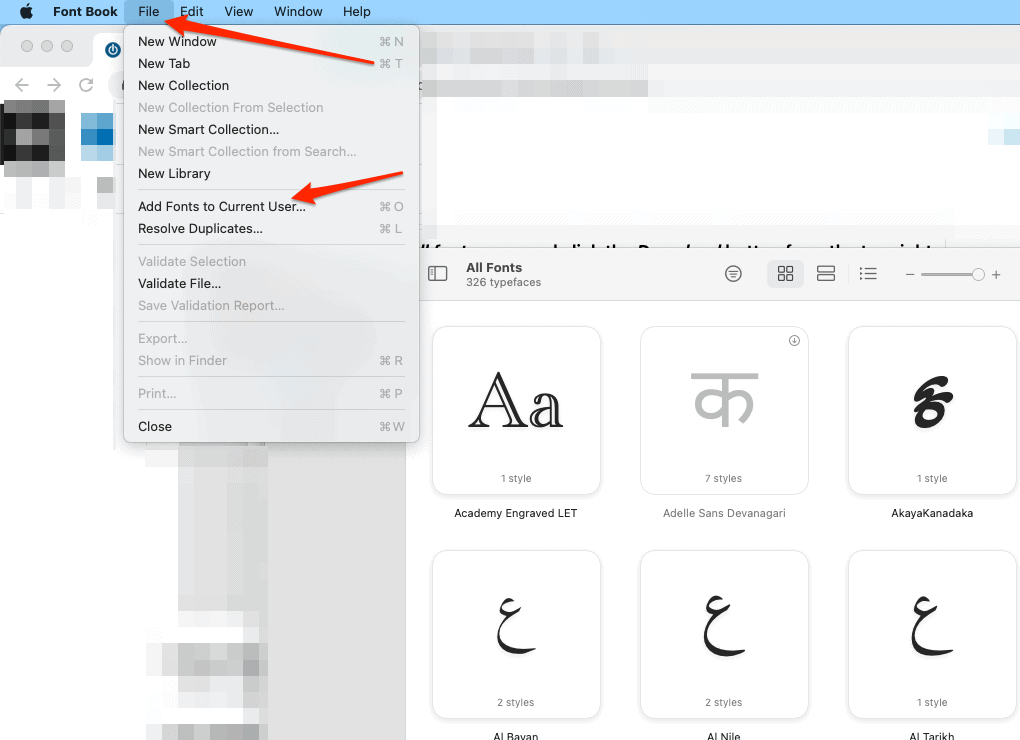
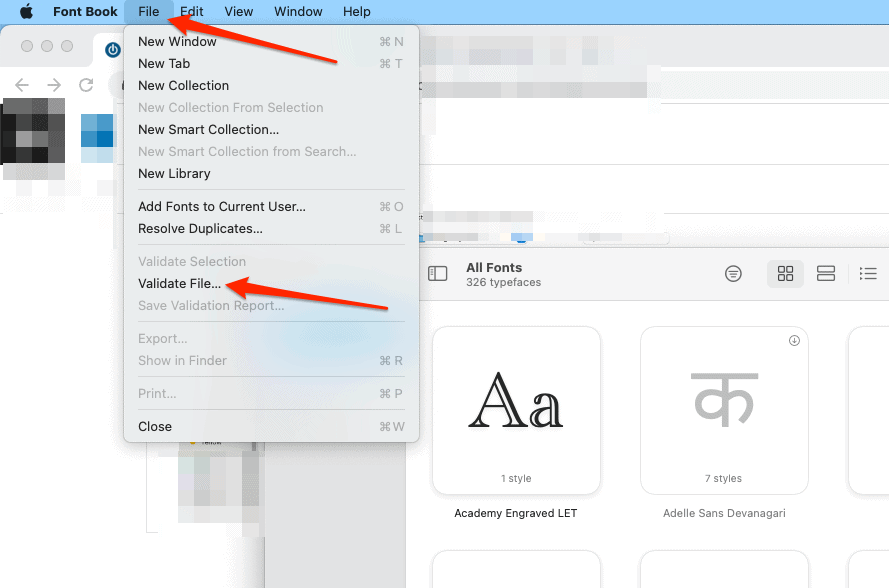
- For third-party fonts, open Font Book then go to File > Add Fonts to Current User.
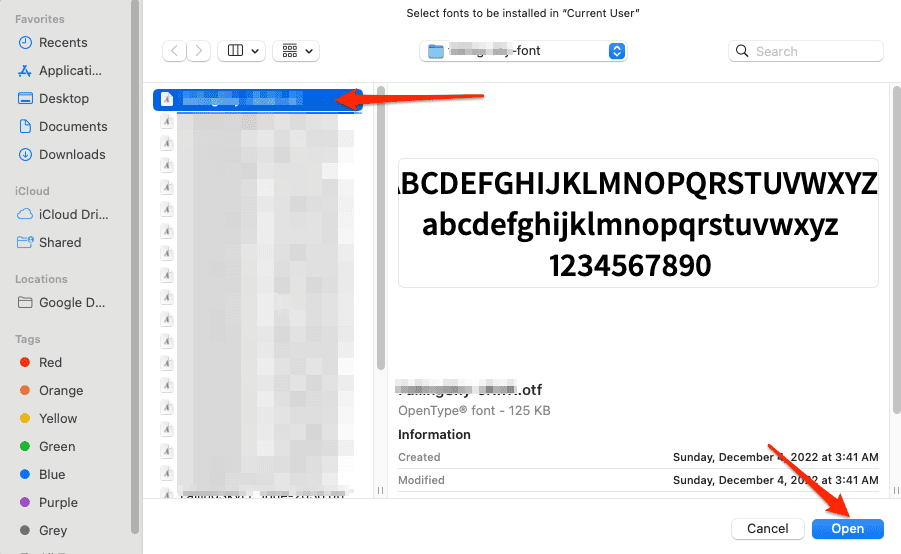
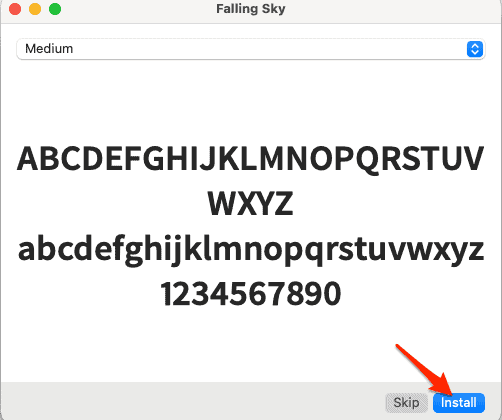
- Select the font file that you want to install then click Open > Install. The font will be automatically installed and validated.
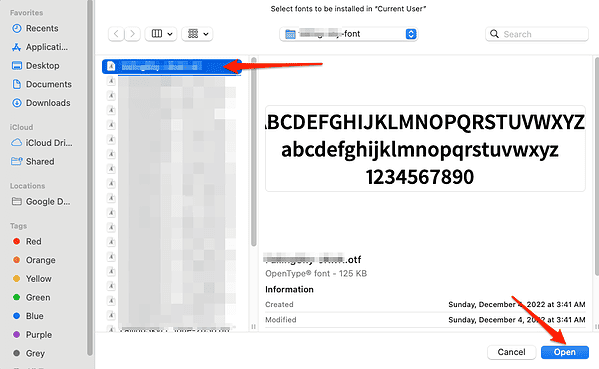
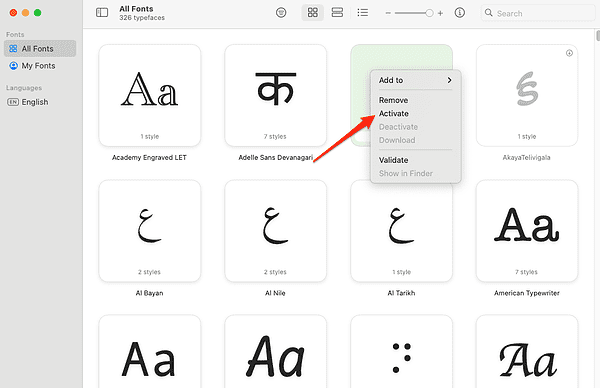
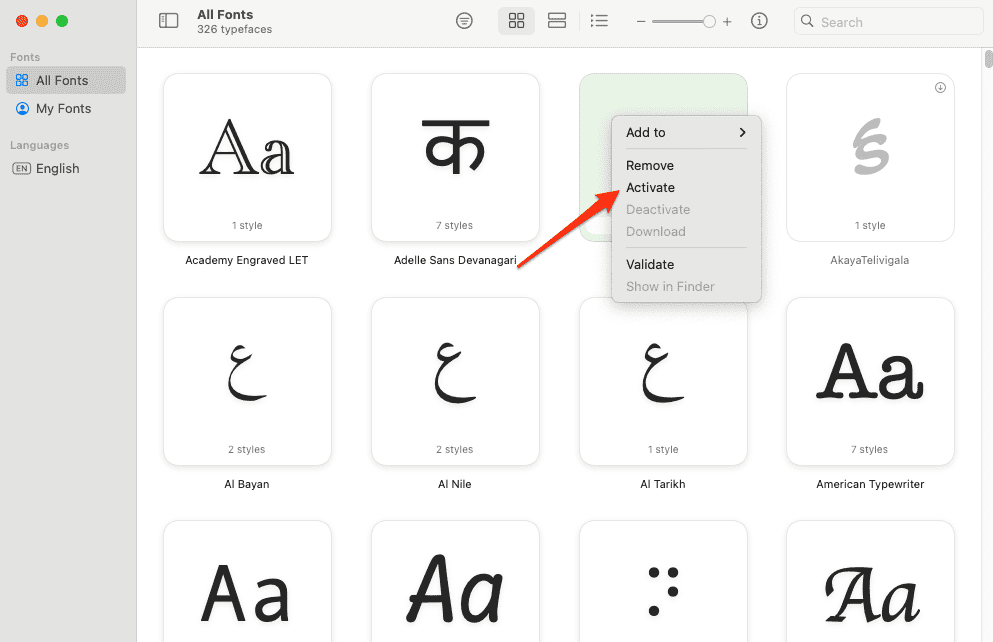
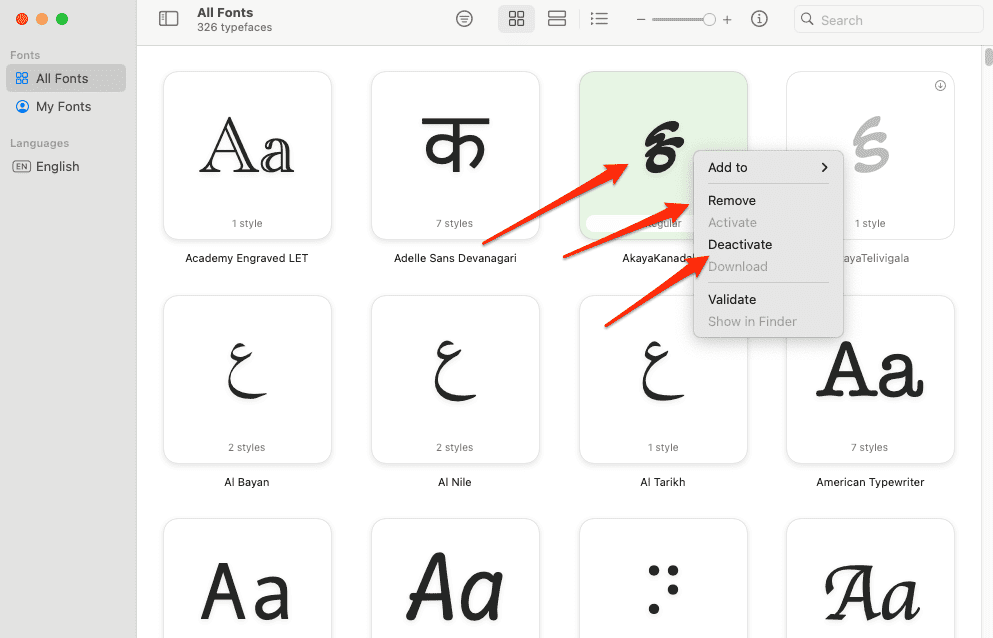
- Optionally, you might also need to control-click the listed font and select Activate.

Font Book will automatically verify and check the font you are installing for faults. Depending on where you choose to store your installed fonts by default, the fonts you add to your computer will either be accessible just to you or to anybody who uses your Mac.
How Do I Validate Fonts in Font Book?
If a font isn’t showing properly or a document won’t open because of a corrupt font, you can verify the font to detect errors. Then remove the font from your Mac.
- Press Command + Space then type Font Book and open the first result.
- Control-click the font that isn’t working properly, then choose Validate.

- If you can’t find the font, then go to File > Validate File. You will be prompted with a new window where you can select the font and then validate it.
If customizing your messages using typefaces isn’t enough and you get the impression that something is still lacking, you may also make use of the special characters that are concealed on your iPhone and Mac.
How Do I Install Fonts on My Mac Without Font Book?
Note that fonts saved in Variable TrueType format (.ttf), TrueType Collection (.ttc), TrueType format (.ttf), OpenType format (.otf), and OpenType Collection format (.ttc) are all supported by macOS.
- Download the font that you want to use on your Mac then open Finder and locate that file.
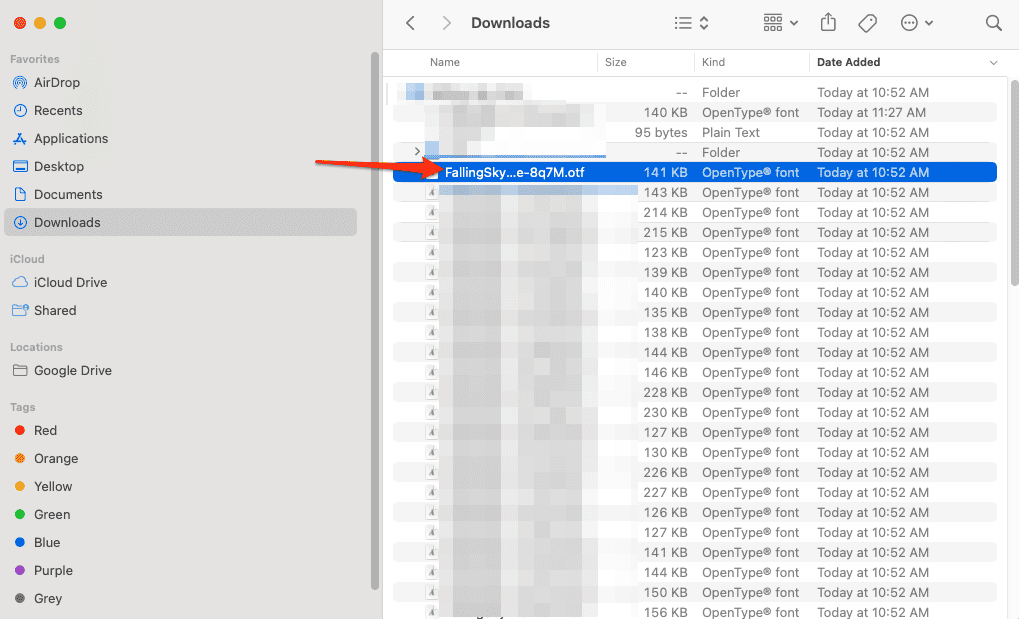
- Double-click the file in order to open it then click Install. This will both install and validate the font. It’s that simple!

How Do I Use a Font That I Downloaded?
When you have finished installing your fonts in the ways that we have demonstrated above, they will immediately appear in the font list of applications such as Pages, Photoshop, Word, Powerpoint, and so on. Select your desired font then start typing. If any issues occur along the way, you will need to revalidate the font.
How Do I Remove a Font from Mac?
When you delete fonts from your Mac, you will no longer be able to access them using the Font Book or the Fonts window. Deactivating a font allows you to keep it on your Mac so you can turn it back on in the future, while giving it a less prominent appearance in the Fonts window.
- Open Font Book by pressing Command + Space and typing its name in the Spotlight Search

- Control-click the font that you want to remove then click Remove. Alternatively, you can choose to Deactivate and reactivate it later on.
Why Can’t I Remove Fonts from My Mac?
Apple doesn’t let users remove system fonts, since doing so can cause damage to your operating system. But, you have the option to uninstall any third-party fonts that you may have installed, as well as any system fonts that weren’t installed by default.
Can You Install True Type Fonts on a Mac?
Fonts saved as Variable TrueType format (.ttf), TrueType Collection (.ttc), TrueType format (.ttf), OpenType format (.otf), and OpenType Collection format (.ttc) are all supported by macOS.
OpenType-SVG fonts may also be used on macOS Mojave and later. Legacy suitcase TrueType fonts and PostScript Type 1 LWFN fonts have a chance of working. However, neither Apple nor I suggest using them.
For more related information, you might want to check out our article on an open-source font app for iPhone and iPad. Don’t forget to leave a comment in the section below and tell us what you think.


What about FontDoctor?
https://fontgear.com/products/fontdoctor-for-macintosh
What about Font Finagler?
https://www.markdouma.com/fontfinagler
I’ve always just used Font Book, so I’ve got no direct experience with either of those. However, the primary focus of this article was how to manage fonts without the use of third-party software.