
So, you’ve spent some time experimenting with Apple File System (APFS). What happens when you’re finished playing with the new file system and want to reclaim that space? It’s not as easy as just erasing the volume in Disk Utility, unfortunately. The current way APFS is implemented, there’s a specific set of steps you need to take when you want to delete your APFS partition.
What’s With the Hassle?
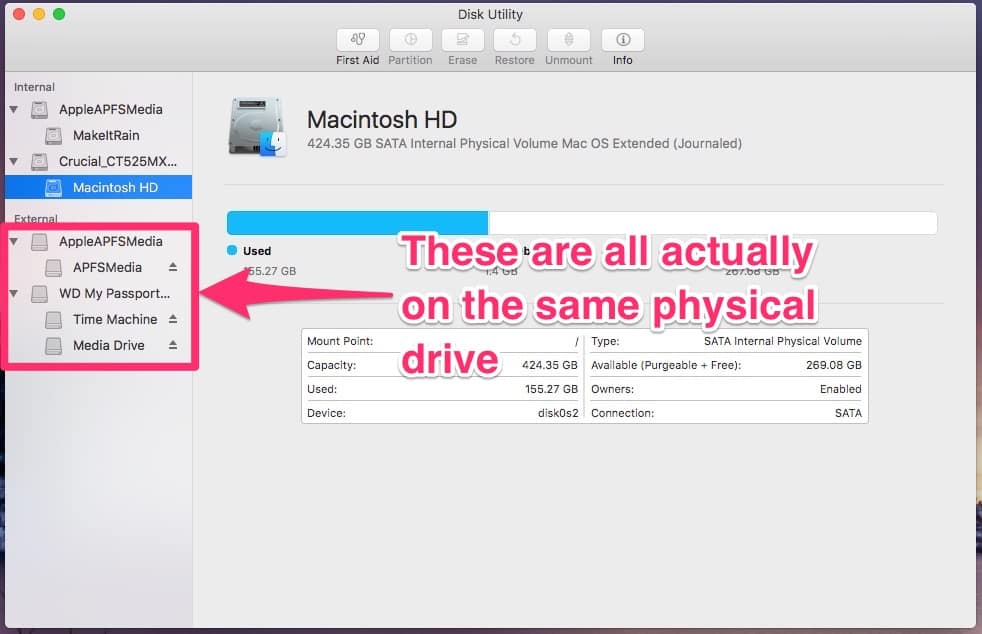
Because of the way APFS is designed, we now have something called a container. This is the base storage unit for APFS, and it’s managed differently from older file systems. Each container can export one or more volumes, the actual “drives” you see in Finder. Because of this, you’ll see an APFS Container and your volumes in Disk Utility, separate from the physical drive the container is located on.
Don’t miss the best of The Mac Observer
Set us as a preferred source and our Apple reporting ranks higher in your Google Search results and Discover feed — one tap, no account changes.
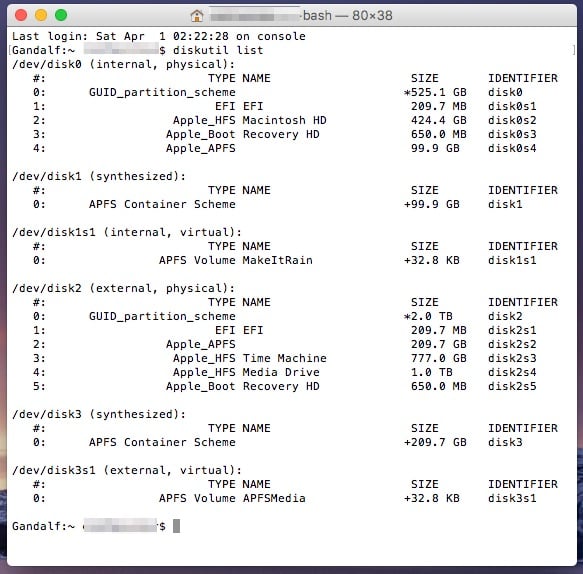
In the Terminal, running diskutil list will reveal this in even starker contrast. You can see disk2s2 in the screenshot below, the partition on my external hard drive hosting the APFS Container. Below that, /dev/disk3 is the APFS container, and /dev/disk3s1 is the APFS volume.
Delete Your APFS Partition the Right Way
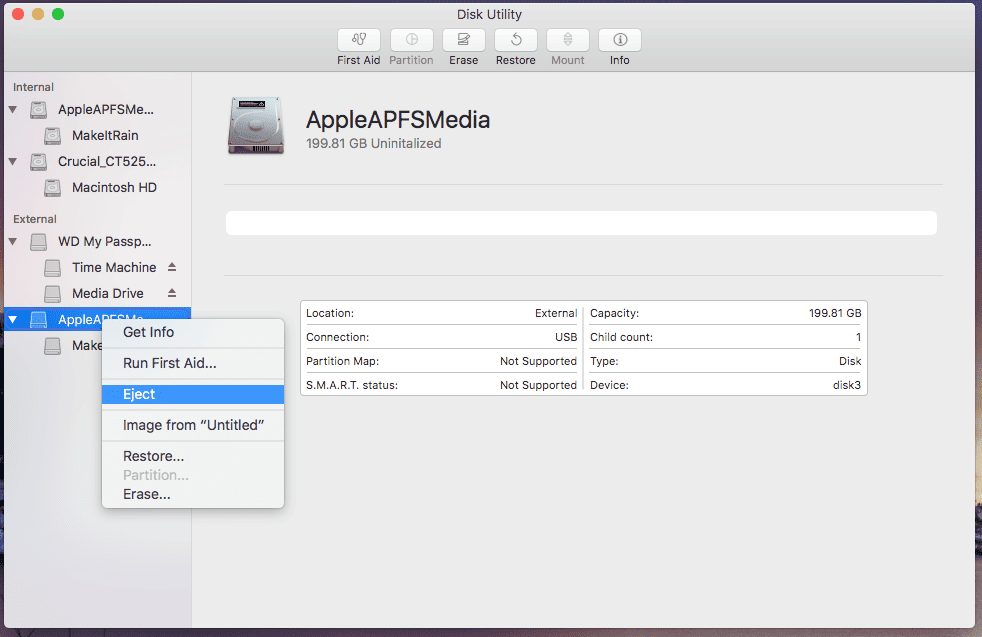
If you use Disk Utility to erase an APFS volume and format it HFS+, you’ll find that the old APFS container sticks around. The same thing happens if you use diskutil the wrong way. This means you can’t merge the partition back into the other partitions on your external hard drive. Here’s what you need to do in order to go about deleting your APFS partition correctly. First, use Disk Utility to eject your APFS container.
Now, launch Terminal and issue this command:
diskutil list
Make note of the device on your external drive (in my case, disk2).
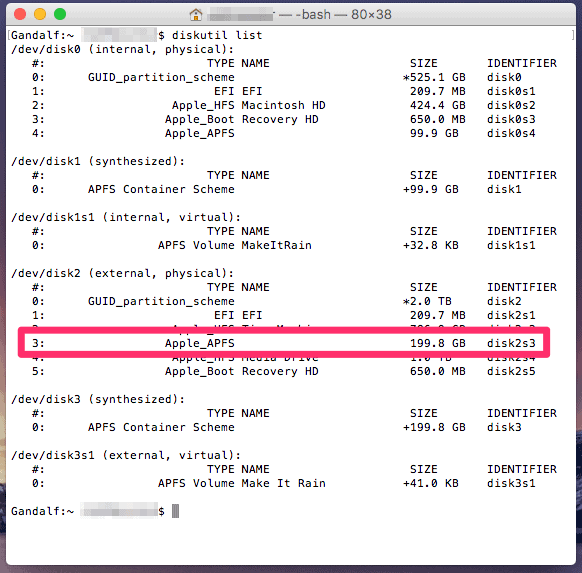
Finally, issue this command in Terminal to delete the APFS container and its volume, replacing disk2s3 with your actual device identifier.
diskutil apfs deleteContainer disk2s3
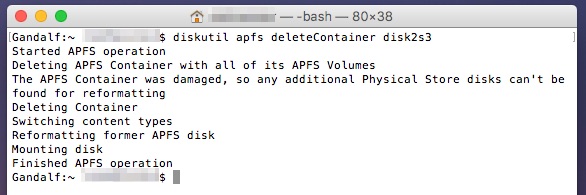
You may get a message that the APFS container was damaged. If so, you can safely ignore that message. However, if the operation fails and you’re working with an external USB drive, try disconnecting the drive and then plugging it back in. For an internal drive, you’ll unfortunately need to reboot.
Remember, It’s Pretty Much Still Beta
Bear in mind that the current tools we have for working with APFS are intended to keep casual users from messing up their Macs. On macOS Sierra 10.12.4, APFS is still rather in a beta stage. I expect the UI tools will get easier to use when all of the kinks are worked out.


It’s all a bit of a pain, I gave up trying as I did not appear to be selecting the right /dev/disk options. I had it working once in the past from these hints, but no joy this time,
Then I had a thought: What happens if I boot into Mavericks 10.9 from a USB drive, what will the APFS partition show up like in Disk Utility? Turns out that you can easily re-partition the drive, as it shows up the same as any other unformatted partition.
Done in seconds without needing to revert to Terminal commands…
I created an account just to say thank you for this article. THANK YOU
Hello, I’m trying to to a clean install of Sierra from High Sierra. How do I proceed from this?
https://imgur.com/a/imdGg
Thanks for this post. I was so confused.
I have two partitions (S1, S2) within a physical drive (Seagate Backup+ SL Media). I wonder if both partitions shouldn’t be within an unique container of the physical drive, instead of how they are right now – image
https://ibb.co/h3i2z5
What partition I must delete?
ok,I do 🙂 diskutil apfs deleteContainer disk1s4