

Hanging indents are a common formatting style where the first line of a paragraph starts with the document margin, while all following lines are indented. You can use Paragraph settings or the Ruler to do a hanging indent in Word for Mac. Both methods are pretty straightforward. If you’re using Pages, you can use the Format sidebar to create a hanging indent or second-line indent on your Mac.
How To Do Hanging Indents in Word on Mac?
When you’re using Microsoft Word, creating a hanging indent is quick and easy. You can do it through the Paragraph settings or using the Ruler. We’ve mentioned both methods so you can choose the one that works best for you.
1. Using Paragraph Settings
Time needed: 1 minute
- Open the Word document and highlight the paragraph(s) you want to indent.
- From the menu bar at the top, click Format > Paragraph.
- You can also right-click the text and choose Paragraph.
- Under Indentation, find the “Special” dropdown and select “Hanging”.
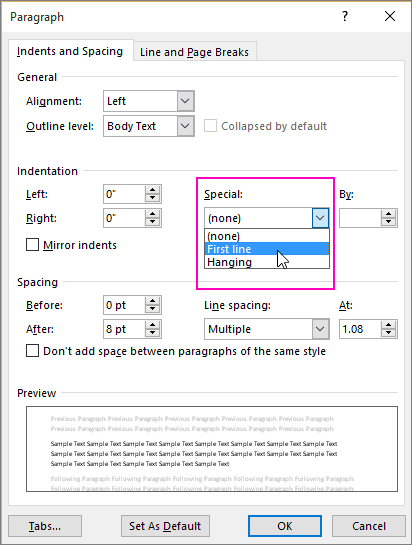
- Now, you can adjust the intent size in the By field.
- Finally, click Ok to apply the hanging indent.

2. Using Ruler
Another handy and quick way to create a hanging indent on a Mac in Word is by using the Ruler tool. This isn’t always visible by default. So, you first have to enable it manually.
Don’t miss the best of The Mac Observer
Set us as a preferred source and our Apple reporting ranks higher in your Google Search results and Discover feed — one tap, no account changes.
- Open your Word document and highlight the paragraph(s) you want to format.
- From the menu bar, click View and make sure the Ruler is selected.
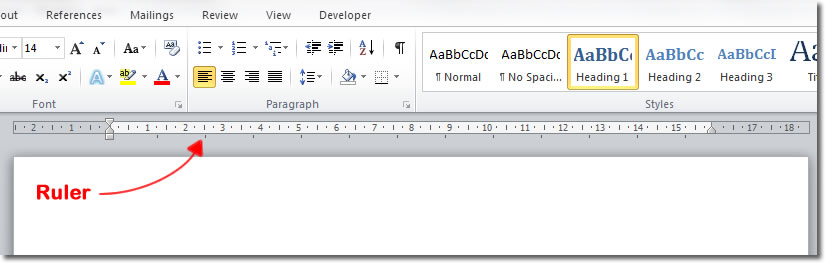
- On the horizontal ruler, you’ll see: A top triangle (First Line Indent), A bottom triangle (Hanging Indent), and a square (controls the overall left margin).
- Highlight the text to which you want to apply a hanging indent.
- Drag the bottom triangle (hanging indent marker) to adjust the indentation level.

How To Do a Hanging Indent on Mac?
If you’re using Apple Pages on a Mac, you can easily create a hanging indent or second-line indent using the Format sidebar. Here’s how to do it:
- Open your Pages document and highlight the paragraph or citation you want to format.
- From the Format sidebar on the right, click the Layout tab.
Scroll down and click the disclosure arrow next to Indents to view the indentation options.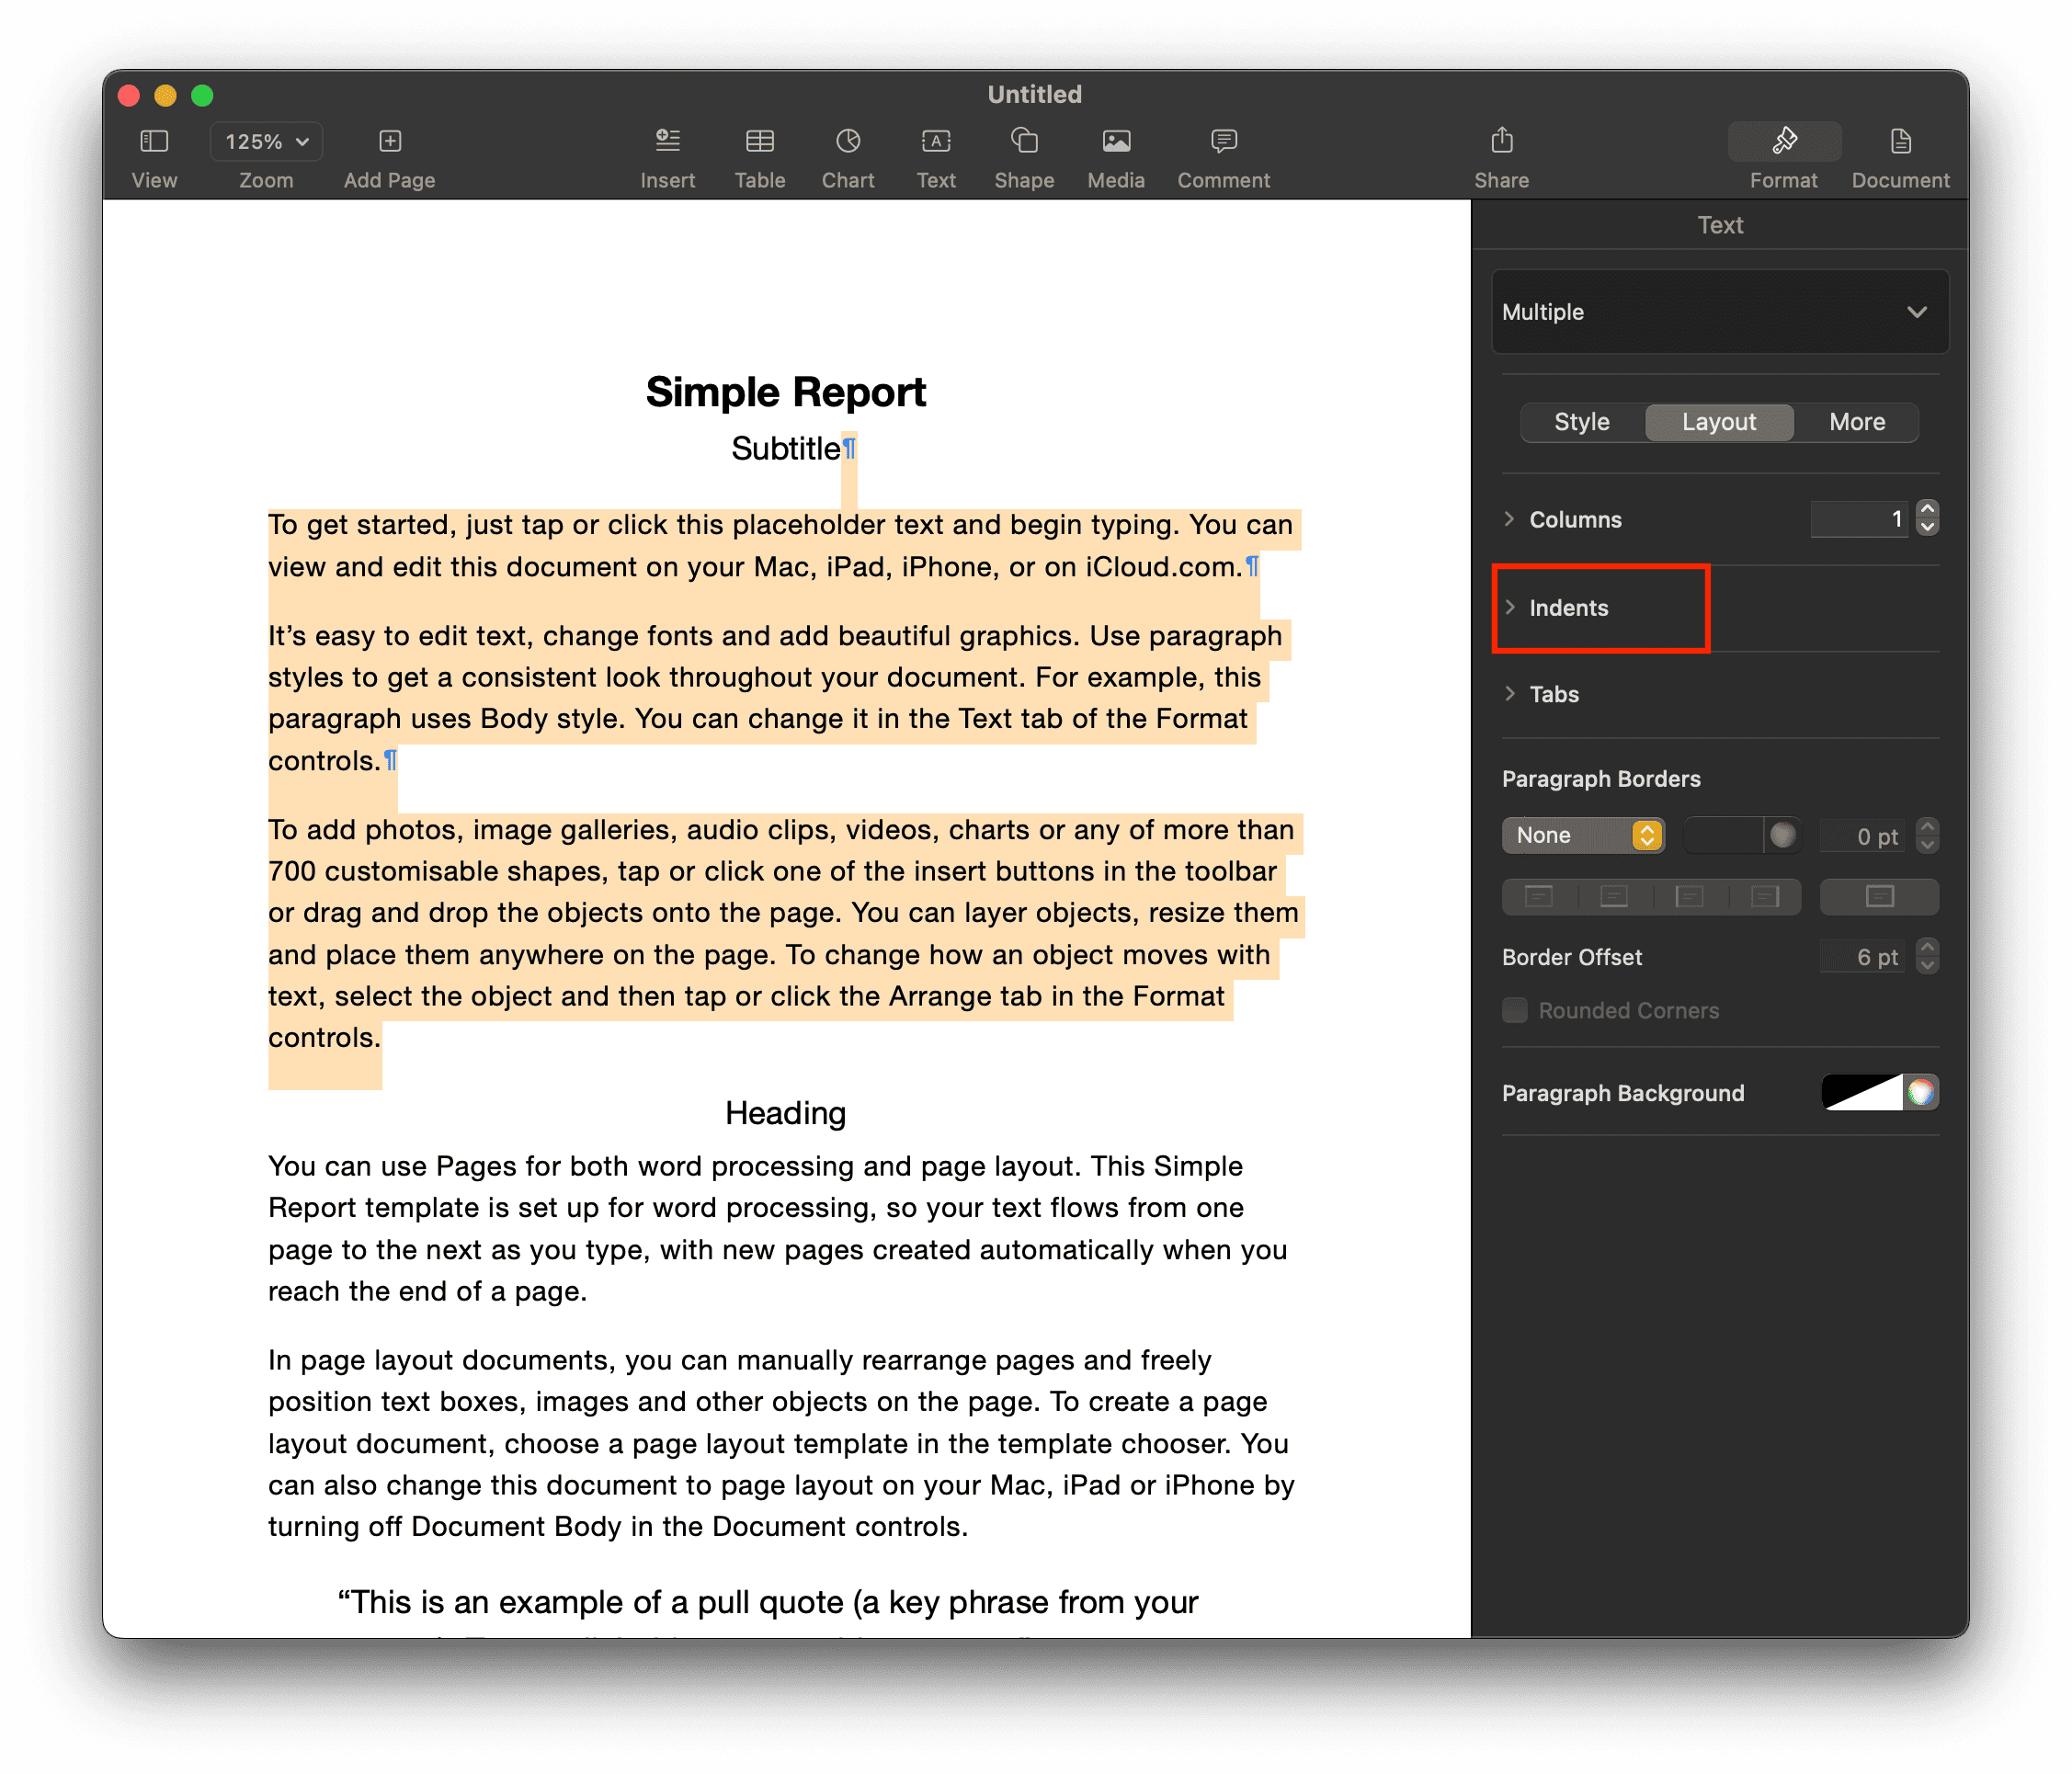
- You can now use the up and down arrows to change the indent’s depth.
From the Format sidebar on the right, click the Layout tab.
Scroll down and click the disclosure arrow next to Indents to view the indentation options.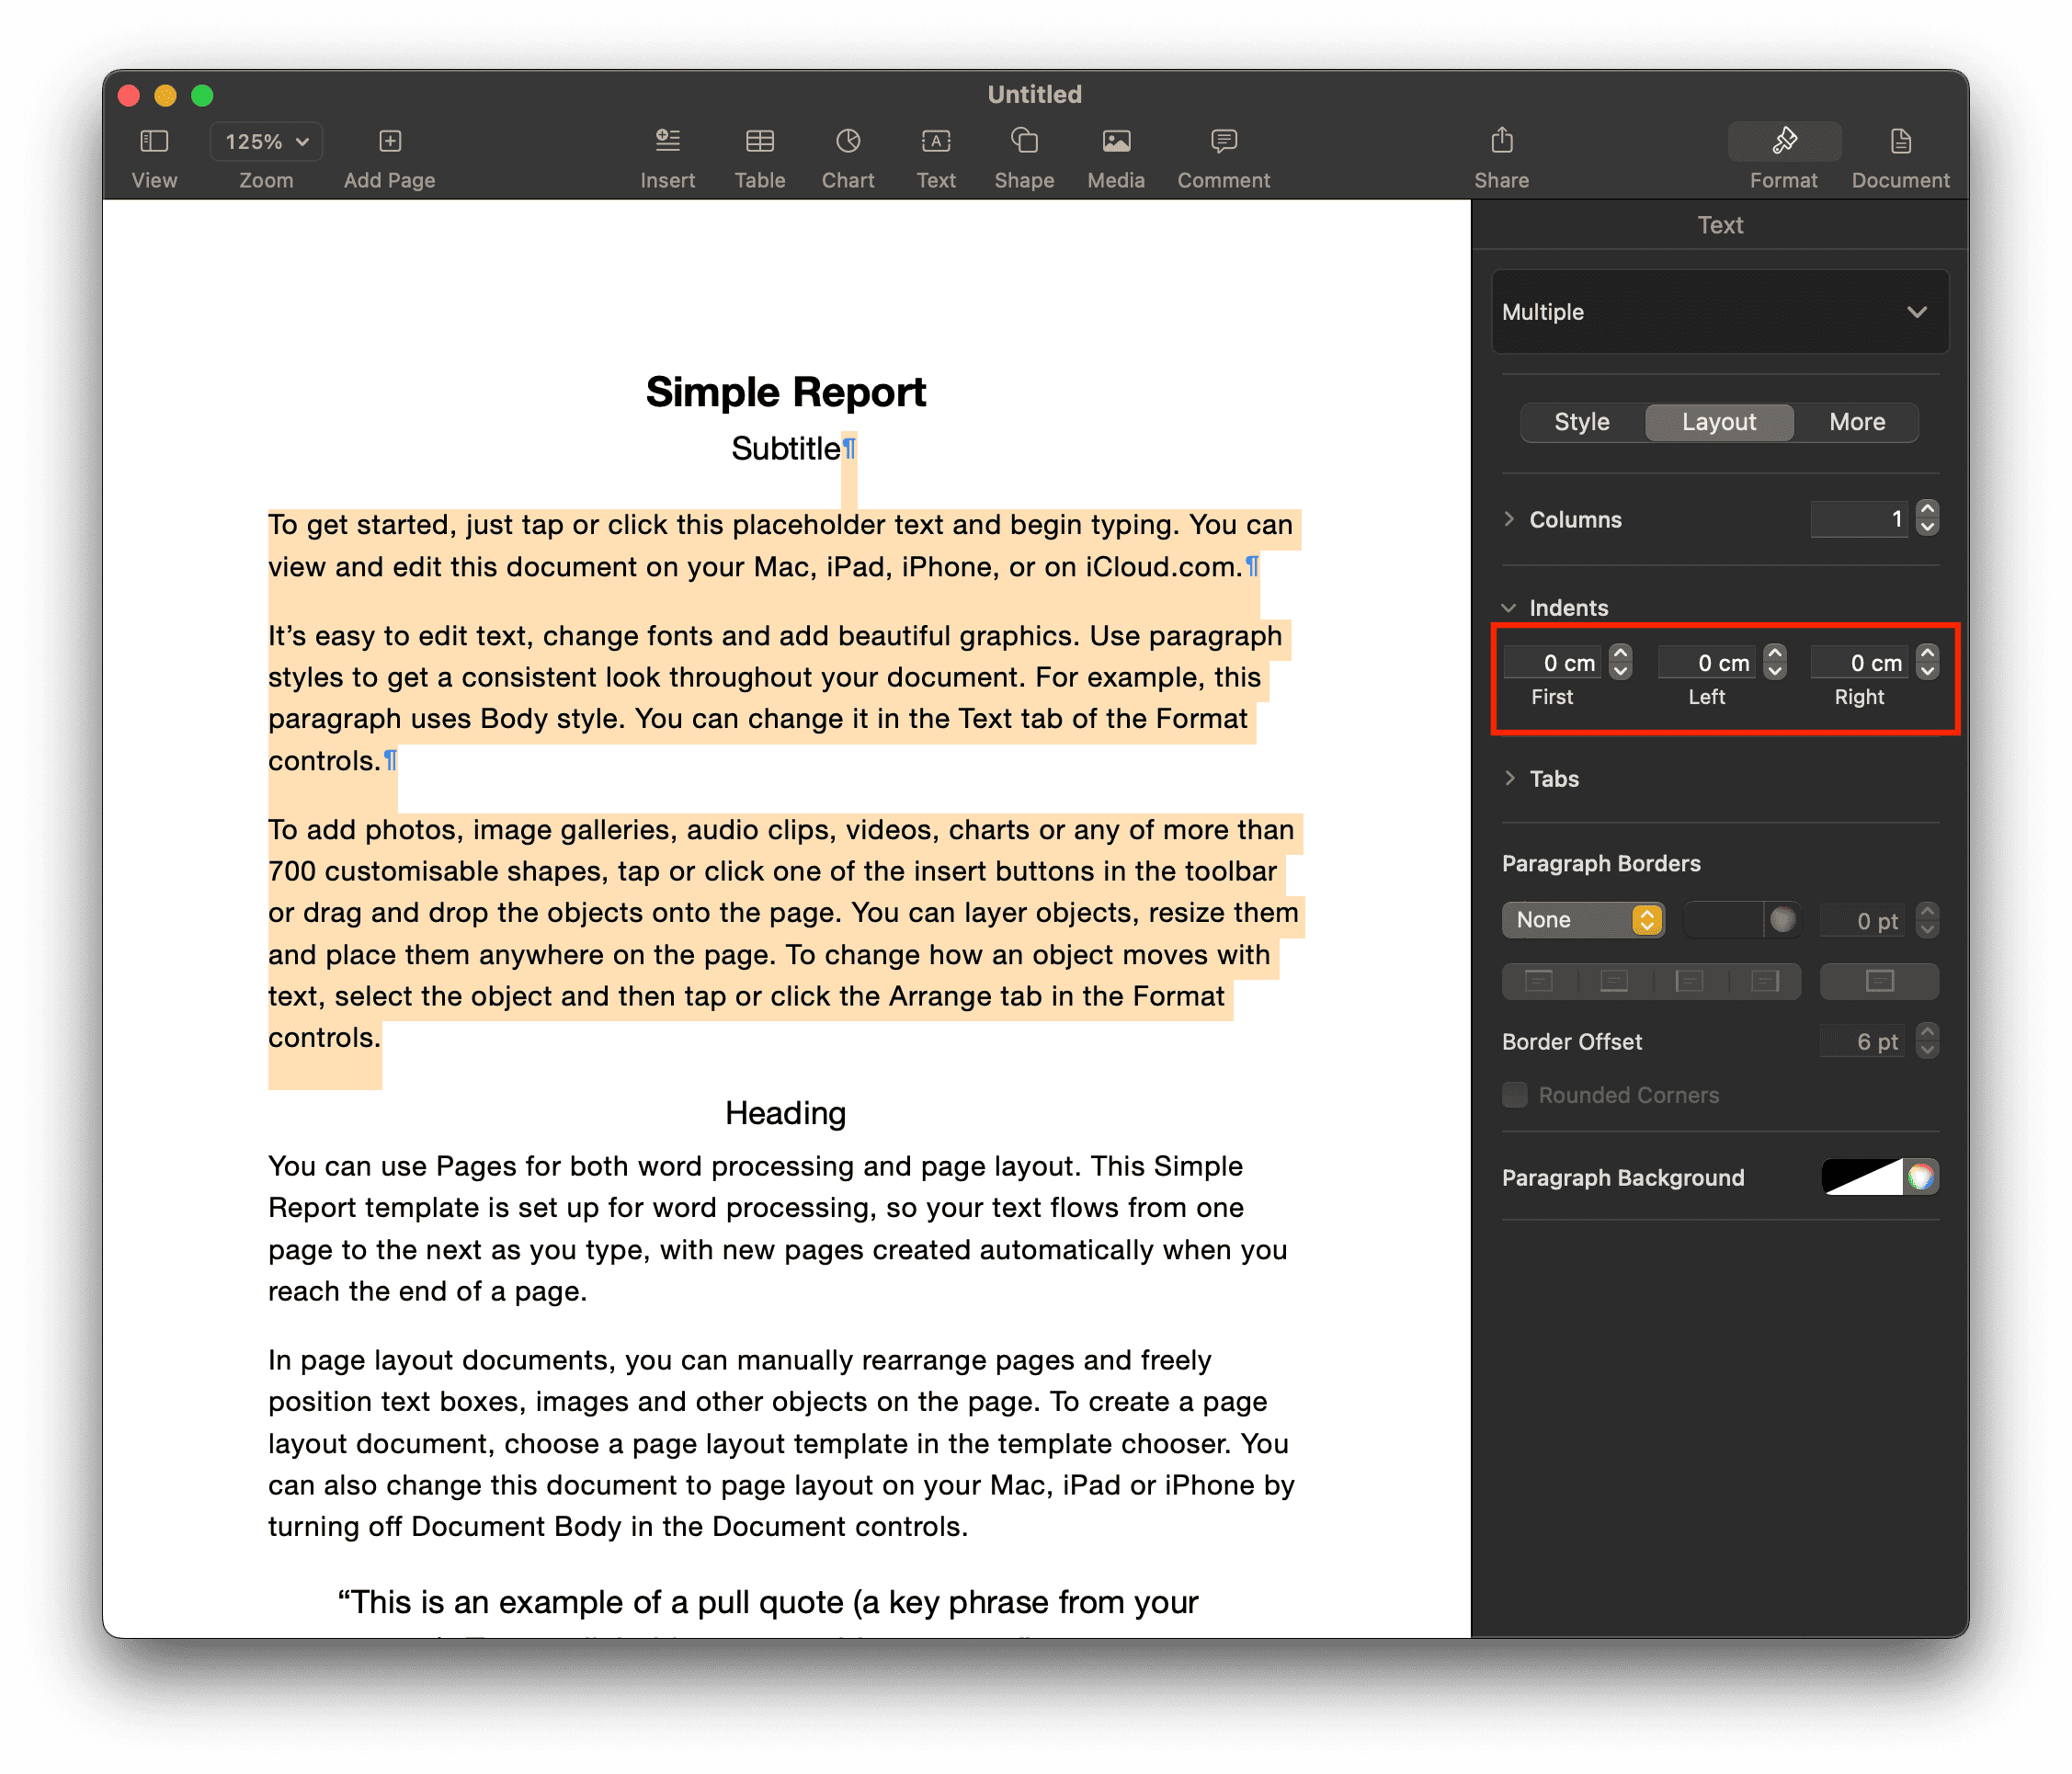


This will help align your paragraphs properly, helping you achieve exactly what’s needed for well-formatted citations.


Discussion