
Those that use iMovie should know there is an easy way to fade music and audio, regardless of whether you’re using the program on Mac, iPhone or iPad. Having the ability to control the fade of your audio can be incredibly useful when editing a project, as it can ultimately give you more control in regard to the overall sound of your project. Being able to fade audio also adds another element to polish your video.
For Apple users, the company provides iMovie completely for free. Available on Mac, iPhone and iPad, the program can be incredibly powerful for both novice and experienced video editors. In addition to a host of features, such as being able to utilize Green-Screen or create other video effects, users can also adjust the audio of their project, including the ability to fade audio in or out.
Where is the Fade Button in iMovie?
If you’re looking to fade your audio, it’s really just a matter of finding the fade button, which is within the audio visual of your workstation. For users that are looking to fade audio either in or out within iMovie on their Mac, simply follow these steps.
Time needed: 1 minute
How to fade audio in iMovie for Mac.
- First, open iMovie and go to the project that you are looking to fade the audio.
- Place your cursor over the audio in your project. You will then see two fade handles. The one at the start of the clip controls the fade-in, whereas the control at the end will handle the fade-out.
- Drag the controls either left or right to control the amount of fade.
Be sure to check your work. The undo button may be your friend in this situation.


Can You Fade Music in iMovie on iPhone?
For those using an iPad or an iPhone, you are also able to adjust the fade in your project. However, before you begin, you will need to ensure that you have the audio separated from the video, which I will also show you how to do.
To separate the audio from a video clip from your iPhone or iPad, simply follow these steps.
- Open your project in iMovie.
- Tap a video clip to show the inspector at the bottom of your screen.
- Select the Actions button (pair of scissors) and then select Detach.
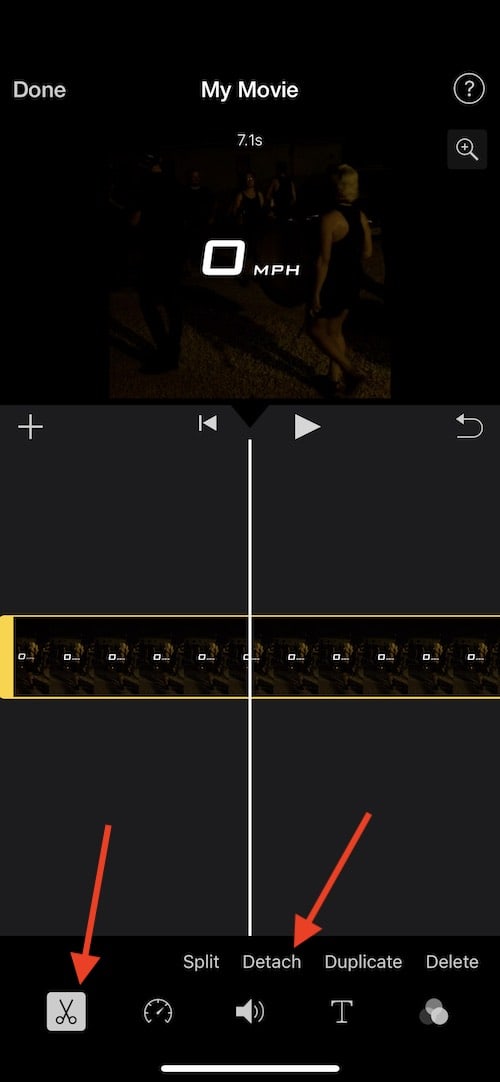
- You will now see a blue audio clip below your video clip.
You can freely move, edit or delete the audio clip.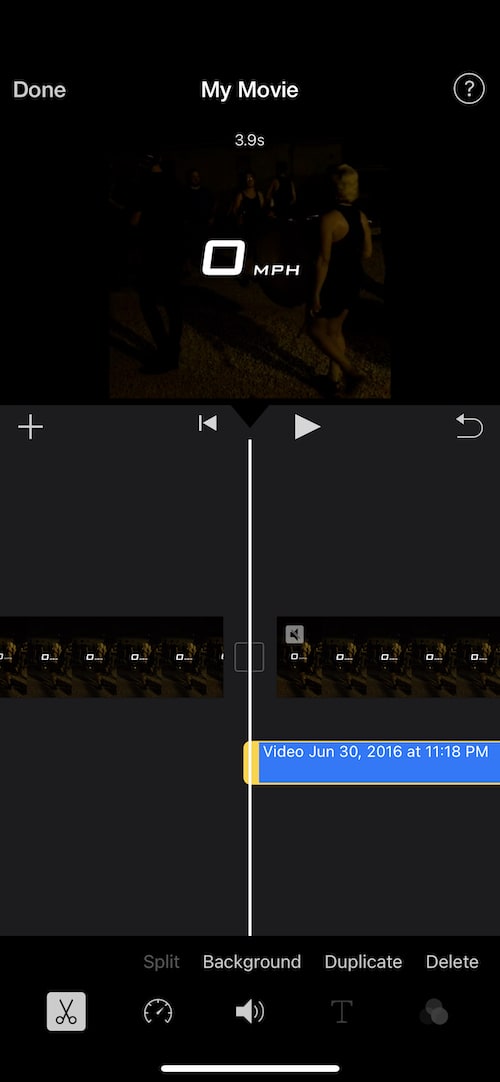


Now that the audio is separate from the video, you can fade the audio in or out. To do this, follow these steps:
- Tap your audio clip to show the inspector.
- Select the Audio button (looks like a speaker).
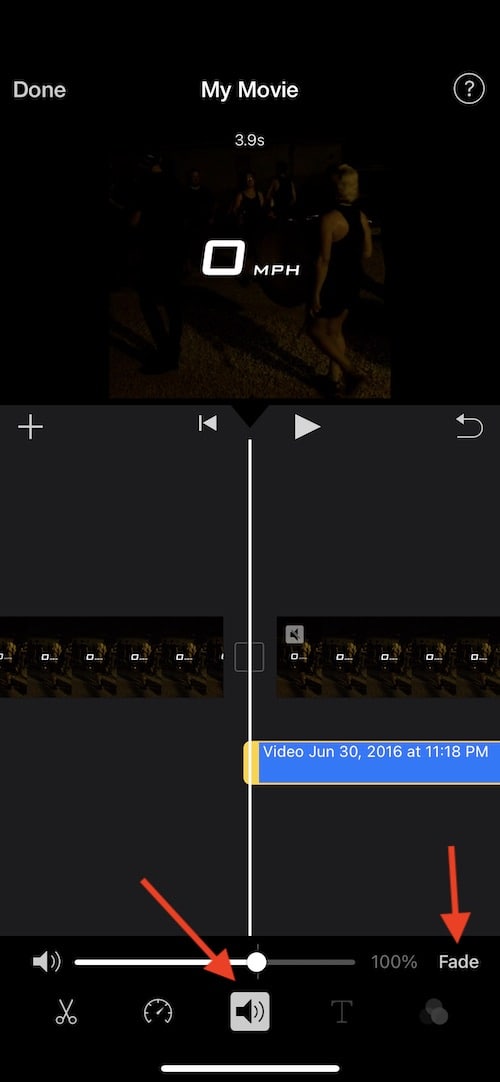
- Then, select Fade. This will reveal the fade handles at the start and end of your clip.
Just like on Mac, dragging the handles left or right will adjust the fade of your project.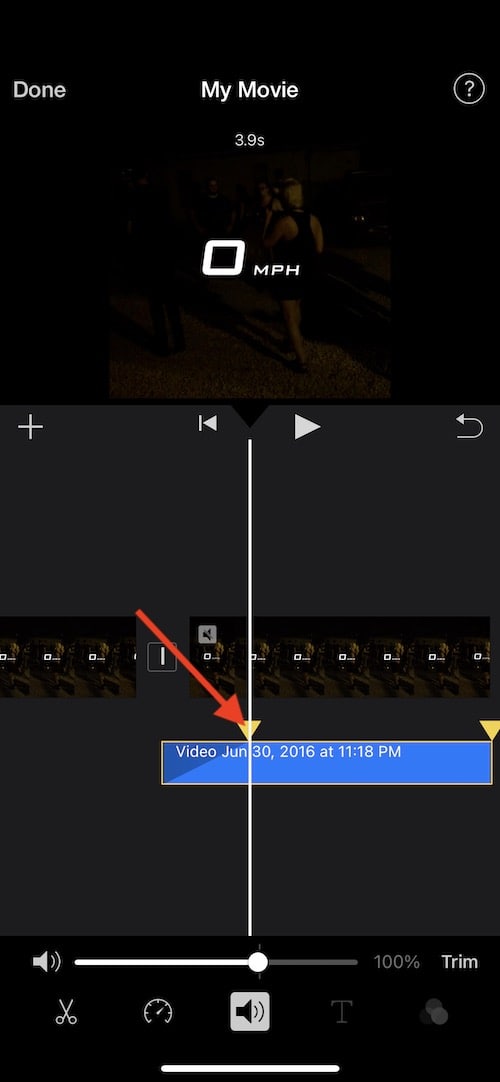


And it’s just that easy! From here, you will easily be able to control the fade of your project.
Getting the Most Out of iMovie
Regardless of whether you are using iMovie on your Mac, iPhone or iPad, being able to control the fade of your audio is rather easy. It’s really just a matter of making sure you know where the setting is located. On iPad and iPhone, it’s also just a matter of making sure you have the audio separate from the video.
Using iMovie, users can create an almost unlimited array of different video projects. Being able to adjust the fade of your audio with a particular video clip not only gives you more flexibility with editing, but also provides an additional element that can add more polish to your project overall. While a user may need to experiment to get their audio exactly where they need it, following these steps will give them the tools to do so.


I have a devil of time clicking on that in either iMovie or Final Cut Pro; it is one thing that Apple could improve upon.