
Page 4 – Next: Multiple Email Addresses, Exchanging Certificates, Sending Encrypted Email
A “Gotcha” for Those With Multiple Email Addresses in the Same Account
If you’re using certificates for multiple email addresses within the same account, things get a bit hairy. You’ll need to choose each certificate at least once in the Settings > Mail > [Account] > Advanced > S/MIME sections for both Sign and Encrypt by Default. After each one, be sure to save changes by tapping Advanced > Account > Done, as above.
If you’re using certificates for multiple email addresses within the same account (multiple From: addresses), things get a bit hairy. You’ll need to choose each certificate at least once in the Settings > Mail > [Account] > Advanced > S/MIME sections for both Sign and Encrypt by Default. After each one, be sure to save changes by tapping Advanced > Account > Done, as above.
It seems that selecting the certificates here activates them for Mail to use for future signing and encrypting. Additionally, based on our tests, it doesn’t seem to matter which certificate is checked here, just so long as each of them has been checked at least once.
Exchange Certificates With Your Recipients
In order for encrypting email with iOS Mail to work, you have to exchange public certificates with your recipients. Simply send an email, asking for a reply back after your recipient has followed the same steps. Forward this article to your recipients so they can follow all of the required steps.
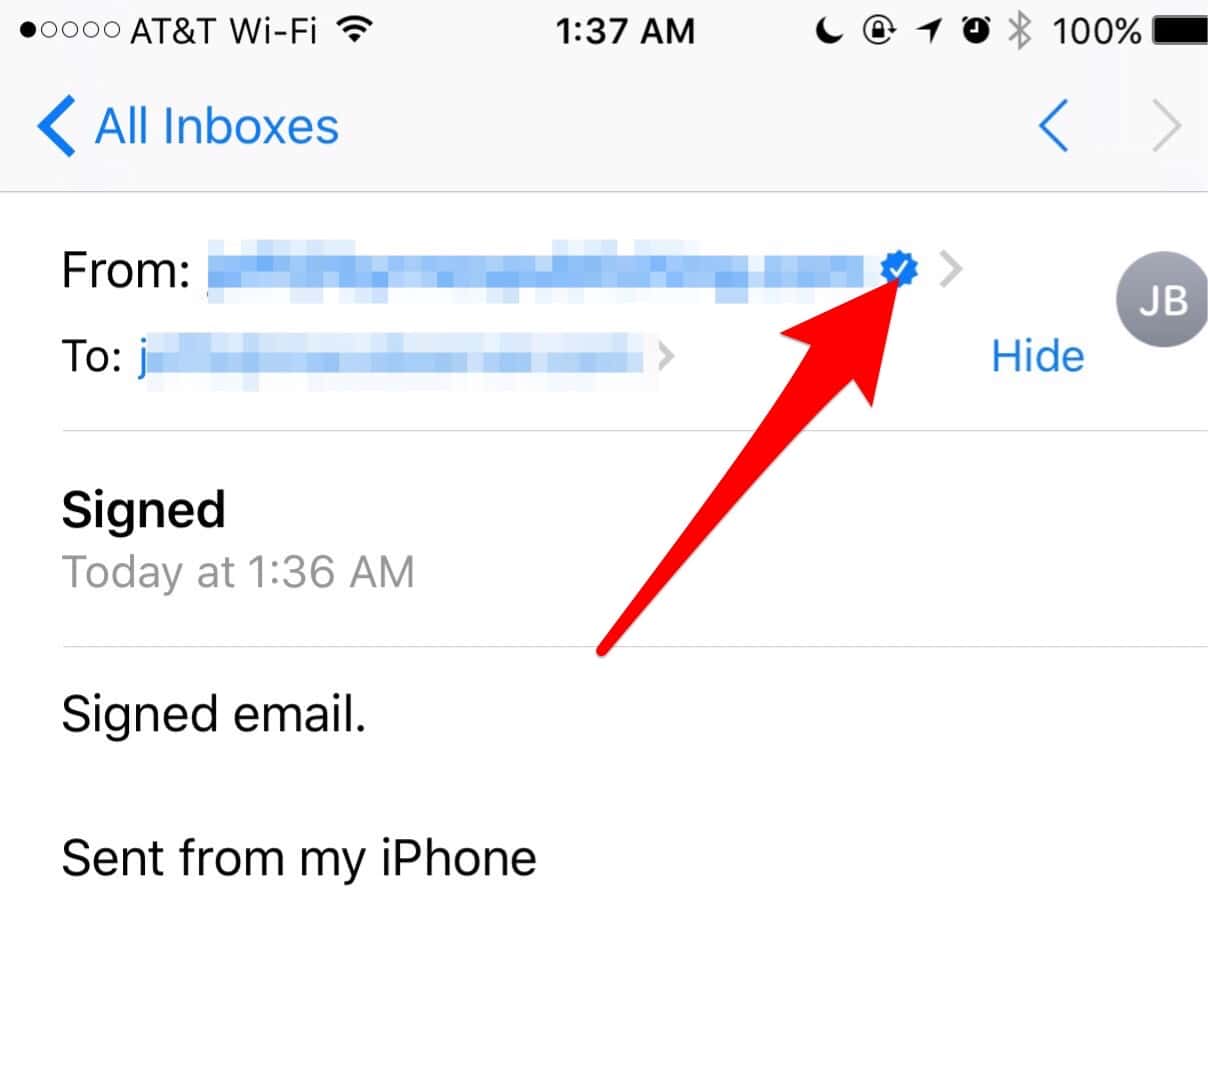
When you receive the reply from your recipient, there should be a blue check mark beside their email address, along with a tick. Now you need to install their public certificate on your iPhone or iPad. Tap the check mark or the email address to get to the next step in doing so.
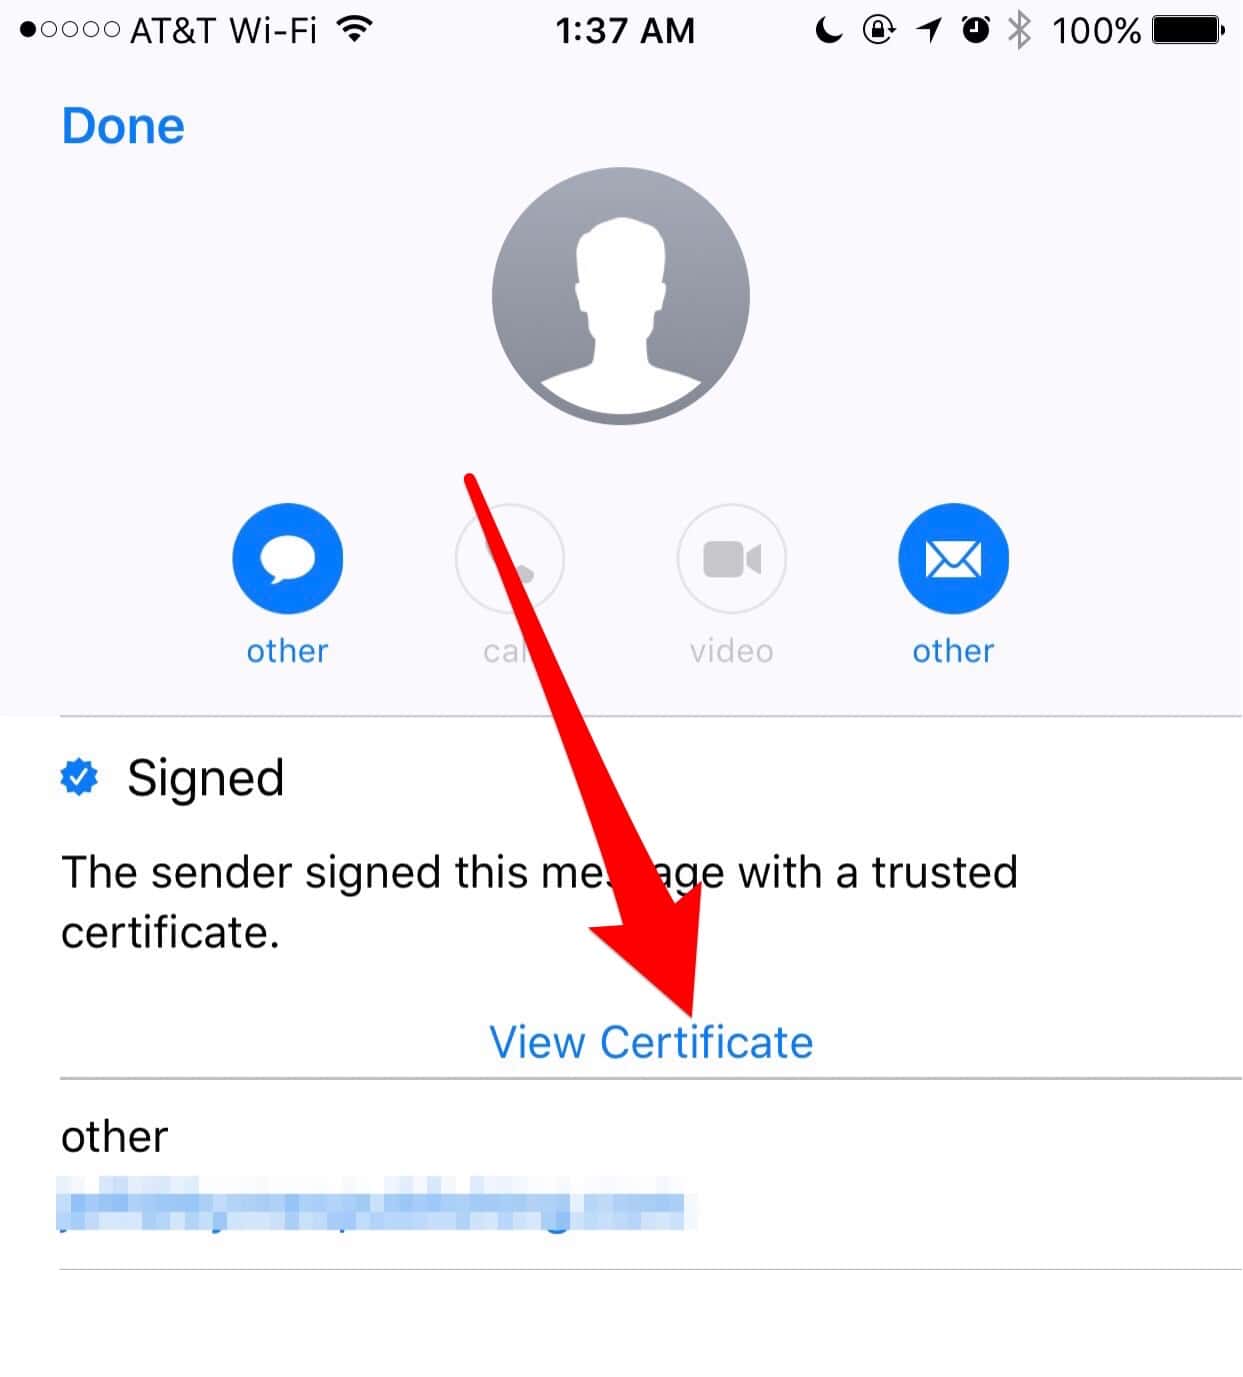
The next screen tells you the recipient signed the email with a trusted certificate. Tap on View Certificate to begin installing the public certificate into the iOS Keychain.
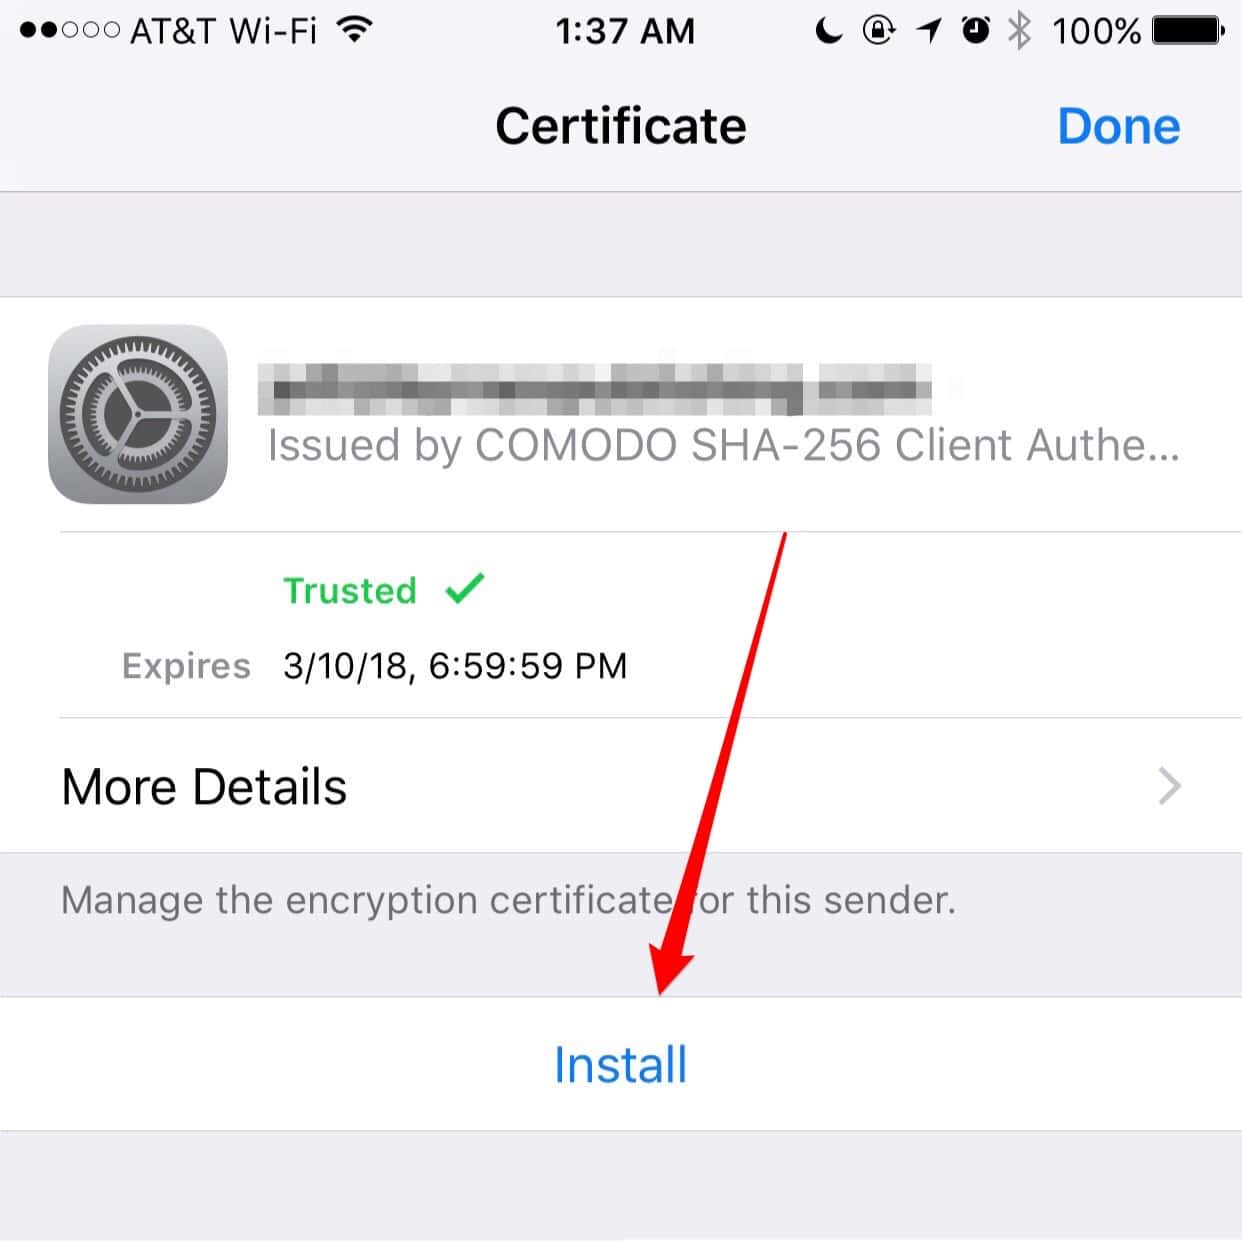
You’ll see the certificate on the next screen, with an option near the bottom to Install. Tap that menu item, then tap Done in the top right corner.
Make sure your recipient does this too. Your recipient won’t be able to open your encrypted email if they don’t.
Send Your First Encrypted Email
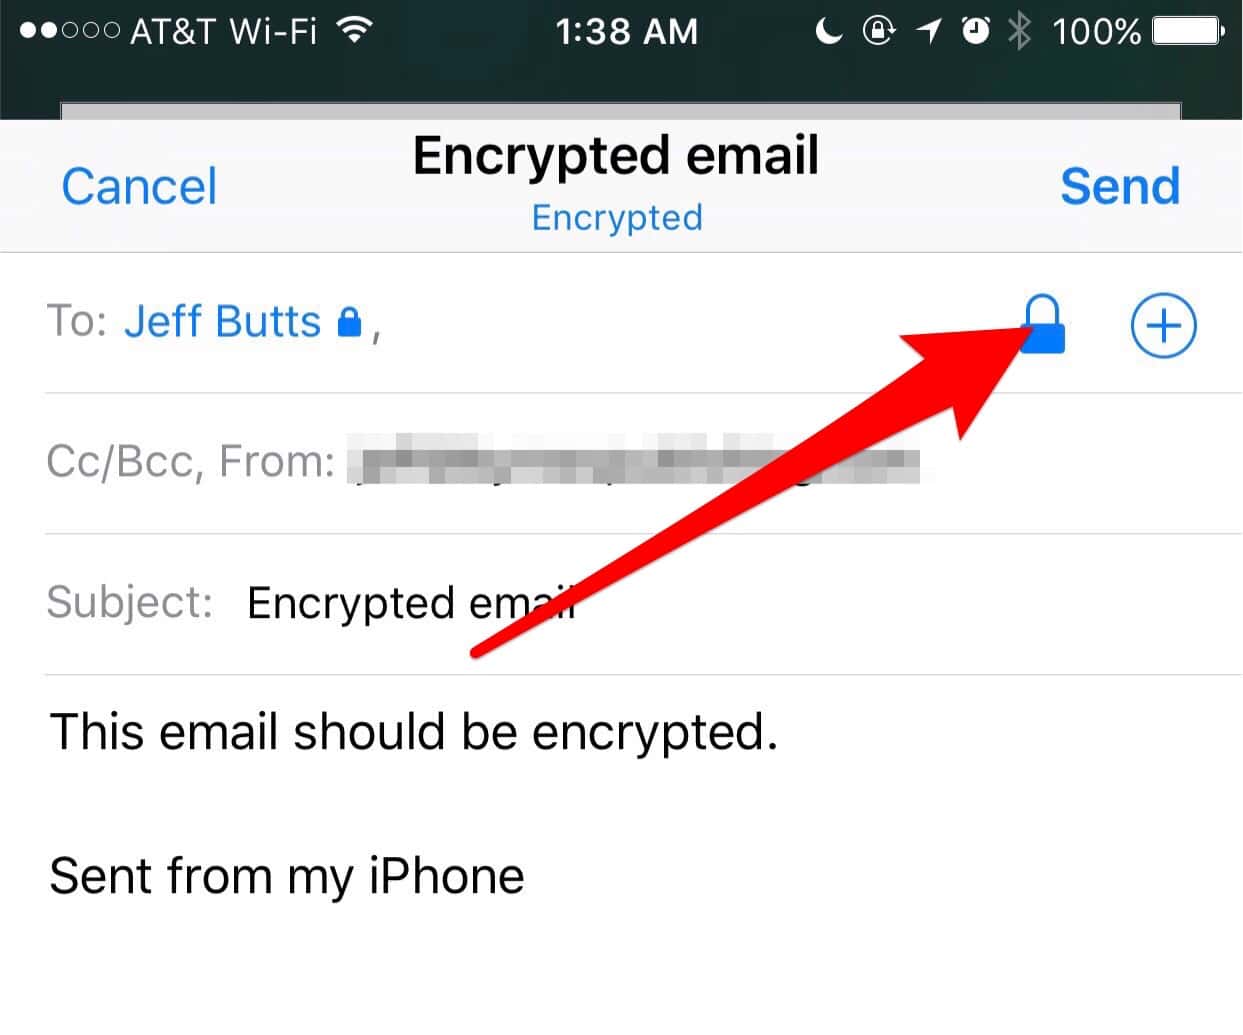
Now you should be able to send encrypted email with iOS Mail. Go into the Mail app, and compose a new message. After you’ve typed in your recipient’s email address or chosen it from the address book, tap in the To: field again. You should see a blue lock to the right, just beneath the Send button. Tap the unlocked blue lock. That tells Mail to send an encrypted email. Leave the lock alone if it is already locked.
Now, go ahead and type out your email, and tap Send. Mail will send your encrypted email. Nobody will be able to read it without your public key.
This article has been updated to reflect changes in setting up encrypted email on iOS 14.


This article worked great for the Mail app in iOS 10.x, but then Apple released iOS 11 and blew everything up. It would be most helpful if an updated version of this article for iOS 11 couild be posted.
Thanks!
Many thanks for this article. It’s a great help for those of us who need to set up encrypted mail on iOS and can’t use Apple’s Configurator 2 utility to do it.
@khurt: The procedure described in the article above isn’t “doing it wrong”. It’s currently the only way that makes it possible to set up encrypted mail in iOS for anyone who is using anything other than macOS 10.12.2.
In my case, I’m in the middle of a project on my Mac Pro (running Yosemite 10.10.5) that will extend to December. Alas, thanks to the tyranny of the App Store, there is no version of Configurator available that will run in Yosemite. Configurator 2 is all that is available, and it runs only on macOS 10.12.2.
I have hundreds of apps and plugins, and disrupting my workflow with a new system installation in the middle of a project would be an idiotic move. No thanks. This article made it possible for me to set up encrypted mail on my iPad, despite Apple’s refusal to provide a version of Configurator that will work with a version of OS X that is (nominally) still supported.
Your’re doing it wrong. I wrote this in 2011 but it still works.
https://islandinthenet.com/ios-5-secure-mail/
Video how to configure S/MIME for free (and renewable) Fossa X.509 certificates either on Mac https://www.youtube.com/watch?v=Fyc5YW3BS0Y iOS https://www.youtube.com/watch?v=beQM4nLWGxs&t=49s and to exchange email with web Gmail.
@Scott B: You’re absolutely right. This really should just work, but it never has. Perhaps I’ll write an op-ed some day lamenting that fact …
@MrJosefKafka: Actually, there is such an article already. Check out my article, MacOS: Using Email Encryption in Apple’s Mail for a walkthrough.
Nice article for the geeks, but this highlights what is wrong with the system: could I get my father to follow along in order to send private messages in email?
Until someone comes up with a way for anyone to use encrypted email without having a computer science degree, it’s a kludge.
(I know… my inner curmudgeon is showing)
The cert goes into the System keychain, but then it propagates into the others 🙂
Oh, I see how to do it. 1) it does have to be in the Login keychain, 2) select the My Certificates category, and 3) twist down the triangle next to the certificate and select the key inside the certificate. That will export a p12 file. Oddly, once I’ve done this I can export directly from the certificate too.
@Jeff Butts: Thanks for the tip. 1) the instructions that you linked to suggest putting the cert in the System keychain, and 2) exporting from the Login keychain also does not allow p12 export.
@deh2k: Make sure you’re in the Login keychain, looking under My Certificates.
Nice piece. Thanks for putting it together. However the p12 file type export option is gray and unavailable on my Mac, so I’m stuck.
Thanks a great piece, would love to see a “how to” for Mac mail.
Thanks again