
You may have heard that Cupertino is developing a new file system known as the Apple File System (APFS). This particular file system became the default for iOS as of 10.3. By the end of 2017, APFS is expected to become the default on macOS, watchOS, as well as tvOS. If you want to experiment with an APFS drive now, you can do that as long as you have macOS Sierra 10.12.4 or later installed.
Proceed With Caution
Remember, APFS is still in development. Right now, you can’t use it for your startup disk, for Time Machine, for FileVault, or with a Fusion Drive. You also won’t find an option in Disk Utility just yet for formatting a partition as APFS. When APFS launches as a final product, we can expect those limitations to change. There will likely also be a method to convert your HFS+ drive to APFS without deleting any data.
Don’t miss the best of The Mac Observer
Set us as a preferred source and our Apple reporting ranks higher in your Google Search results and Discover feed — one tap, no account changes.
If you really want to experiment with APFS and are comfortable with the command line, here’s what you need to do.
Format APFS Drive in macOS Sierra
The first thing you need to do to format APFS drives is launch Terminal. Then, run the following command to find the device identifier of the disk you want to format as APFS.
diskutil list
I decided to blow away my Boot Camp partition on my external hard drive, so I was looking for a listing called BOOTCAMP.
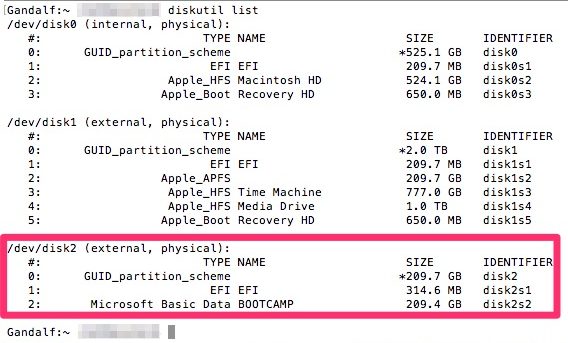
In my case, the device identifier was disk2s2. Yours is liable to be different, so be very careful with the next step. Entering the wrong one in this command could result in formatting the wrong drive and losing important files. Take a deep breath, count to five, and type this command into your Terminal window.
diskutil apfs createContainer /dev/disk2s2
Again, make sure you type in your own disk identifier, not necessarily mine. macOS will unmount the drive, delete the partition, and then create an APFS container.
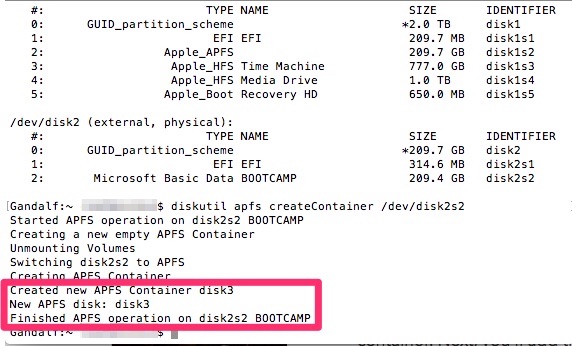
You’ll see the progress, and notice that the command tells you the name of the APFS Container.
Created new APFS Container disk3
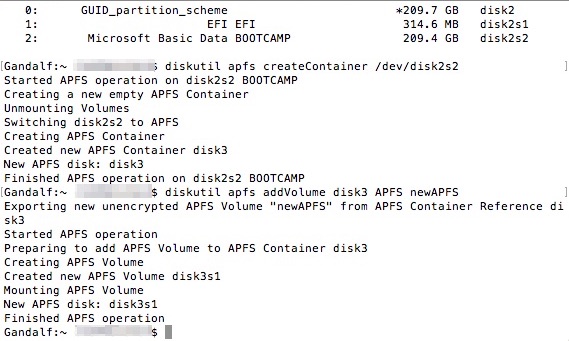
Your own output will probably be different, so pay careful attention. Next, you’ll add the APFS volume. To do so, go back into Terminal and enter the following command.
diskutil apfs addVolume disk3 APFS newAPFS
Replace disk3 with the name of the APFS Container. You can also replace newAPFS with whatever you want to name your newly created APFS drive.
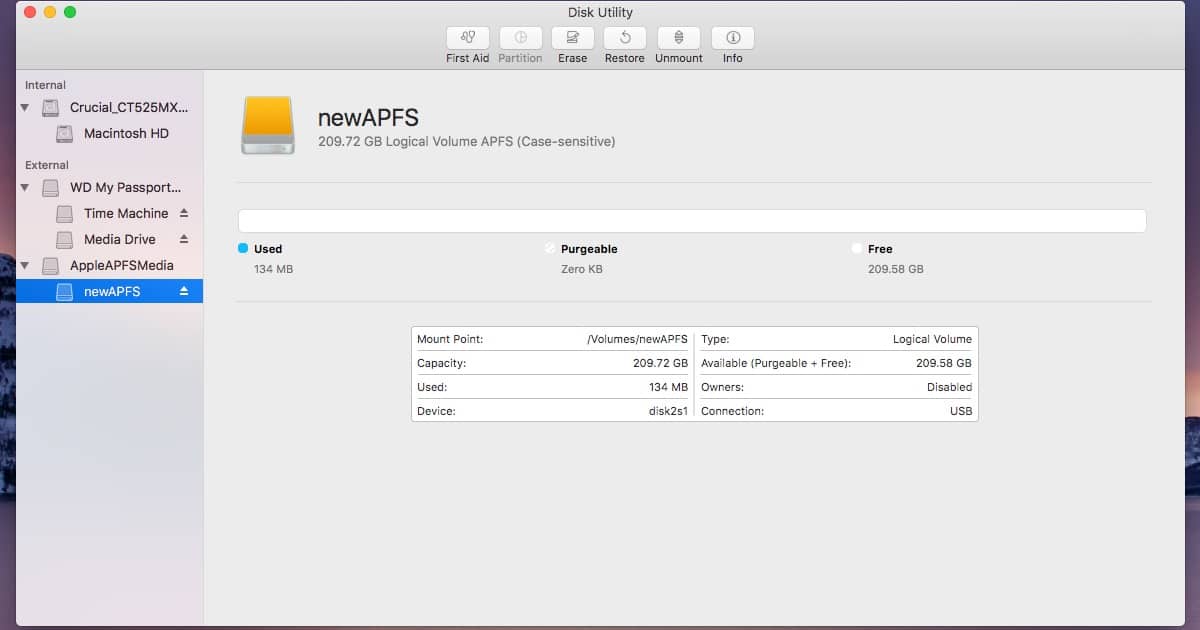
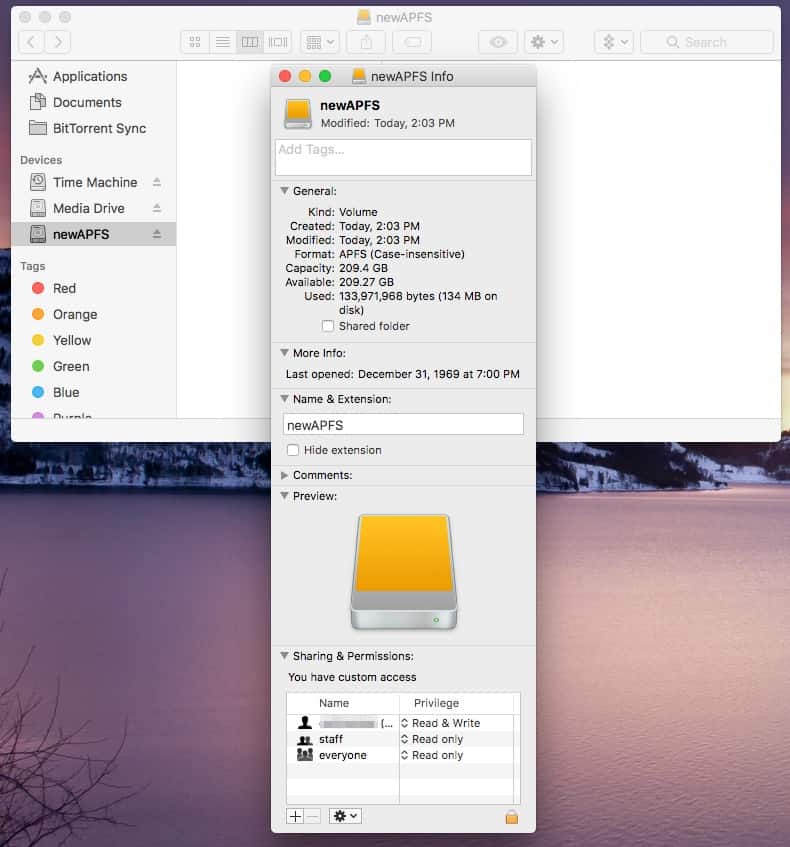
Once done, you’ll have a new volume in Finder for the APFS drive. Now you can start experimenting with it.
When you’re done playing around and want to reclaim the drive for HFS+ or something else, Disk Utility will happily do that for you. For further reading, check out how to format a drive With GUID for macOS Ventura.


Discussion