

macOS Tahoe offers great performance improvements. Major operating system updates can cause connectivity problems. You might find your Mac unable to access websites. Streaming content or staying connected can fail. Corrupted network settings often cause these issues. Minor software conflicts are also to blame. Fortunately, these problems are simple to resolve. Fixing the internet not working macos tahoe issue needs a direct approach. Start with the easiest solutions first.
Table of contents
Essential Troubleshooting Steps for macOS Tahoe
Your internet connection fails after an update. Therefore, you should reset the components that establish the network link. Here are five reliable steps to get your macOS Tahoe system back online. These steps ensure stable performance immediately.
1. Renew the DHCP Lease
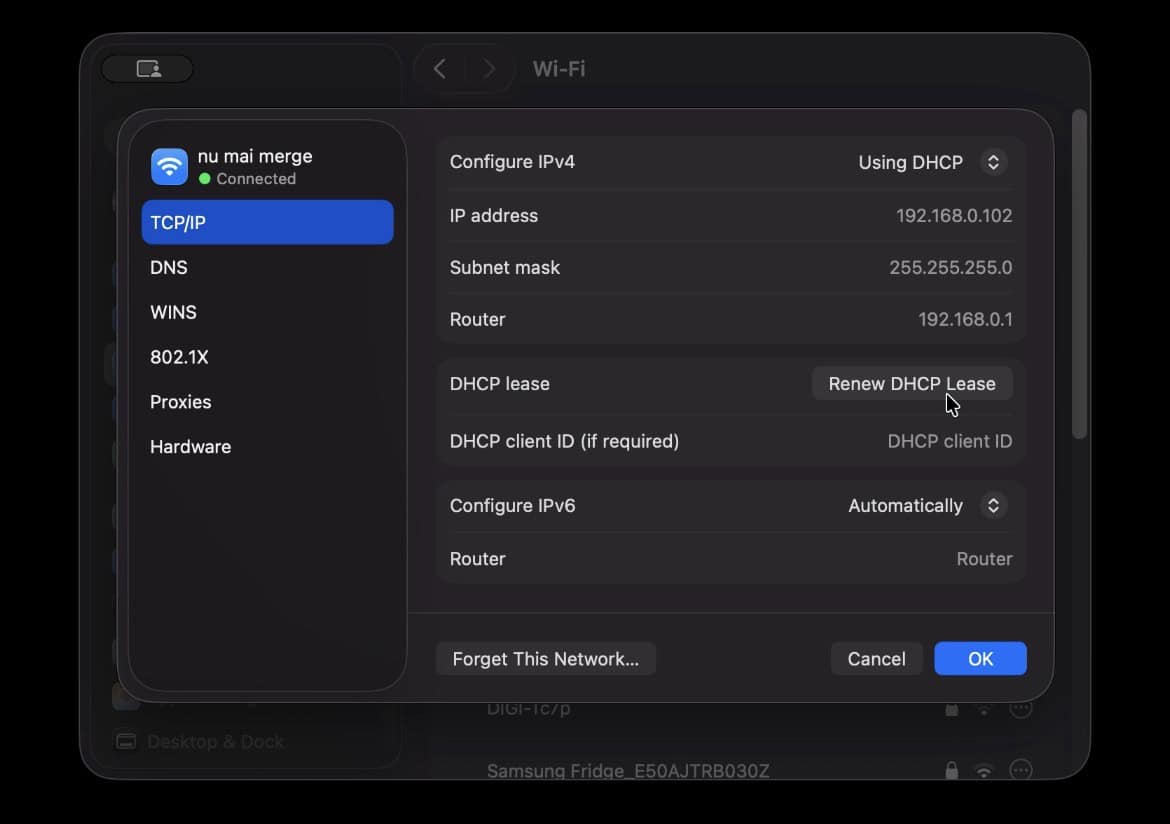
A DHCP (Dynamic Host Configuration Protocol) lease gives your Mac its IP address. This lease might be expired or corrupted. This causes connectivity problems after an OS update. The network stack restarts during the update process. Renewing the lease forces your Mac to request a new IP address. This action often resolves the problem quickly.
Don’t miss the best of The Mac Observer
Set us as a preferred source and our Apple reporting ranks higher in your Google Search results and Discover feed — one tap, no account changes.
- Click the Apple Menu and select System Settings.
- Navigate to Network in the sidebar.
- Select your active Wi-Fi connection and click Details.
- In the new window, select the TCP/IP tab.
- Click the Renew DHCP Lease button. Then confirm your action.

2. Check Your DNS Settings
Domain Name System (DNS) servers translate names into IP addresses. Slow or faulty DNS servers make the internet seem broken. The connection itself might be fine in reality. Specific browsing failures are often related to this setting. For instance, this can cause particular Safari issues on macOS Tahoe.
- Open System Settings and go to Network.
- Select your Wi-Fi connection and click Details.
- Go to the DNS tab.
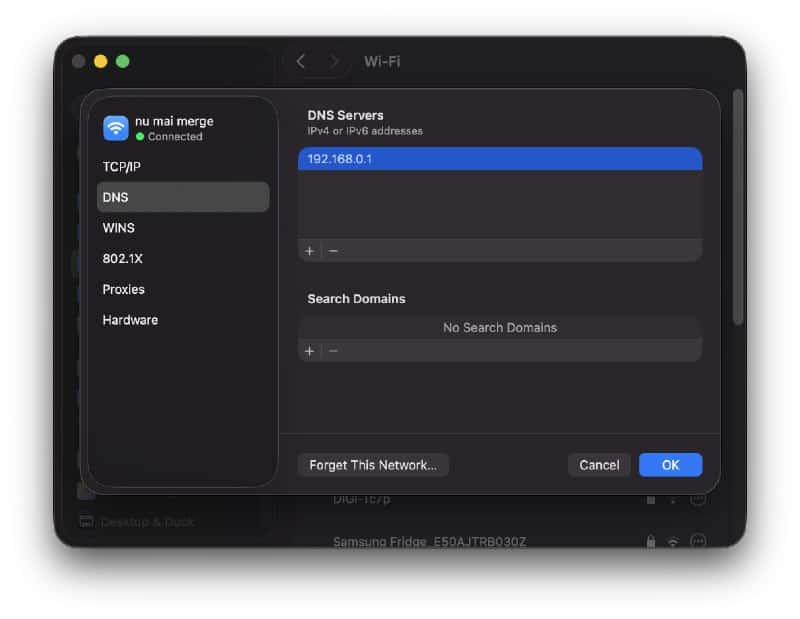
- Delete DNS servers if they are listed. Use the “–” button.
- Alternatively, add a reliable public DNS server. Use 8.8.8.8 or 1.1.1.1. Click the “+” button to add it.

3. Delete Corrupted Wi-Fi Preference Files
Preference files store settings and configurations. They handle network connections. An update to macOS Tahoe can corrupt these files. This unfortunately causes connection failures. Deleting them forces macOS to create fresh ones. This eliminates potential conflicts upon restart. Thus, default functionality gets restored. This common fix works after major updates. Furthermore, this issue affects other macOS releases as well.
- Turn off Wi-Fi using the Control Center or Menu Bar.
- Open Finder.
- Click the Go menu.
- Select Go to Folder…
- Type
/Library/Preferences/SystemConfiguration/and press Return. - Delete the following files:
com.apple.airport.preferences.plist,com.apple.network.eapolclient.configuration.plist,com.apple.wifi.message-tracer.plist, andNetworkInterfaces.plist. You might need your admin password.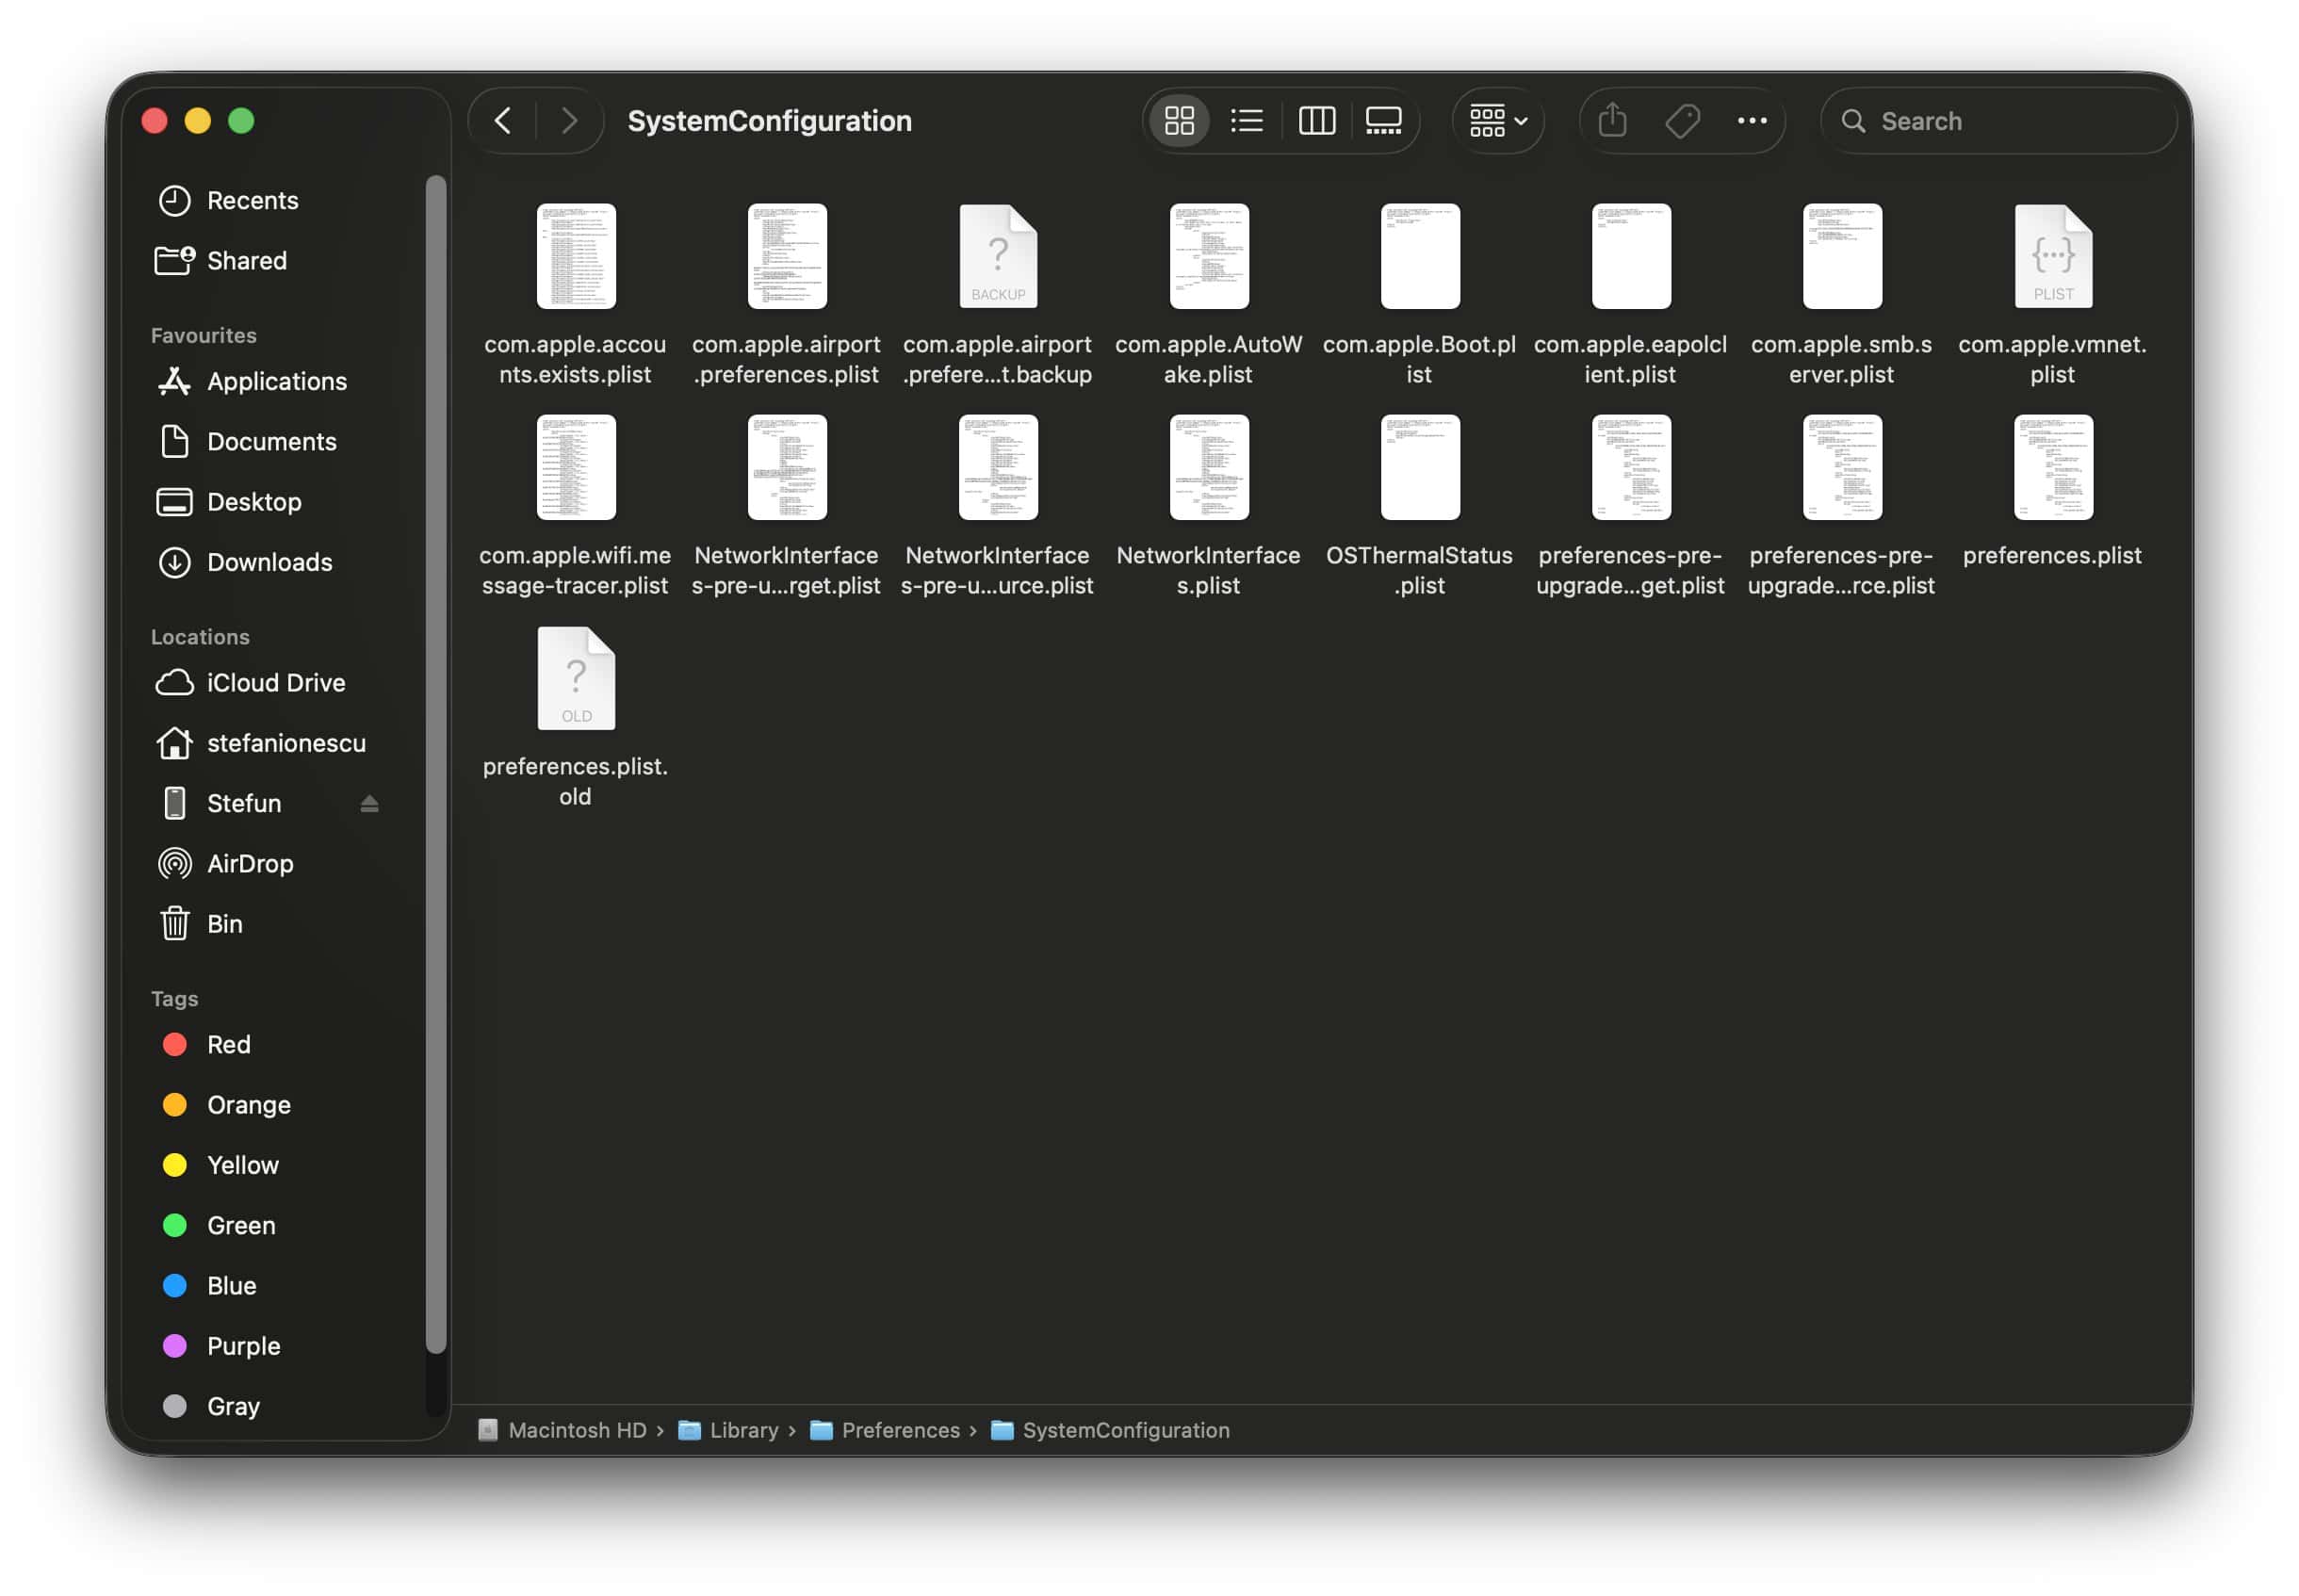
- Restart your Mac. Then re-enable Wi-Fi.

4. Run macOS Network Diagnostics
Apple’s built-in Network Diagnostics tool is helpful. It identifies and fixes network connection issues. The tool systematically checks Wi-Fi, Ethernet, and other services. It offers guided steps to fix common problems quickly. This step is essential when manual fixes fail.
- Hold down the Option key. Click the Wi-Fi icon in the Menu Bar.
- Select Open Wireless Diagnostics…
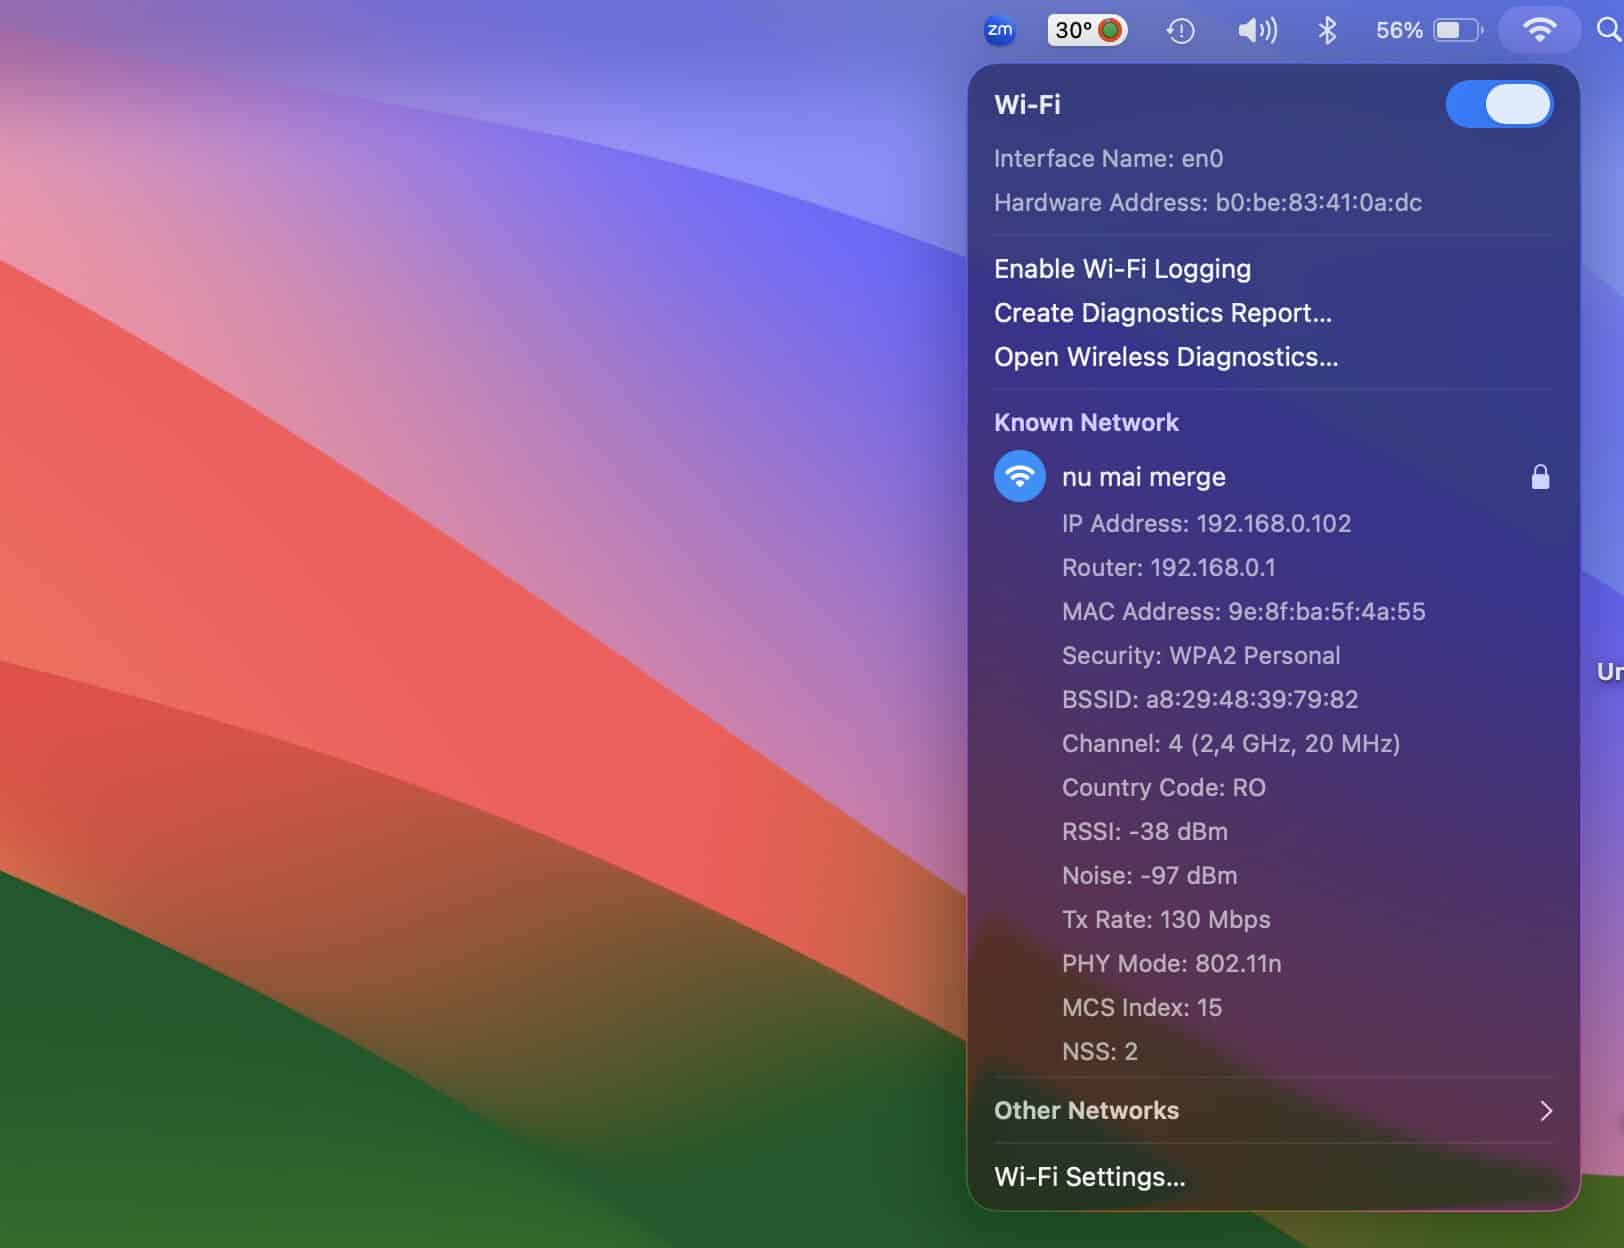
- Follow the prompts to run the initial analysis. Ignore the introductory window if it appears.
- Review the summary of issues once the scan completes. Follow the provided recommendations for repair.

5. Disable Any Proxy Settings
Proxy servers offer security, privacy, or filtering. However, they can interfere with basic connectivity. This happens if they are misconfigured. They might also be incompatible with a new OS like macOS Tahoe. Your internet was working before the update. Therefore, temporarily disabling proxies is a smart diagnostic move. It rules out external configuration issues.
- Go to System Settings and then Network.
- Select your network connection and click Details.
- Navigate to the Proxies tab.
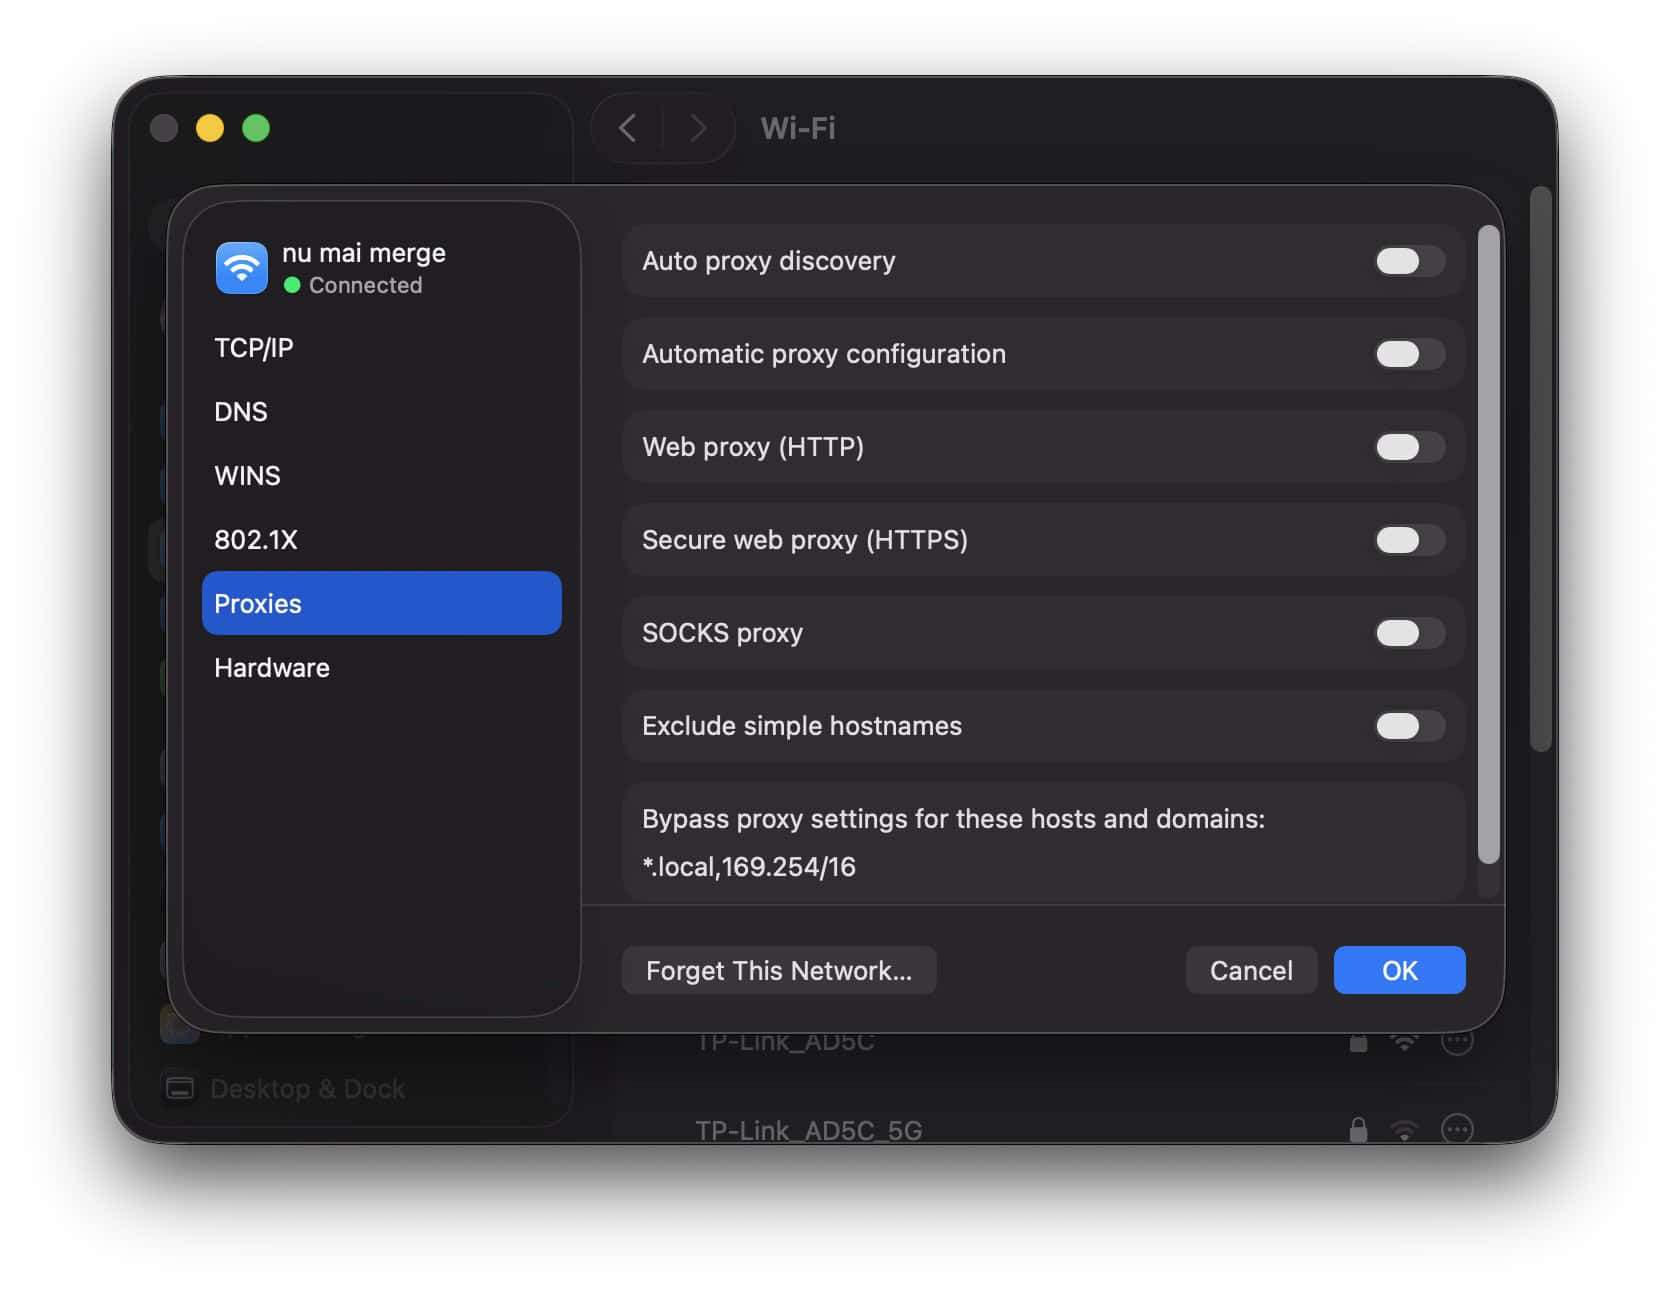
- Ensure that all listed protocols on the left are unchecked.
- Click OK.
- Click Apply to save the changes.

FAQ
Updates can inadvertently overwrite or corrupt network files. They might also introduce incompatibilities with your router’s settings. A full OS update resets network services. Sometimes they hang or fail to reinitialize correctly. Consequently, this causes the internet not working macos tahoe problem.
You might rely on your iPhone for internet access. If so, you should verify how the feature works now. macOS Tahoe includes new auto-joining features for your iPhone’s hotspot. Therefore, be sure to check how macOS Tahoe now auto joins your iPhone hotspot. This ensures it is configured correctly for your needs.
Maintaining a Seamless macOS Tahoe Connection
Resolving unexpected connectivity problems on your Mac is simple. It involves checking and resetting network configurations methodically. You can overcome common issues quickly. Renew your IP address. Verify DNS settings. Clean up old preference files. These steps fix the internet not working macos tahoe issue. If problems persist, check external resources. Look for general macOS Tahoe fixes and information. Maintaining a clean setup ensures a reliable experience with your new OS.


After deleting plist internet files, make sure that your Firewall is turned on. Turning on the Firewall resolved my connection to the internet.
A godsend.
After upgrading to Tahoe my wifi preference files became corrupted (I now know).
Thanks to your article I’m back up and running and as good as new!