If you’re wanting to install a new version of macOS on your unsupported Mac, there may just be an answer. When it comes to Mac devices, there is eventually a time when the company decides that certain devices will no longer receive updates to the current version of macOS. While some may disagree on when Apple determines this, Cupertino likes to ensure that the device is fully capable of completely utilizing all of the features within the update. With that in mind, typically it is much older devices that may find themselves being unsupported with a newer version of macOS.
Of course, for those that want to, there is a way to install newer versions of macOS on older Mac devices, though it may take a bit of work. This is in thanks to OpenCore Legacy Patcher, which helps older Macs get updated versions of macOS. While these methods I’m about to show aren’t for beginners, users can learn more about what OpenCore does, and how they can take the plunge once they’ve done some research.
What Does OpenCore Legacy Patcher Do?
OpenCore Legacy Patcher is a bootloader for Macs that users can use to inject patch data through their memory, rather than through the disk. Using these methods, users are then able to install versions of macOS that are typically unsupported on their older devices. Regarding OpenCore Legacy Patcher, it is capable of supporting Big Sur and newer for Legacy devices. If you’re looking to install macOS on a Mac that is unsupported, you may need to look no further.
Additionally, this method also means that OpenCore is capable of achieving a “near-native experience” on Macs that typically no longer feature support for current versions of macOS.
As the list of supported devices is quite long, I would suggest checking out their webpage to see if your device is supported, and how. Keep in mind that not every Mac device is going to see support, and not every device is going to receive support for macOS all the way up to Ventura.
Another thing that a user is going to want to keep in mind is that while a good variety of Macs do see support all the way up to Ventura, some important features may still be in public beta. With that in mind, I wouldn’t really recommend this for a machine that you use daily. This is more for the truly dedicated, and running OpenCore may find you missing features that you greatly need.
How to install OpenCore Legacy Patcher?
If this all sounds like it is of interest to you, then all you need to do is create the OpenCore installer. Fortunately, this is a rather easy process that I can walk you through. Once you create the Installer, you just then need to boot into the macOS installer.
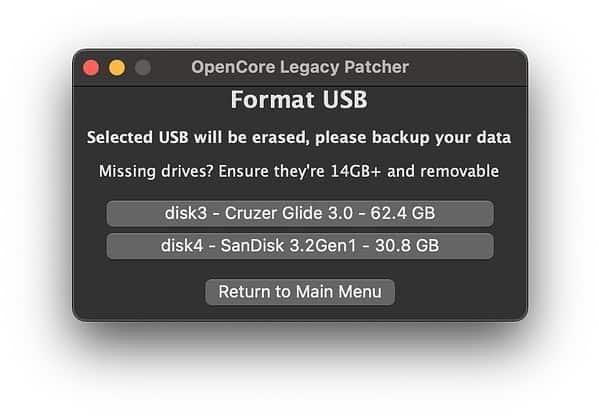
Note that you will need a 16GB or larger USB drive. However, after the initial installation, there is a way to no longer boot from the USB. Also note that this will wipe the USB drive, so you will need to use a fresh one. Users should also take into consideration that since OpenCore supports Big Sur and later, it will only give you those options. Also be aware that if your machine is older than 2012, it may not be able to support Ventura, even through these methods.
Time needed: 15 minutes
To install and use the OpenCore Legacy Patcher, follow these steps.
- First, you will need to install the OpenCore Legacy Patcher app. Note that my guide is going to use the standard OpenCore-Patcher, which is meant for GUI.
- Open the app. You will then see a menu presenting you with several options.
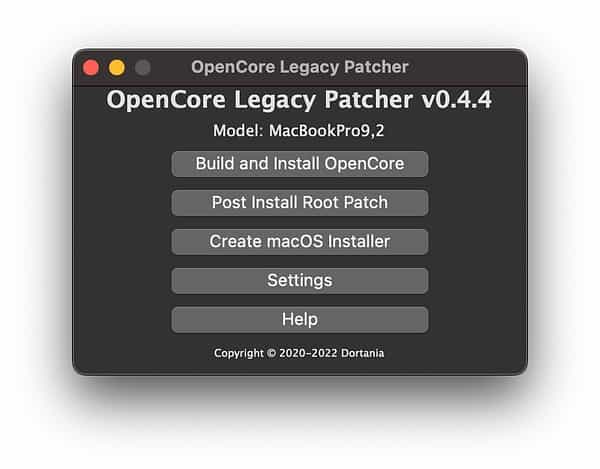
- Next, select Create macOS Installer. You will be given two options. You can either download a macOS Installer, or you can use an existing one. This guide will assume that you need to download an Installer.
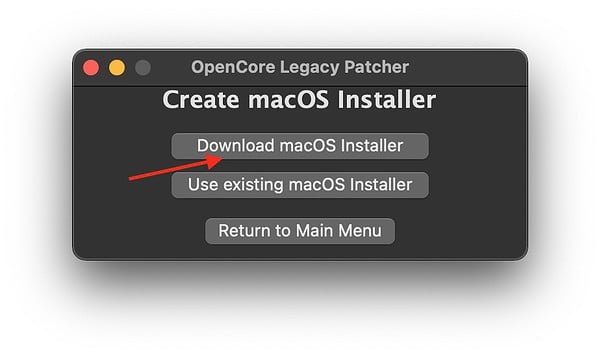
- Click Download macOS Installer. Note that you will need around 12GB of space for whatever installer you choose.
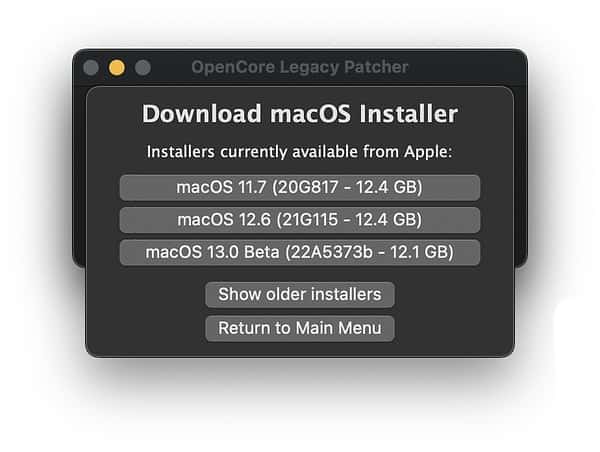
- The Installer will download, and you will need to enter your machine’s name and password to allow installation.
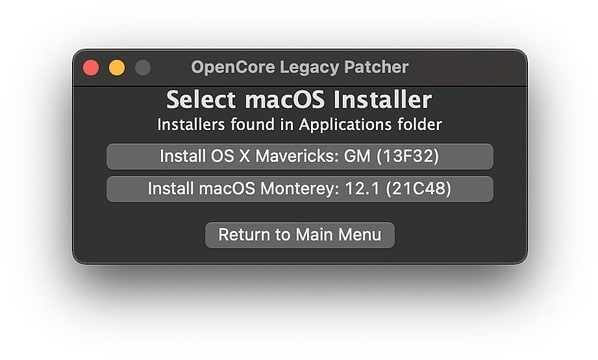
- You will then need to select the downloaded Installer.
- Choose which USB you are going to format and install the OS. You should then receive a prompt that the Installer has finished flashing.
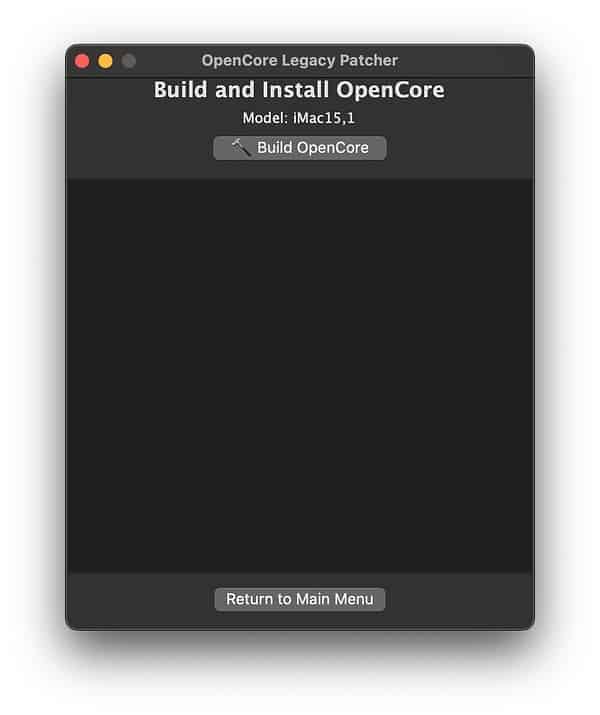
- Once finished, you will then need to build and install OpenCore. Open the app once again. Now is a really good time to note that configurations for OpenCore are specific to their hardware. You need to build OpenCore for the exact model of Mac that you are running.
- From here, select Build OpenCore.
- Then, click Install OpenCore.
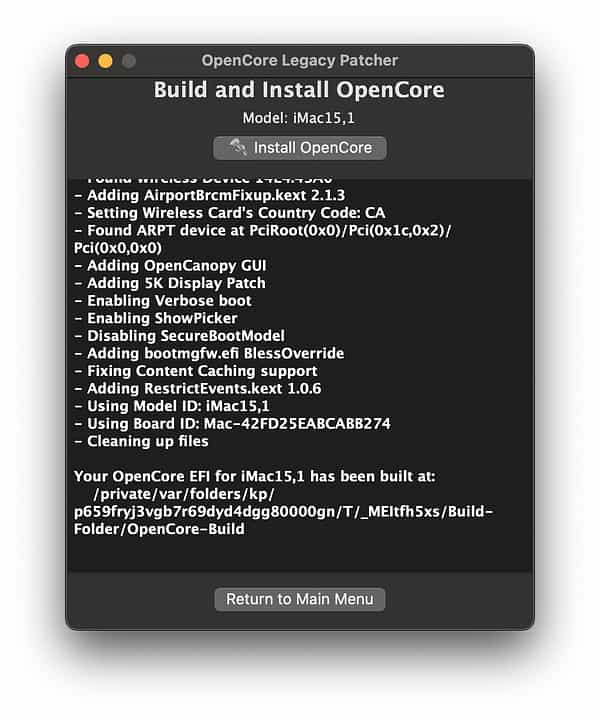
- When it is finished Building, click Install OpenCore. You will need to select the drive that contains the new macOS. You will also need to select your partition.


How to Boot into OpenCore to Install macOS
- Now that we have OpenCore and your version of macOS, it’s finally time to boot OpenCore. Reboot your machine. While it is restarting, hold down the Option key so that you can select the EFI Boot entry that features the OpenCore icon.
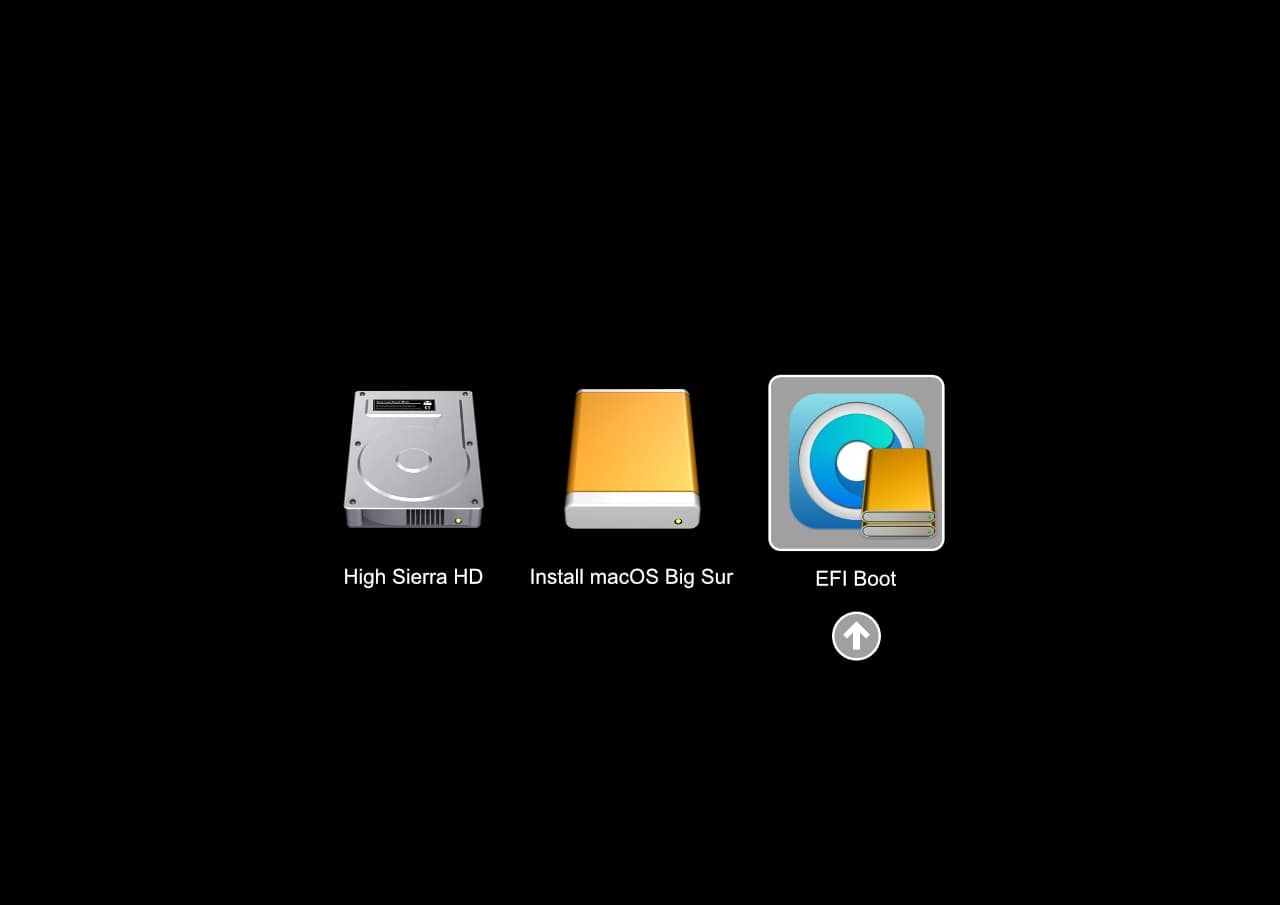
- After clicking the EFI Boot, you will then need to choose Install [your macOS selection].
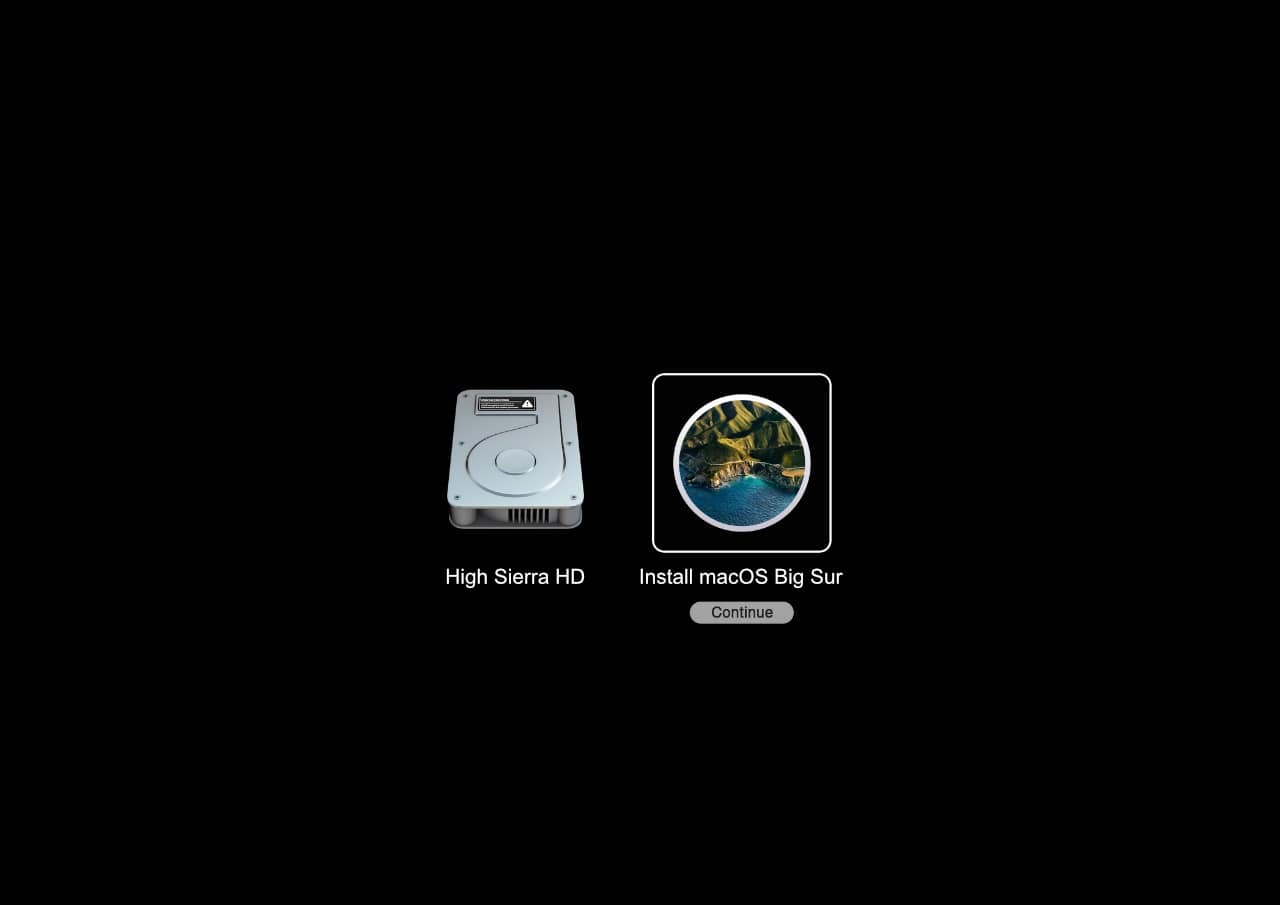
- From here, you should see the macOS installer screen. It will behave like a typical macOS installer. Should you find that your Mac is looping back and forth to the start of the setup, shut it down and start it again while holding the Option button. From here, select the option that features a grey hard disk icon. It may say something like macOS Installer, or it may say something different if you changed the name.
- You will also need to install Post-Install Volume Patches, which OpenCore should do automatically. You can also select Post Install Root Patch from the main menu of the app, and it will check this for you.


If this sounds confusing, you are essentially doing the following things:
- Downloading and building the macOS Installer.
- Running OpenCore-Patcher.
- Rebooting and booting OpenCore.
How to Boot into macOS without a USB
If you want to boot into macOS without a USB, simply follow these steps.
- Open OpenCore Legacy Patcher.
- Under Settings, adjust them for taste.
- Build OpenCore again, but this time install OpenCore to an internal drive.
- Reboot your device while holding the Option key, and then select the internal EFI.
Do I Need to Update OpenCore Legacy Patcher?
Typically, users will not need to update OpenCore Legacy Patcher. However, a user may wish to do so if there are certain benefits, such as something not working when you install a new version of macOS. If you want to update OpenCore Legacy Patcher, all you need to do is download the latest release, and then rerun the patcher. You will then need to rebuild OpenCore and install it again.
You can check which version of OpenCore, as well as its patcher, by running the following commands in terminal.
#OpenCore Version

nvram 4D1FDA02-38C7-4A6A-9CC6-4BCCA8B30102:opencore-version

#Patcher Version

nvram 4D1FDA02-38C7-4A6A-9CC6-4BCCA8B30102:OCLP-Version
Not for Beginners
As mentioned, OpenCore Legacy Patcher isn’t for the feint of heart. Additionally, I would once again recommend that you do not use OpenCore on a device that is your daily driver. However, if your machine is particularly old (2012, for example) you may really want to consider upgrading your device.
When it comes to installing versions of macOS that are unsupported by Apple, it’s more a matter of proving that you can rather than you should. Personally, when it comes to my own devices, anything I use daily I ensure that it only receives official updates from Apple.
Using OpenCore Legacy Patcher to Install macOS on Unsupported Mac
However, with all that in mind, if you are feeling confident, I would recommend trying out OpenCore Legacy Patcher on an older device. Of course, if you are having issues with OpenCore, it does offer a Discord page where you can ask questions. It also provides a troubleshooting page should you run into any issues. If you find that you really like the OpenCore Legacy Patcher, you should also consider donating.
While some may not like how Apple determines what makes a Legacy device, there are some workarounds for the technically savvy. However, if you are new to this world, I would highly suggest doing your homework before diving in. While the process is straightforward, those without experience may run into issues. Ensure you’re doing your research before diving right in.